:: Diary - August 2007 ::
:: Wednesday, August 1, 2007 ::
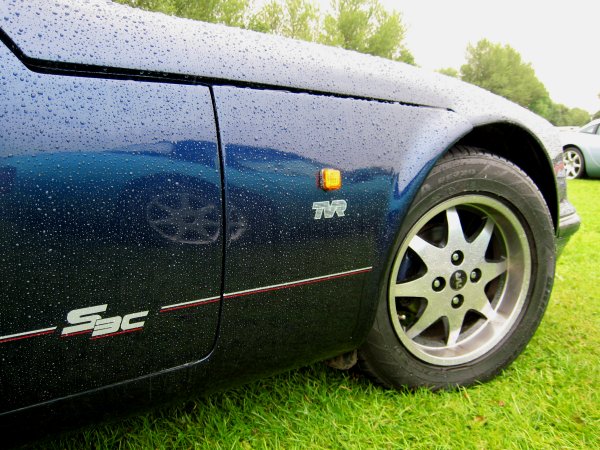
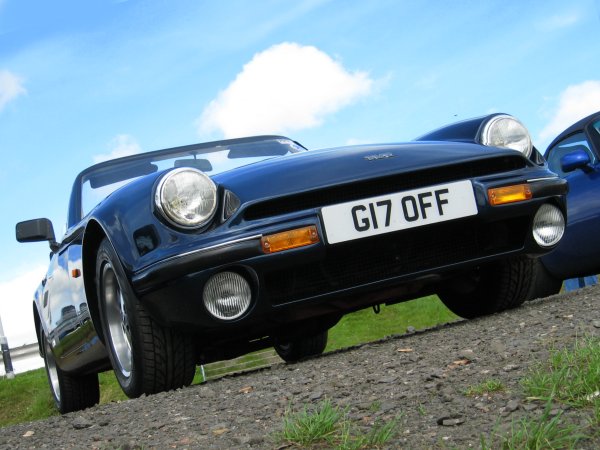
I've been looking, on and off, for spray paint to patch the colour of the car. The car is TVR Starfire Blue, which I was told
ages ago is the same as Toyota Dark Blue Pearl. I remember that the car's handbook quotes a Toyota paint code, and a while ago,
not long after I got the car, I bought a wee pot of touch-up paint from a specialist in England somewhere, to touch in a couple of
scratches under the front bumper (the scratches were somewhat superseded when I lamped the front of the car into the Saab in July
2005). I quoted a Toyota paint number then and the match wasn't too bad.
The repairer who sorted the front after the Saab interface episode also said it was a Toyota colour.
Today I found a shop that sells Tetrosyl spray paints, and rather than do it by manufacturer like Halfords or Holts do, they do it
by paint code - so Blue 23 might for example match similar colours from different manufacturers. Unfortunately I can't remember the
paint code... and the handbook's in the car and the car's in the garage and the garage is too far away for me to be bothered to go
and disturb the farmer just for a quick look at the book. So I'll do it at the weekend.
A bit of research on the car club web site suggests that the paint code should be PA14B (TVR) or 8e3 (Toyota) so I'll check the book
at the weekend.
The spray paints are for touching up a number of wee scratches on the bulkhead under the bonnet, and also for the mirror refurb (if
I ever got round to it).
I'll use the wee pot of paint to touch up some scratches underneath the front of the bonnet (where it's obviously hit the ground when
I've opened it).
:: Saturday, August 4, 2007 ::
My waterproof connectors and headlight bowls arrived today. I must remember to order new headlamp units.
I get my wee paint pot out and touch in the scratches under the bumper. It's not great but at least they're not bleeding obvious
like what they were.
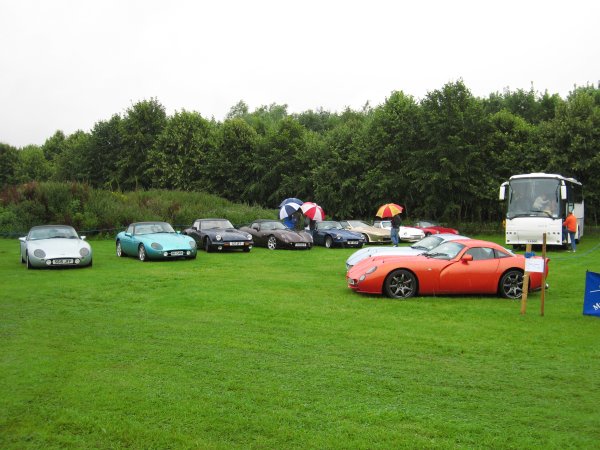
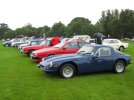
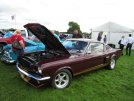
 Car club meeting today - not at our usual venue (where there is a wedding on) but at Knockhill racing circuit. A few members are
away down to the TVR 60th anniversary celebrations at Rockingham this weekend, so between that and the change of venue, and the
holidays, a reduced turnout is expected. As it turns out, there are 9 cars there, including new members Sally and Martin with
their Griffith.
Car club meeting today - not at our usual venue (where there is a wedding on) but at Knockhill racing circuit. A few members are
away down to the TVR 60th anniversary celebrations at Rockingham this weekend, so between that and the change of venue, and the
holidays, a reduced turnout is expected. As it turns out, there are 9 cars there, including new members Sally and Martin with
their Griffith.

 The sun is out, it's dry, and the cars look great.

 I still haven't learnt to wear a hat when it's sunny. Yep I've burnt my head.
Later on. I order a pair of headlamps online - yep once again ebay is my friend.
Also checked the paint code I was looking for the other day - PA14B or Toyota 8e3 Dark Blue Pearl.
:: Sunday, August 5, 2007 ::
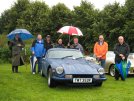
Today is the Irvine Classic Car Show, so of course when I get up, it's raining.
 We load the car up in the rain, with all the essentials you need for the Scottish summer - raincoat, umbrella, wellies, life
jacket, baling pail, paddle, emergency provisions. I's still raining when we leave to meet the others.
We load the car up in the rain, with all the essentials you need for the Scottish summer - raincoat, umbrella, wellies, life
jacket, baling pail, paddle, emergency provisions. I's still raining when we leave to meet the others.
We meet up with the main group and set off in convoy, through the rain. We stop at a couple of rainy places to pick up other
members. After some confusion (generated mainly by me, it has to be said) which results in wet cars being spread half way across
rainy Ayrshire, we arrive at the venue and park up in the rain.
 Various other stands have their gazebos etc out to shelter in (because it's raining - did I mention that?) so George parks up the
luxury coach as a suitable shelter. Good man George!.
Various other stands have their gazebos etc out to shelter in (because it's raining - did I mention that?) so George parks up the
luxury coach as a suitable shelter. Good man George!.
There are no members of the public present as far as I can see - all our visitors are from otehr stands, and we visit theirs,
being careful of course not to scratch any cars with our unbrellas.
The rain lets up for a few minutes when the heavy showers come on, but goes back to persistent pissing shortly afterwards.
 Following a vote, we announce George's beautiful 3000M as the best on our stand, so after a presentation of a plastic rosette and
a big smile, he sets off for the main arena for the final judging.
Following a vote, we announce George's beautiful 3000M as the best on our stand, so after a presentation of a plastic rosette and
a big smile, he sets off for the main arena for the final judging.
 The announcer / commentator obviously has a very large hip flask because most of his comments are slavering gibberish. He forgets
to read out George's name even though I told him and he wrote it down himself (no not ON himself, I mean he himself wrote it
down).
The announcer / commentator obviously has a very large hip flask because most of his comments are slavering gibberish. He forgets
to read out George's name even though I told him and he wrote it down himself (no not ON himself, I mean he himself wrote it
down).
 Even although the weather is absolutely crap, we had a good day out so never mind - there's always next year (I think I remember
saying that last year).
Even although the weather is absolutely crap, we had a good day out so never mind - there's always next year (I think I remember
saying that last year).
We drive back through the heaviest rain yet and put the car away. As I lock the garage, the rain goes off. Fantastic.
:: Tuesday, August 7, 2007 ::
Back to the car shop that sells the Tetrosyl paints. Sure enough they have any paint code or any shade you can think of. Every one,
that is, except Toyota 8e3 dark blue pearl. Why is this TVR lark never ever easy eh?
:: Saturday, August 11, 2007 ::
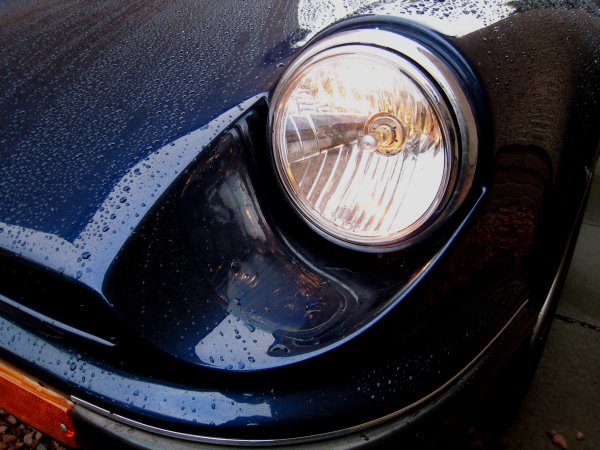
Brought the car along to the house during the week, because the weather forecast seemed ok and I wanted to get my headlamps changed
and the waterproof connectors fitted. So naturally it pishes rain from dawn till 6pm, leaving me only a couple of hours before it
starts getting dark.
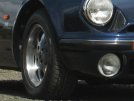
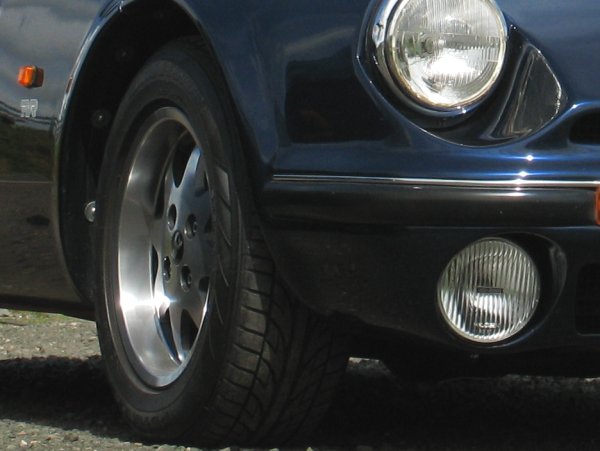
Removing the old headlights is pretty easy - undo a wee screw underneath that holds the chrome trim on, then another screw that
holds the lamp and retaining ring onto the bowl. Disengage from adjusters, disconnect wiring and it's off. I do at least have the
presence of mind to throw the old one away until I have the new one fitted and working - always an important consideration with
TVRs!
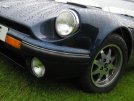
Putting the new headlamp in is not so easy. I have bought new light units and also new bowl and adjuster assemblies (mainy to get
new retaining rings because mine are all rusty). I fit the new retaining rings to the lamp unit and we're ready to refit. This is
where the fun begins...
You see, the built-in sidelights are those stupid little capless bulbs, that fit into a rubber grommet-type holder that plugs into
the back of the headlamp. This rubber grommet has two flimsy wee connectors pushed through from the back, that the bulb pushes into.
Except when you push the bulb in, it pushes the connectors out the back, then when you push the connectors back in, it pushes the
bulb out the front. Eventually, after evolving another arm and hand, I manage to hold it all together and push it in the back of the
light, put it all together and switch on the lights to test, and... no sidelight. Take it to bits again and push connectors together,
try again... no sidelight. Take it apart, and find that the connector is so fragile it's snapped. I solder it back together,
reassemble it all and... yay it works!
Now for the other side. Same exercise, and when I test it there's no sidelight. Again. Much fiddling with the connectors but still
no sidelight. I try the old bulb holder (which doesn't fit the new lamps by the way, I thought of that) but still no shiny but the
other side is on ok. In a flash of inspiration I check the back lights - and the same side is off - I've blown a fuse. Taking the
connector apart I find that the two terminals can touch until you put the bulb in. This whole sidelight arrangement is so far
beyond crap that it makes mere crap look ingenious.
Dismantle passenger footwell, replace burnt fuse and both lights come on. Reassemble and at last it's all working!
 It does look pretty fandabby - I'll have to adjust the lights though, when I get the car back in the garage (where it's dark!)
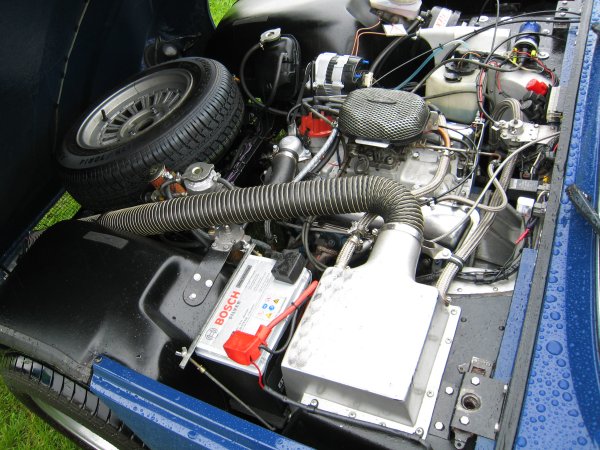
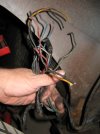
While I am in about the footwell wiring, I check the colour of the wires to the diagnostic connector. Back in May 2005
I had problems getting a diagnostic tester to work and said I would have to check the car's wiring. Well prompted by a thread on Pistonheads,
in which other S3C owners have had the same difficulty, I finally got round to checking it today. A couple of owners have found that
the triangular plug that fits the diagnostic tester is actually an octane adjustment plug, while the diagnostic plug is totally
different. I check the "Bible" and find that mine is the same - the "diagnostic" plug isn't, and there's another different-shaped
socket with the right wiring colours to be the diagnostic plug. I need to make up lead adapters and try it. Maybe in another
couple of years or so...
:: Sunday, August 12, 2007 ::
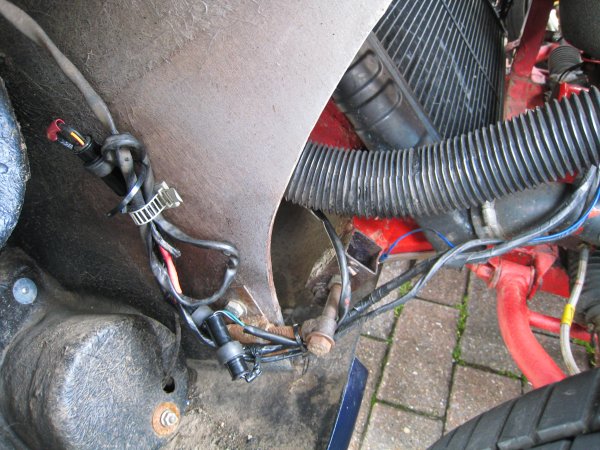
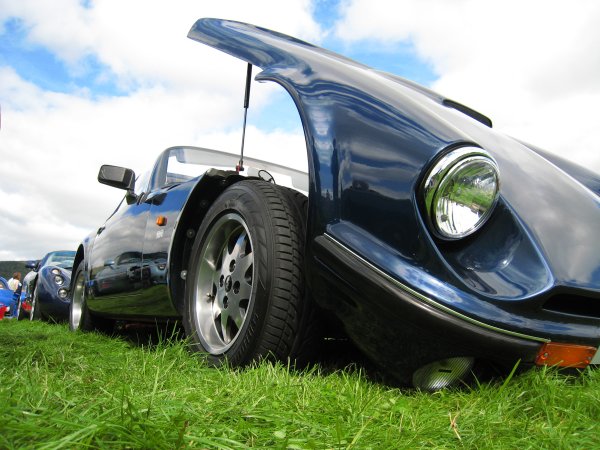
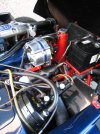
Nice and bright this morning (the weather, not me) so I decide to have a go at tidying the front lighting wiring and fitting the
waterproof connectors.
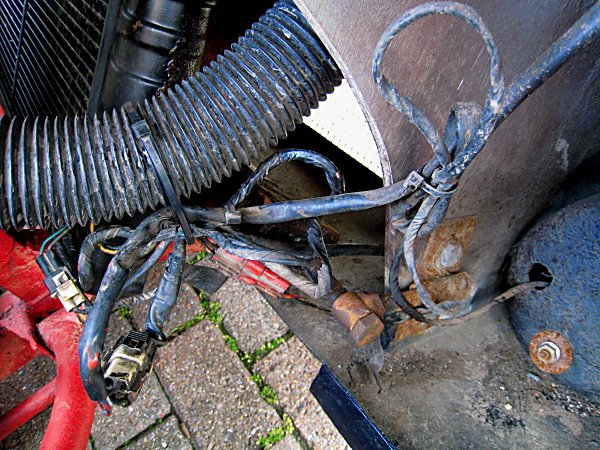
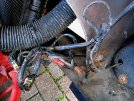 The old wiring, installed by TVR and then amended when the bonnet was refitted, is quite frankly, a bloody mess. The connectors
aren't waterproof (fair enough) but that is compounded by the careful placement of the connectors in the direct spray off the
front tyres, so that they are guaranteed to get soaked.
The old wiring, installed by TVR and then amended when the bonnet was refitted, is quite frankly, a bloody mess. The connectors
aren't waterproof (fair enough) but that is compounded by the careful placement of the connectors in the direct spray off the
front tyres, so that they are guaranteed to get soaked.
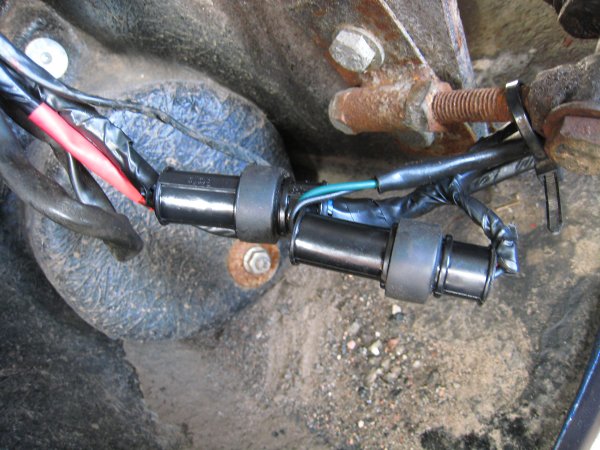
Each of the new connectors comes in bits - a plastic connector block, a rubber seal that the wires go through, and a number of brass
terminals that fit into the block. There are two types of connector blocks - male and female - and two different types of brass
terminals - male and female. No instructions though so you have to figure it out for yourself.
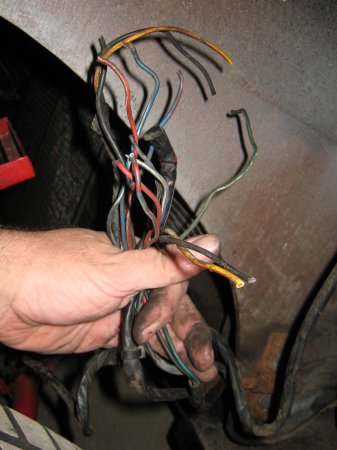
First step is to note carefully the colours of wires that are connected through to each other, and strip back a little bit of the
loom tape to give me some working length, then cut the old connector off the end of the loom. At this point I realise that I didn't
need to write down the colour coding - if I leave a tiny bit of wire on each old connector and then push them back together, I
can work out how to wire the new ones.
Clean up the wires with white spirit to remove all the gunge and loom tape adhesive, and then a wipe with WD40 before pushing the
wires through the rubber bung seal. I tried the first connector without cleaning or libricating the wires first and it was a nightmare!
Then strip each wire and fit a terminal on - I just crimped them carefully but I suppose you can solder them if you prefer. Be
very careful to use female termonals for the female block and male ditto. I put all the female blocks on the "car" side and the
males on the "lamp" side, to reduce the chance of an accidental short-circuit if connectors become unconnected and fall against
something metal.
Once all the terminals are on, push them through the connector block till you feel them click into place, making sure that the
terminals are in the same order as the wires through the bung, then slide (or rather, push, force, cajole, bribe) the bung down
the wires into place in the back of the connector. Pushing with a blunt screwdriver helps.
Despite being totally paranoid about connecting up the wrong wires, I find that when I have finished, all the lights work! This,
for me, is a bit of a novelty - usually they have required a lot of wire-jiggling to get them on.

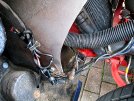 Then I tidy up the wiring so that the connectors are protected by the inner wheel arch, rather than out in all the spray. Seems
obvious but seems to be beyond the garage...
Then I tidy up the wiring so that the connectors are protected by the inner wheel arch, rather than out in all the spray. Seems
obvious but seems to be beyond the garage...
Anyway, I decide I've sliced enough fingers for today so I stop after I have done the nearside, which was always the problem.
Besides, it's started to rain and there's no point making waterproof connectors with water inside them...
:: Tuesday, August 14, 2007 ::
After a busy and frustrating day at work, a session of chiropractic and a sore head, not as a result of the chiropractic, but I'm suffering
caffeine withdrawal symptoms - I don't drink tea or coffee but I've been knocking back coca-cola for years as if it really was
"the real thing", with the result that I can barely function without the damn stuff. All except for my bladder that is, which is
over-functioning, trying to cope with whatever is in it. Having seen how well it cleans worn coins, and how well it works as a
de-rusting penetrating oil (and because the corner shop didn't have any in stock) I haven't had any since Friday.
I'm like a bear with a sore head. And PMT. And an ASBO.
So I decide that some solitary occupational therapy is in order, and what could be better than an evening rewiring the other side
of the front lights?
Loads of things could be better, I realise, but that's all I've got.
I push the car forwards and sideways across the garage doors to let as much light into the front wheelarch as possible, without
letting the rain blast in the open door.
Then I open the boot to get the connectors out from where I left them on Sunday, and decide that I'd better also waterproof the
aerial which lets water into the boot. After 10 minutes of finding the right socket to fit the tiny bolt underneath, and the
right screwdriver to fit the top, I find that it's rusted solid and will have to be drilled out. So I'll leave that for another
day then because my drill is at the house.
 And so to the wiring. Displaying my new-found wiring confidence, I chop all of the connectors out of the loom leading to the
front lights, and am just starting to install the new connectors when Dave turns up to collect his entry pass for the Callander
Classic car show.
And so to the wiring. Displaying my new-found wiring confidence, I chop all of the connectors out of the loom leading to the
front lights, and am just starting to install the new connectors when Dave turns up to collect his entry pass for the Callander
Classic car show.
The rewiring goes faultlessly well (see Dave, I promised I wouldn't give away how much your chat was putting me off what I was
doing, and forgetting the rubber bung on one connector, and connecting another up the wrong way round at first, was obviously
nothing to do with you, they were just the kind of mistakes I didn't make on Sunday when I was concentrating harder).
A quick test confirms that I'm a dope for forgetting to reconnect the ones I did on Sunday (having taken them apart to make sure
that both sides were connected the same so that the indicators, headlamps and spotlams could fit either side).
Another quick test proves that everything works and I'm a genius (a forgetful one though).
Push the car back into position, tidy up and go home to post details for other members, on how to get their passes, and to confirm
numbers for the pre-show club breakfast.
Therapy done!
:: Friday, August 24, 2007 ::
Callander Classic car show this weekend, so I go along to the garage and collect the car for a bit of fettling.
First job is to waterproof the boot - water is getting in through the aerial and has rusted the mounting nut solid. I dismantle
the aerial from the top and then drill down the centre of the mounting screw till it drops out the bottom. I pull the rest of the
aerial to bits and install the new one, sealing the edge of the hole with that liquid rubber stuff you get for coating the handles
of screwdrivers and stuff.
Then I also remember that my windscrean sealant sytem (aka half a roll of insulating tape) is peeling off and due its annual
renewal. I peel the old stuff off and stick the new stuff on, to cover the edge of the windscreen.
Then I take off the front wheelarches and fit a couple of clips to the inside of the bonnet hinge panels, to hold my new light
wiring harness in place and prevent it rattling about.
Last weekend in a petrol station I noticed a tamper-proof tax disc holder for a quid. Since my disc holder is knacked and keeps
falling off, I bought one. It comes in two bits - you stick the disk in the centre of a self-adhesive sheet, then stick a sticky
disc onto the front, covering the tax disc. Any attempts to peel of the sticky bit leaves the paper disk damaged. It doesn't stop
people nicking it for the hell of it, but it does mean it can't be stolen and altered for somebody else. At least that's what it
says on the tin.
A quick wash and dry and it looks not too bad at all. I was going to polish it but I don't think I'll bother.
:: Saturday, August 25, 2007 ::
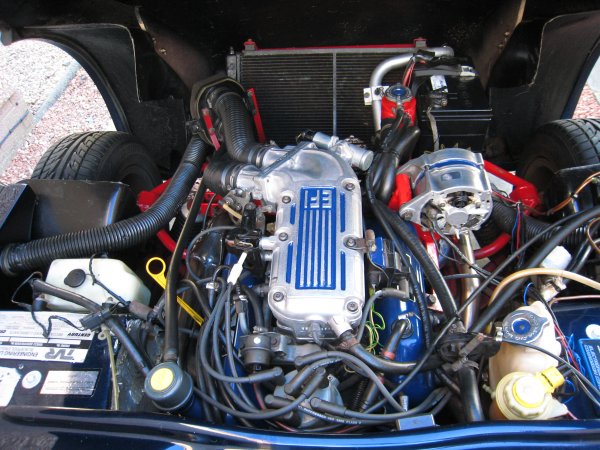
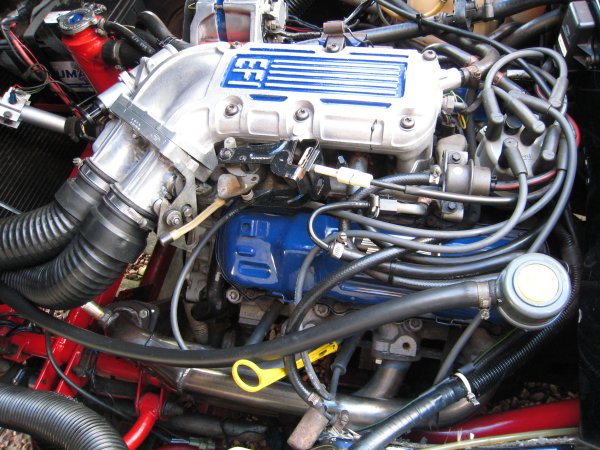
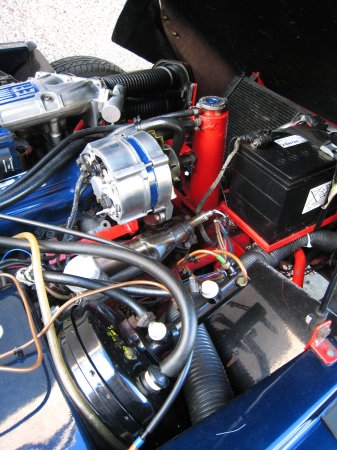
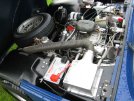
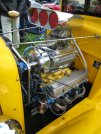
Yesterday I decided not to wax the bodywork, so today I polished just about everything else, starting with the engine bay. First
a clean up with an increasy-dirty cloth, cleaning the rocker covers and inner wings etc then the engine mechanicals etc. Then I
use engine cleaner to clean all the dirt off the inside of the bonnet and the chassis etc - not white spirit or solvent-based
stuff because that would remove the waxoyl as well.
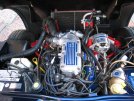
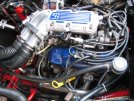
Then I metal polish all the erm, metal bits, the alternator, the plenum chamber, exhaust manifolds, etc, then paint the top
radiator hose (the metal one) with hi-temp aluminium paint, because it's starting to rust a wee bit.
While I am in a polish mood, I also clean the wheels with the polish ball and drill combination.
By this time I am totally knacked so come indoors to write my diary for all you dear avid readers.
It's started raining. There is no rain in any weather forecast, but there it is. Absolutely bloody magic eh?
:: Sunday, August 26, 2007 ::
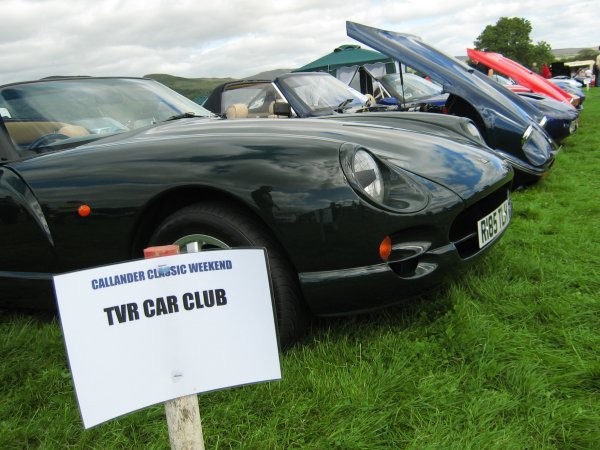
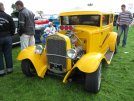
Up bright and early for the Callander Classic Show! In a frenzy of activity (especially considering the
ungodly hour of the morning) I load up chairs, umbrellas, passes, hats, suncream, raincoats, boots and wellies - just the
normal car show survival gear. Then start the car and sneak out of the street as quietly as possible.
First I drive over to meet up with Dave and Jim for ritual gassing (that's blethering, not filling the cars). It's so
quiet that we hear Jim leaving his garage 5 miles away.
Then we drive to Callander to meett up with the others for breakfast - fruit / cereal and a nice tasty fry-up. Lovely!
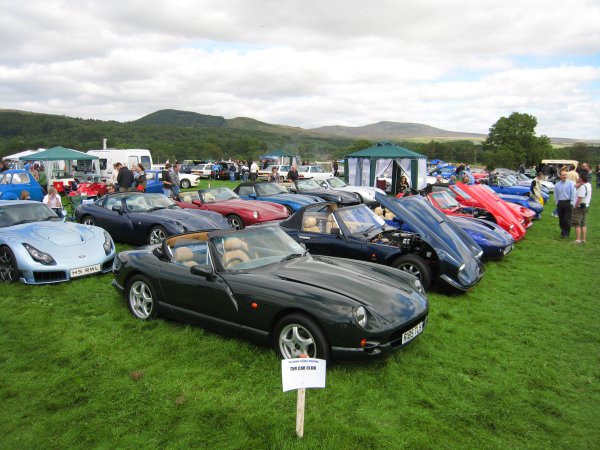
Various regulars are there plus a few new faces, always good to see. There's a wide range of cars too, wedges, Ss, Chimaeras,
Tuscans and Griffiths.
I notice that there's a gurny old bint at the next table, who watches us malevolently, as if waiting for a riot to break out
among these louts. She obviously thinks that Hells Angels drive TVRs on their days off.

 Disregarding the weight of the curse that appears to have been heaped on my shoulders, we set off to the show, 5 minutes
up the road. We park up, then a quick polish and dust, clean the wheels etc before the show starts.
Disregarding the weight of the curse that appears to have been heaped on my shoulders, we set off to the show, 5 minutes
up the road. We park up, then a quick polish and dust, clean the wheels etc before the show starts.
 I learn a good tip from John F - he uses a fine tip Stabilo marker to colour in the black bits on the TVR badge. I try it
and he's right - it really brightens it up!
I learn a good tip from John F - he uses a fine tip Stabilo marker to colour in the black bits on the TVR badge. I try it
and he's right - it really brightens it up!
I reward his assistance by showing him my rubber flying helmet - no that's not some swingers' euphemism, I have a flying
helmet made of rubber. The assembled members demonstrate their appreciation by laughing till they split up the sides.
Then I have a wander about to look around the cars - a good selection of classics and americans. I am particularly taken
by the VW camper vans, whose owners are reclining inside brewing tea and reading the newspapers - if you're going to sit
around car shows, that's the way to do it. Didn't take many photos though because I forgot.
The winner of the concours is a 1953 Cadillac which is, to be fair, lovely - pale blue and white with white interior. A
badge on the window says it's been professionally restored, so you would think it would be good. Later, at the end of the
day, I watch it being pushed / winched onto a flatbed lorry, not even doing that under its own steanm. It's not hard to
keep it in concours condition when you never use it, but what's the point of having it then eh?
Overall, a grand day out, except that half-way home I hear the exhaust blowing again, and a quick grope under confirms that
it's the same place, that left-hand front joint. I've pasted it, taped it, hammered it, but still it leaks again, because
one of the pipes isn't quite round and I can't reshape it with the tools I have. I need to think of something more permanent
than cracked putty and self-adhesive bacofoil.
:: Thursday, August 30, 2007 ::
Right - time to attack the exhaust to effect a semi-permanent repair. I bought big eff-off jetex clamps, a bit stronger
than the ones I had on, to help to hold it all together. I also bought one of those jubilee-clip silencer repair things
to wrap round the joint.
I take off the clamp and the front downpipe so that I can get a proper go at it. I clean out the joint and put some new
firegum on the mating surfaces, then cut the silencer strip to size and wrap it round and tighten it up a bit, then wrestle,
hammer, prise, force, lever and hypnotise the new exhaust clamp over one end, and the old one over the other end.
Tighten all 3 up - the clip should hold the paste in the joint and the clamps should stop ant leaks. Seems to work!
It'll do till I take the whole exhaust off over the winter and get all those pipes into shape.
 Car club meeting today - not at our usual venue (where there is a wedding on) but at Knockhill racing circuit. A few members are
away down to the TVR 60th anniversary celebrations at Rockingham this weekend, so between that and the change of venue, and the
holidays, a reduced turnout is expected. As it turns out, there are 9 cars there, including new members Sally and Martin with
their Griffith.
Car club meeting today - not at our usual venue (where there is a wedding on) but at Knockhill racing circuit. A few members are
away down to the TVR 60th anniversary celebrations at Rockingham this weekend, so between that and the change of venue, and the
holidays, a reduced turnout is expected. As it turns out, there are 9 cars there, including new members Sally and Martin with
their Griffith.

 The sun is out, it's dry, and the cars look great.
 I still haven't learnt to wear a hat when it's sunny. Yep I've burnt my head.