(Disclaimer - the following explains how I replaced the brake shoes on my car. This is purely advisory, and is given in good faith. This method may work for you, and it may not. If it goes wrong, then don't blame me!)
I jacked the car up, making sure it was well supported on axle stands or similar. I took the wheels off.
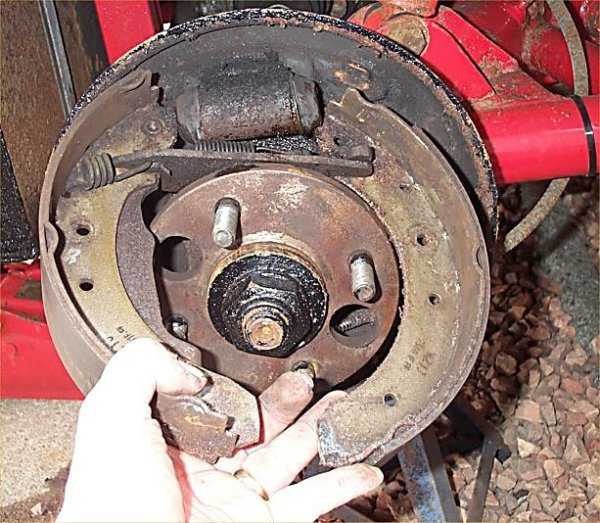
1. With the wheel off, the brake drum is held on only by friction. It should come off easily. If it's stuck on (like mine was) then careful hammering (to jolt it free) combined with careful levering between the drum and backplate did it. I also had to work around the drum levering each bit off a tiny bit at a time.
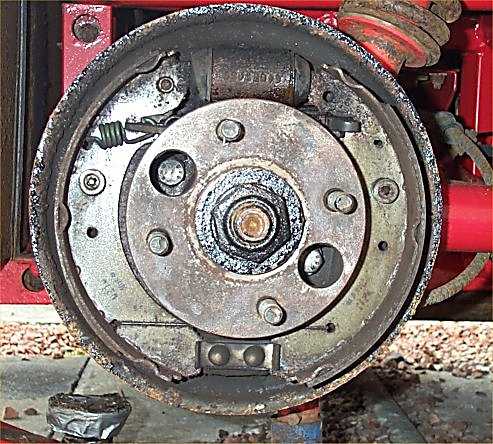
 2. Make a very careful note of how it all goes together - where all the springs
go etc... Otherwise you have no chance of getting it all back together correctly.
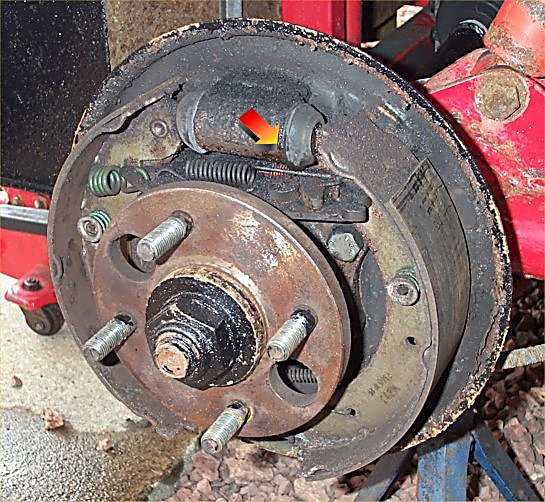
2. Make a very careful note of how it all goes together - where all the springs
go etc... Otherwise you have no chance of getting it all back together correctly.
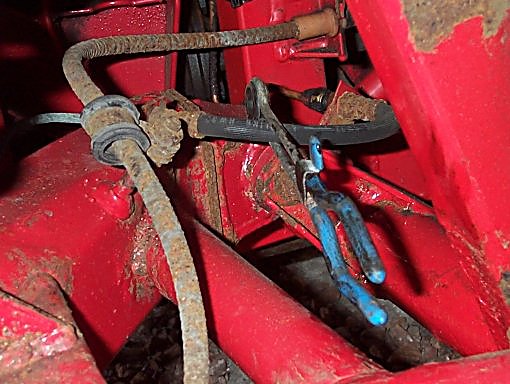
Note in this case the brake fluid leak (arrowed in second pic). This is nothing
to do with the brake sticking, but not good news!
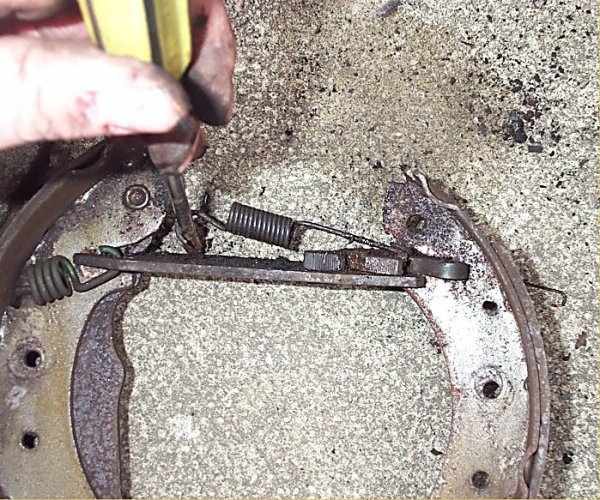
 3. remove the shoe retaining springs. There is a special tool you can buy to
do this, but I have never bothered - a pair of mole grips applied lightly to the
circular retainer (careful not to crush it!) - press back, hold the pin from
behind with a finger, half turn (pin or spring) and there you go!
3. remove the shoe retaining springs. There is a special tool you can buy to
do this, but I have never bothered - a pair of mole grips applied lightly to the
circular retainer (careful not to crush it!) - press back, hold the pin from
behind with a finger, half turn (pin or spring) and there you go!
 4. Pull the shoes off one at a time - again there is a special tool for this but
I use large pliers. Just be careful that you lever on the metal shoe and NOT the brake
friction material.
4. Pull the shoes off one at a time - again there is a special tool for this but
I use large pliers. Just be careful that you lever on the metal shoe and NOT the brake
friction material.
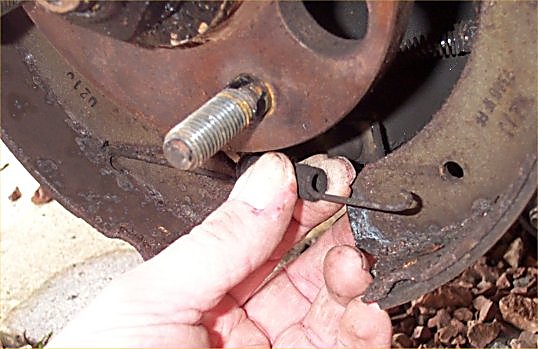 5. Then push the shoes together and remove this spring and put it down carefully,
REMEMBER to note which way round it came off!
5. Then push the shoes together and remove this spring and put it down carefully,
REMEMBER to note which way round it came off!
 6.Then disengage the handbrake cable from the lever attached to the rear shoe.
 7. Then if you twist the bottom of the shoes upwards, you can JUST fit the self-adjuster
mechanism between the hub and the brake cylinder.
7. Then if you twist the bottom of the shoes upwards, you can JUST fit the self-adjuster
mechanism between the hub and the brake cylinder.
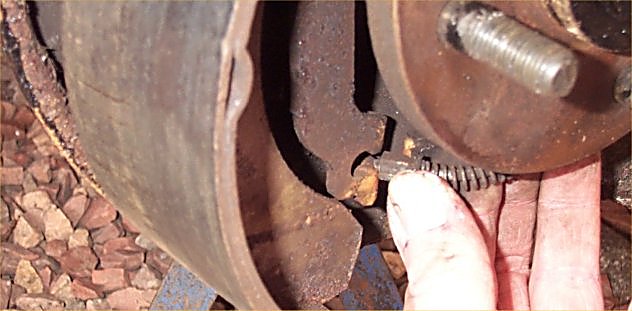
 8. This is a fiddly bit! You have to lever this big spring out of the adjuster arm,
then the little adjuster peg spring that is underneath it. The front shoe can be
pulled off the adjuster arm at this point.
8. This is a fiddly bit! You have to lever this big spring out of the adjuster arm,
then the little adjuster peg spring that is underneath it. The front shoe can be
pulled off the adjuster arm at this point.
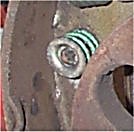
Then you have to remove the short fat green spring in the photo. Make sure the
handbrake arm is pushed right back (it was siezed on mine) and you should be able to
wrestle the arm off.
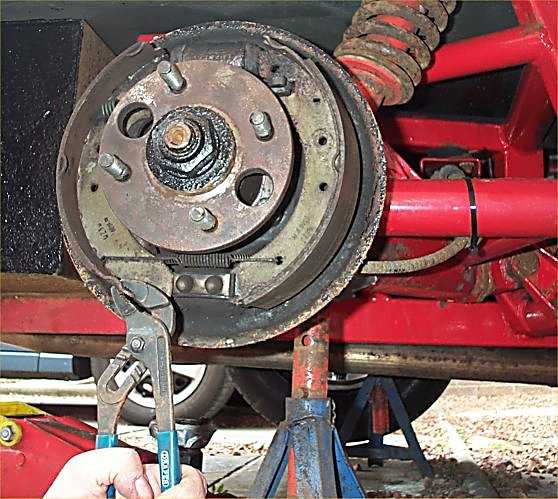
 9. At this point you can clean up all of the parts with brake cleaner. In my case I
had to also remove the wheel cylinder. First seal off the circuit by clamping the
rubber hose shut. This wee tool costs only a few quid and doesn't chafe the hose.
It stops all the fluid running out and any air getting in, and minimises the amount
of brake bleeding you have to do when (if) you get it all back together.
9. At this point you can clean up all of the parts with brake cleaner. In my case I
had to also remove the wheel cylinder. First seal off the circuit by clamping the
rubber hose shut. This wee tool costs only a few quid and doesn't chafe the hose.
It stops all the fluid running out and any air getting in, and minimises the amount
of brake bleeding you have to do when (if) you get it all back together.
10. Then undo the brake pipe connector (11 mm spanner) being careful not to bend the pipe. Then undo the two 10mm bolts holding the wheel cylinder on. You'll need a very thin-walled socket.
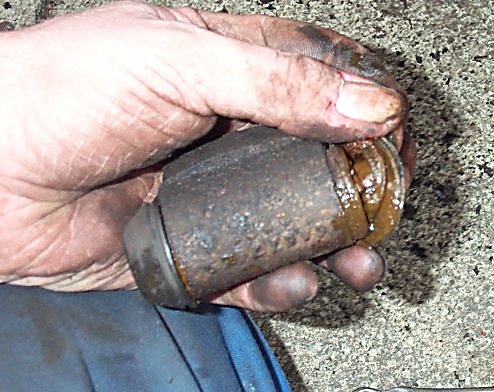 11. Here's the wheel cylinder removed. The bit under the rubber seal should be dry.
The brown stuff is a mixture of brake fluid leaking out, and rusty water leaking
in. This is a bad sign. You can spend several hours cleaning this up, and buying
and fitting new seals, to get it working properly again.
11. Here's the wheel cylinder removed. The bit under the rubber seal should be dry.
The brown stuff is a mixture of brake fluid leaking out, and rusty water leaking
in. This is a bad sign. You can spend several hours cleaning this up, and buying
and fitting new seals, to get it working properly again.
Or you can go to Halfords and buy one for a Ford Sierra 1.8 or 2.3 diesel for about a tenner. While you're there, get a set of Sierra 1.8 or 2.3 brake shoes.
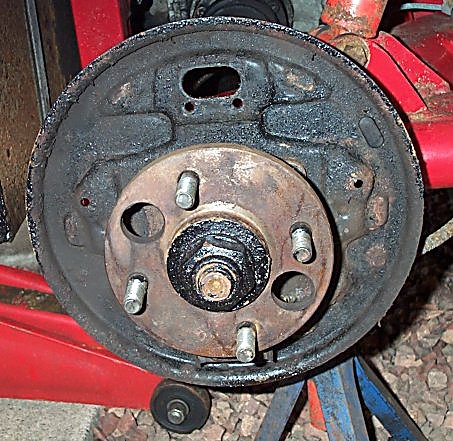 12. Here's the backplate, all cleaned up and ready for reassembly. You can see the two holes
for the bolts that hold the wheel cylinder on, and the two separate holes for
those shoe retaining springs.
12. Here's the backplate, all cleaned up and ready for reassembly. You can see the two holes
for the bolts that hold the wheel cylinder on, and the two separate holes for
those shoe retaining springs.
 13. Pick up the rear brake shoe. The handbrake lever should be on the back (nearest the backplate).
Start with a little bit of copper grease on the handbrake actuating arm. Make sure
it's nice and free.
13. Pick up the rear brake shoe. The handbrake lever should be on the back (nearest the backplate).
Start with a little bit of copper grease on the handbrake actuating arm. Make sure
it's nice and free.
14. At this point you have to re-attach the handbrake cable to the arm - you'll never get it back on after you assemble all the shoes and springs. I pushed the hex nipple through the arm, gripped it with pliers and twisted it into position.
15. Now pick up the flat brake adjustment arm, and the short fat spring that holds it on. Hook the spring through the hole in the shoe, put some copper grease on the mating surfaces of the arm and the shoe, hook the spring through the arm and twist the arm into position by hand.
16. Now grease the adjustment pawl and mating surfaces on the other end of the arm. Don't get grease on the teeth of the pawl or fixed wheel! Then slide the other shoe over the adjustment pawl and into the slot in the end of the arm. Push it right in so that the adjuster pawl is pushed right back.
 17. Now take the second-biggest spring, and hook it through the shoe from the back, then hook
it through the hole in the arm as shown here. Then take the little thin spring, hook the
round end over the button on the adjuster, and the other end through the other hole in the arm.. grease the adjustment pawl and mating surfaces on the other end of the arm.
17. Now take the second-biggest spring, and hook it through the shoe from the back, then hook
it through the hole in the arm as shown here. Then take the little thin spring, hook the
round end over the button on the adjuster, and the other end through the other hole in the arm.. grease the adjustment pawl and mating surfaces on the other end of the arm.
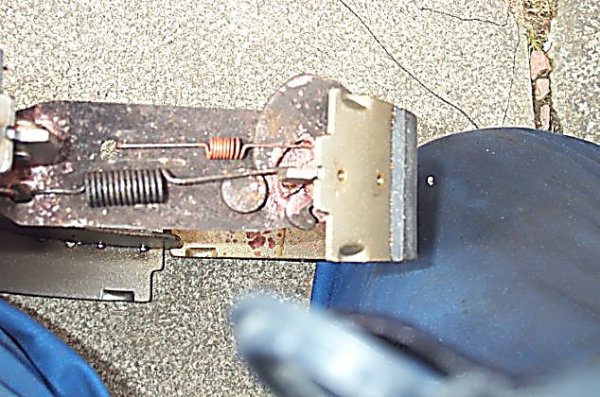 18. Looking down from above, it should look like this. Note the adjustment pawl pushed
right back. If you don't do this, you'll never get the brake drum back on!
18. Looking down from above, it should look like this. Note the adjustment pawl pushed
right back. If you don't do this, you'll never get the brake drum back on!
19. Now waggle all of that assembly between the hub and brake cylinder, into position. Then install the bottom spring, between the two shoes.
20. Locate the top of the shoes against the wheel cylinder pistons. Again, a dab of grease on the mating surfaces. Then hook the front shoe first, onto the bottom pivot point (grease again!) and then the rear shoe with the pliers again.
21. Put the shoe retaining springs back on - push the pin through from behind, put the spring on then use large pliers to hold the retaining cup, push it back, get the pin through and then a half-turn to secure it. Be careful that you don't launch a spring or cup into orbit over your shoulder - I did! This necessitated another trip to Halfords to buy a new fitting kit for Ł4.49.
One last check to make sure no springs have come loose and everything is at it should be, then replace the brake drum!
Sorted!
Now do the other side!
Remember if you have disconnected or even loosened any hydraulic pipes, you'll have to bleed that circuit.
Remember anyway, when you have finished, to dab the brakes to make sure that you have taken up all the free travel and have started the self-adjusters moving into position. You don't want to be adjusting your brakes the first time you have to stop, do you?
...