:: Interior Removal and Carpet Replacement ::
When I bought my S, almost 9 years ago, the carpets were already in a hell of a state, due mainly to damp penetration before I got it. I had some repairs
done to the footwell sides, and I also replaced the mats and the rear parcel shelf, so it didn't look too bad. Last year I refurbed the seats, but that
showed up how worn and threadbare the carpets had become.
So - I can't put it off any longer, it's time to replace the carpets, so I've been looking at various options. You can buy carpet off the roll, and cut
them to shape yourself. You would need to sew new beading trim around all the edges. Carpet sewing machines cost a mint, I have discovered, and sewing
them all by hand doesn't appeal.
There is a place in Belgium which sells pre-fitted carpet sets, and I've been told that they are a good fit. So I ordered a set, and although they are
expensive, at least it should save a lot of cutting, fitting and sewing time.
So - here's my guide to how I did mine. You don't particularly need an awful lot of skill to do a presentable job with a pre-cut set (you undoubtedly
need much more skill to do a pristine job, or to cut the carpets to shape yourself). There is still some trimming involved though, so you'll need a sharp
knife and heavy duty scissors.
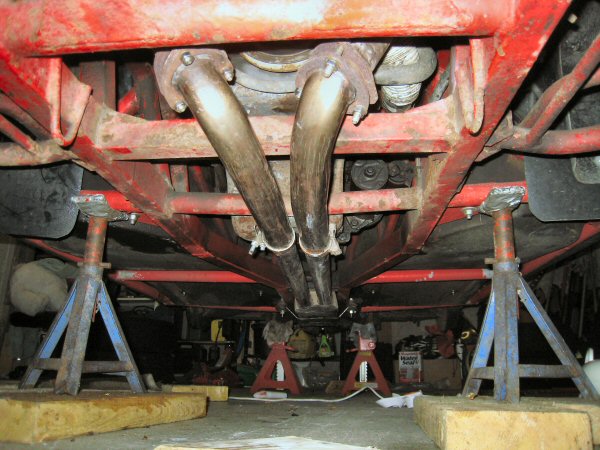
My first step is to get the car lifted on to sturdy axle stands. Then I start by removing the exhaust: 6 nuts and bolts at the downpipes, then a jack and
block of wood to hold the front of the exhaust up till I remove the two silencer bolts, then lower the front a wee bit and release the single bolt at the
rear - and that's the exhaust off.
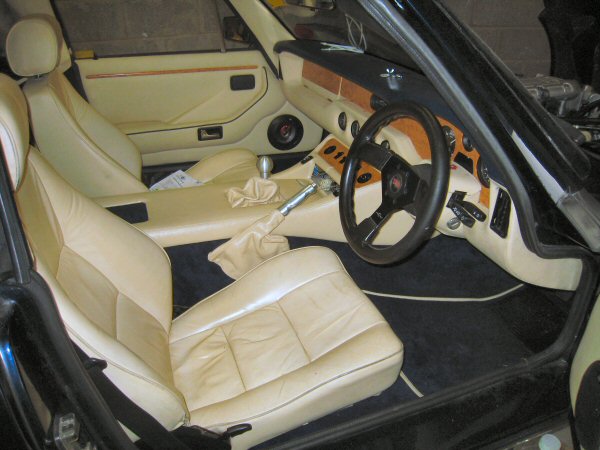
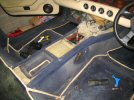
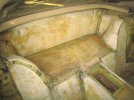
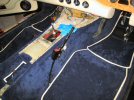
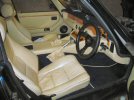
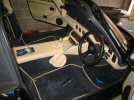 Next job - remove seats. A quick dive underneath with a power wrench quickly removes all 8 nuts (how glad am I that I locked the bolts into the frames
when I refitted the seats?) and the seats are out. Then another 5 minutes with the electric spanner, and the seat belts are all out. So far so easy. This
photo doesn't really show the state of the carpets.
Next job - remove seats. A quick dive underneath with a power wrench quickly removes all 8 nuts (how glad am I that I locked the bolts into the frames
when I refitted the seats?) and the seats are out. Then another 5 minutes with the electric spanner, and the seat belts are all out. So far so easy. This
photo doesn't really show the state of the carpets.
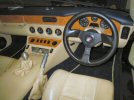
Then it's time to remove the centre console. First remove the radio, then remove two screws at the rear of the transmission tunnel, lift the rear of the
console upwards and back, and then I can just get my hand in and pull the corrugated ducting off the back of the two eyeball vents. Pull it out a wee bit
further, and then snip through a cable tie that hold the wiring loom on to the front left corner of the console.
At this point, you might just be able to reach up behind the dash, between the glove box and the volt meter, and you'll find two multiplug connectors that
connect the console wiring loom. If you can disconnect those now, that makes removing the console easier. I didn't know those plugs were there, so I
disconnected all the switches etc individually, as shown below
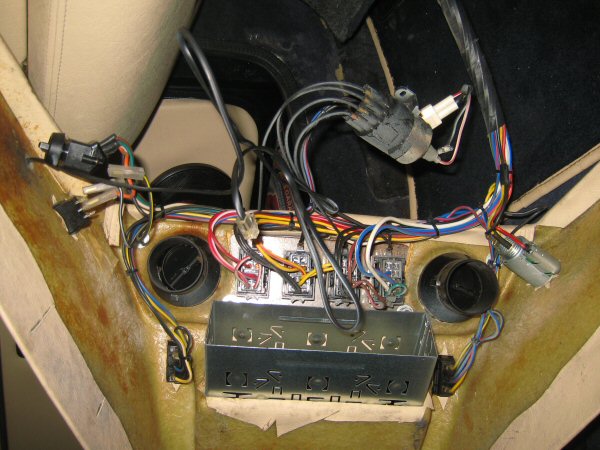
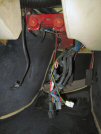
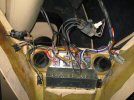 That lets me lift the console and turn it onto its side, and after noting the order of all the wiring connectors, by photographing them (with a few more
photos than just this one) and writing them down on a whiteboard on the wall, I disconnect all of the loom and remove the console.
That lets me lift the console and turn it onto its side, and after noting the order of all the wiring connectors, by photographing them (with a few more
photos than just this one) and writing them down on a whiteboard on the wall, I disconnect all of the loom and remove the console.
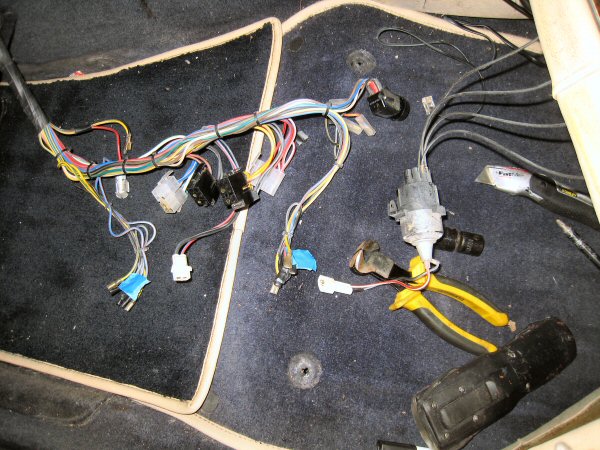
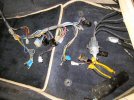 Here's the wiring loom for the 4 switches in the panel (heater fan, font fogs, rear fogs, panel lights), the two window switches, the electric mirror
switches, the immobiliser and the cigar lighter (or sat-nav power source so that mapless followers don't get lost, as I prefer to call it).
Here's the wiring loom for the 4 switches in the panel (heater fan, font fogs, rear fogs, panel lights), the two window switches, the electric mirror
switches, the immobiliser and the cigar lighter (or sat-nav power source so that mapless followers don't get lost, as I prefer to call it).
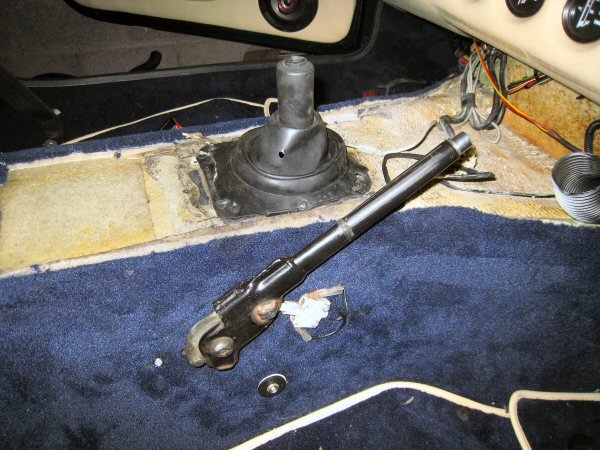
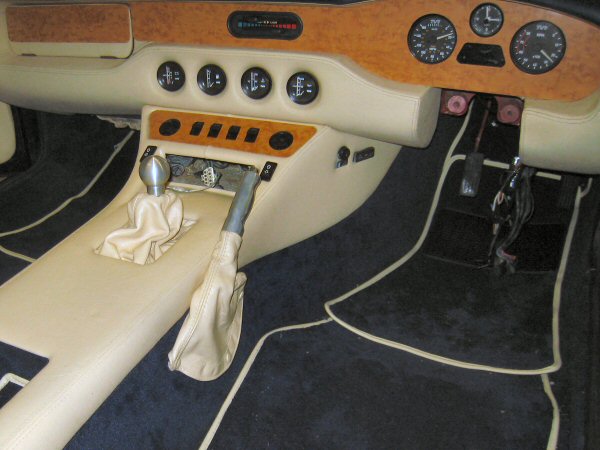
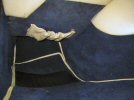
Then I remove the gear knob and gaiter, and the rubber gaiter underneath. Then it's another dive underneath the car to loosen the handbrake cable adjuster
by a dozen turns (that's why the exhaust had to come off, you can't reach it with the exhaust in place unless you break your forearm and insert another
elbow back-to-front) and then remove the clamp bolt that holds the cable on to the handbrake lever, and then the little bolt that holds the lever on to
the tunnel, and pull the lever assembly out of the tunnel. I also remove the handbrake warning light switch, because it's screwed through the carpets.
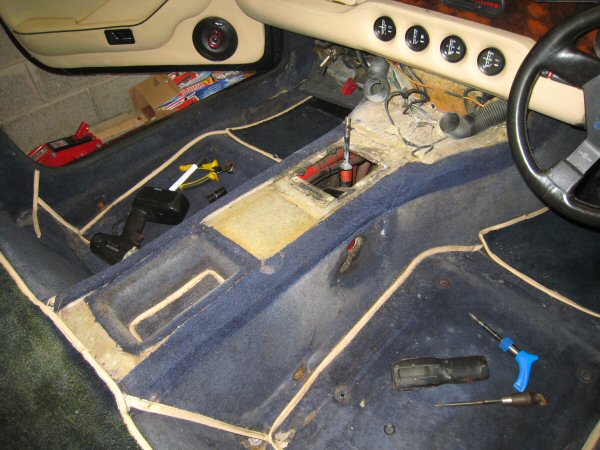
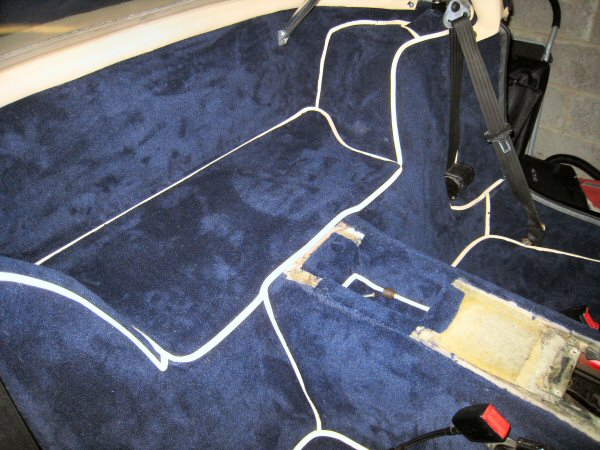
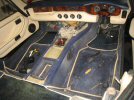
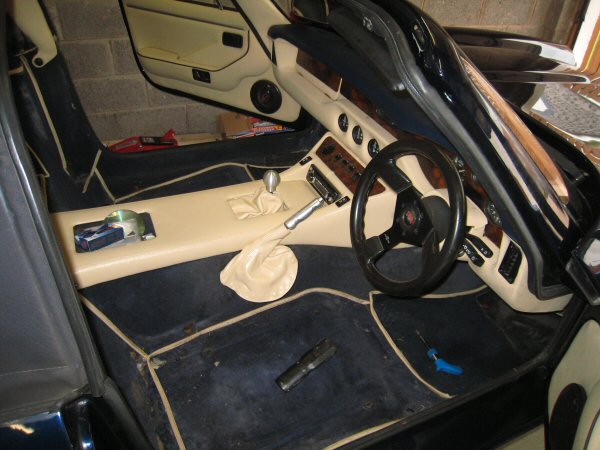
 So that gets me to this stage. You can see 5 different colours of carpet in this photo. The mats in the footwell were never really meant to match, but
the rest of that should all be the same colour!
So that gets me to this stage. You can see 5 different colours of carpet in this photo. The mats in the footwell were never really meant to match, but
the rest of that should all be the same colour!
 Then I remove the roof stays - I can just reach if I use a socket and extension on the nut inside the boot, and the electric spanner on the head of the
bolt. Then I remove the two domed nuts holding the stays on to the roof hoop.
Then I remove the roof stays - I can just reach if I use a socket and extension on the nut inside the boot, and the electric spanner on the head of the
bolt. Then I remove the two domed nuts holding the stays on to the roof hoop.
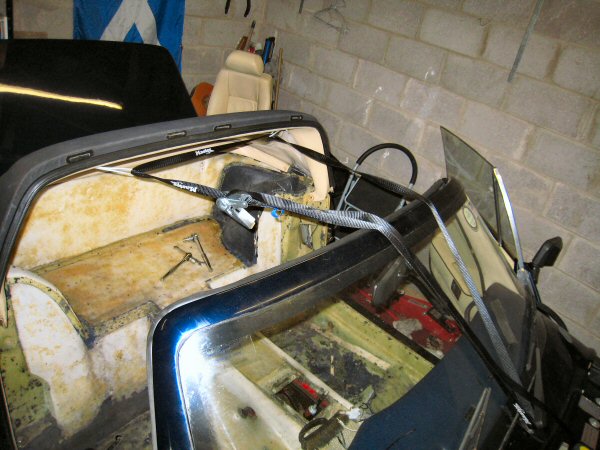
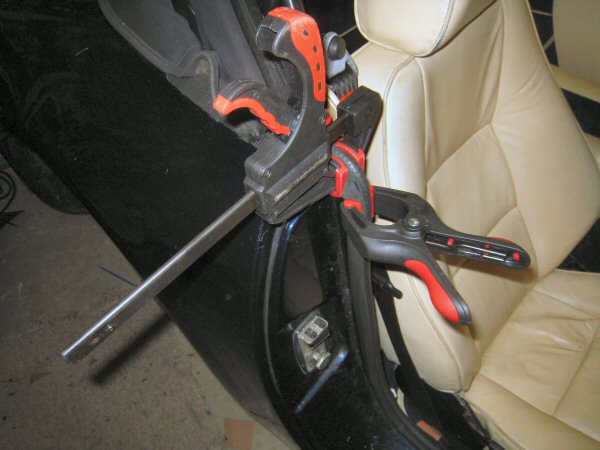
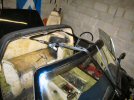 First, I need to find a way to hold the rear bit of the hood up - it's in the way when it's down, and it will be impossible to glue the new carpet in,
and hold the roof up at the same time. So I get a couple of cable ties and make two loops, then loop a ratchet strap through the cable ties, and under
the windscreen wiper. If I loop the cable ties round the front nuts for the roof struts, and adjust the length of the strap, I can hold the roof up out
of the way.
First, I need to find a way to hold the rear bit of the hood up - it's in the way when it's down, and it will be impossible to glue the new carpet in,
and hold the roof up at the same time. So I get a couple of cable ties and make two loops, then loop a ratchet strap through the cable ties, and under
the windscreen wiper. If I loop the cable ties round the front nuts for the roof struts, and adjust the length of the strap, I can hold the roof up out
of the way.
 Then I remove the front offside wheel arch, to disconnect the steering column. I cut off the cable tie
and pull back the gaiter I installed, then loosen the pinch bolt and disconnect the steering joint. Then inside the car, I remove the steering cowl,
disconnect the wiring to the lights and indicator and wiper switches, and the dreaded ignition block connector, then remove the two 17mm bolts that hold
the column up under the dash and remove the column from the car and add it to my increasing pile of bits.
Then I remove the front offside wheel arch, to disconnect the steering column. I cut off the cable tie
and pull back the gaiter I installed, then loosen the pinch bolt and disconnect the steering joint. Then inside the car, I remove the steering cowl,
disconnect the wiring to the lights and indicator and wiper switches, and the dreaded ignition block connector, then remove the two 17mm bolts that hold
the column up under the dash and remove the column from the car and add it to my increasing pile of bits.
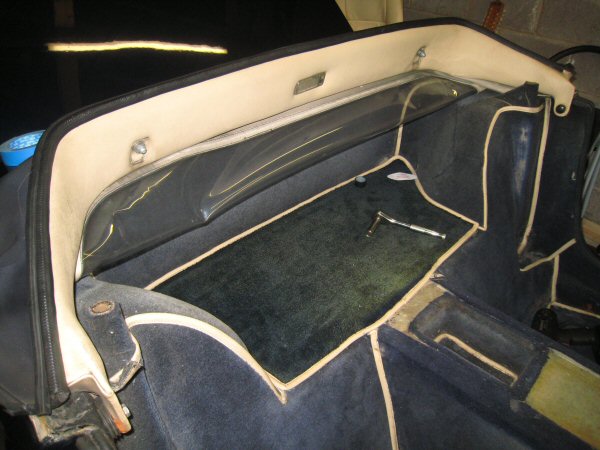
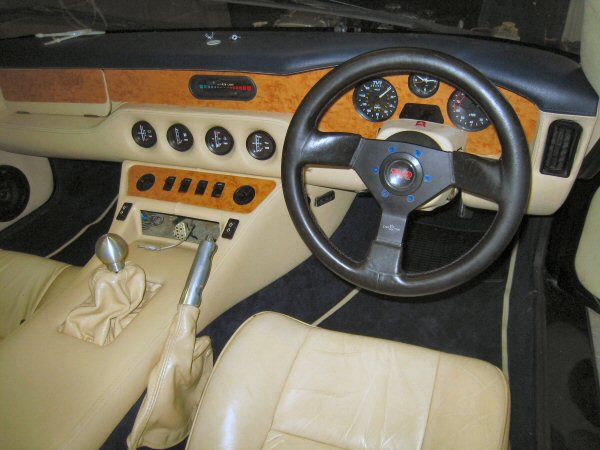
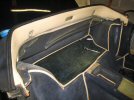
 So now I've got to here. The instructions say I shouldn't remove the carpets till I have the new ones, so I can see how they go together.
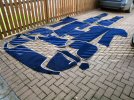 When the parcel arrives, there are 24 separate bits of carpet, so I lay them out so that I can figure out where they will all go. Then I put them back in
the box in the reverse order to the way I'll fit them, so that the first bits (the trims around the upper seat belt mount) are on the top and the floor
mats are on the bottom.
When the parcel arrives, there are 24 separate bits of carpet, so I lay them out so that I can figure out where they will all go. Then I put them back in
the box in the reverse order to the way I'll fit them, so that the first bits (the trims around the upper seat belt mount) are on the top and the floor
mats are on the bottom.
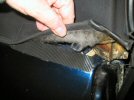
I make a start to removing the old carpets. I need to take them out in the right order, because they are tucked under each other. So first it's the
footmats, which come out easy because they were never glued in. Then the floor carpets under the seats - now these are rotten, having been soaked through
several times - and they were rotten when I got the car, before I spent months tracking down various tiny leaks. So the floor carpets have to be scraped off
in tiny bits with an old blunt screwdriver, and it takes ages.
Next, the mat on the parcel shelf. I replaced mine 8 years ago so that at least comes off easily.
Next off are the carpets on the sides of the transmission tunnel. I've got the driver side off ok, but the passenger side rips off at the front of the
gear lever, because I need to work around the hatch above the footwell for the fusebox and ecu etc. I'll get to that as I work forwards.
Then I remove the base of the wee cubbyhole in the transmission tunnel, and then the bit of carpet that goes round the sides.
Next, the two vertical bits just behind the doors (where the roof hoop bolts through). I remove the rubber door seals, then I rip the caerpet off, and
undo the roof bolts which are not into captive nuts - you need to get a hand up inside the rear panel behind the door, to hold a 13mm spanner on the nut
inside. Note to self - remember this before you stick these new bits down!
Next step is to remove the bits along the sills. My sill carpets were so rotten 8 years ago that I had to get new bits grafted in, and the carpet tears
off at the edges of the patch, just in front of the front edge of the doors.
Then it's on to the vertical panels behind the seats. I lever the edge away, in front of the top seat belt mount, and the carpets come off more or less
in one piece, except for the bottom 4 inches or so which have been soaked and are falling to bits. These can't be scraped off, because there is a foam
backing, so the old carpet has to be picked off in tiny bits.
Then it's the big panel across the back of the parcel shelf. Now the book (and the instructions) say that you have to remove the roof entirely, and that
involves removing 5 bolts, under the rear window, that go through the interior trim piece that goes round the back edge of the hood, then the cloth roof,
then the tub and into the front edge of the boot. They have a cross-headed screw head, and it's impossible to get a screwdriver on without cutting through
the roof. I have a set of offset screwdrivers but even then, it's almost impossible.
I decide to see how much of the carpet I can remove with the hoop in place. I remove the two screws at the ends of the hoop, and then it turns out that if
I'm careful, it all just tugs out in one piece across the back. The sides are a bit more piecemeal, and I have to dig bits of carpet out with the blunt
screwdriver. I remove the two bits of velcro just behind the doors, that hold the edge of the roof down. I'll have to replace those. I think that if I
trim the top edge of the carpet slightly, I should be able to tuck it back up behind the trim hoop with a wallpaper scraper or something, and it should
look ok.
Next step is the wheelarches. I see that the old carpets have been cut and stitched to shape them a bit, but the new bits are just single piece, so I
want to get at least one of the arch carpets off in one piece in case I need to cut a pattern. I manage to carefully remove the driver's side panel from
the foam backing, except for about an inch around the bottom edge (which is glued to the floor) so that'll do!
Next, I remove the wee bit of carpet around the upper seat belt mount, again trying to keep it in one piece in case I need a pattern.
 All of that has taken me about 3 hours, and I've still got the other rear wheelarch to do, and then the sides of both footwells, before I'm finished
removing carpets.
All of that has taken me about 3 hours, and I've still got the other rear wheelarch to do, and then the sides of both footwells, before I'm finished
removing carpets.
 Then another note of how the area around the upper seat belt mount is carpeted, before I strip that off.
That only leaves the sides of the footwells. The drivers side is easy - the carpet just rips out once I get hold of an edge. There is a single screw up
behind the dash, which seems to be an instrument earth, but I can't get to it. I rip the carpet around it.
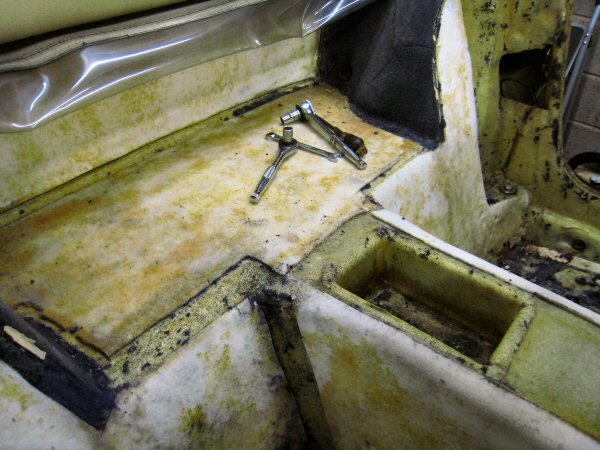
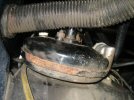
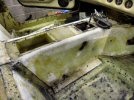
 Then the carpet on the bulkhead, in front of the pedals - that just peels off. That leaves me with this - you can see that the foam lining on the
transmission tunnel is loose, I'll need to stick that back down before I put the carpet on top.
Then the carpet on the bulkhead, in front of the pedals - that just peels off. That leaves me with this - you can see that the foam lining on the
transmission tunnel is loose, I'll need to stick that back down before I put the carpet on top.
I still have to scrape all the glued-down edges off the bare floor - it takes ages and access is terrible.
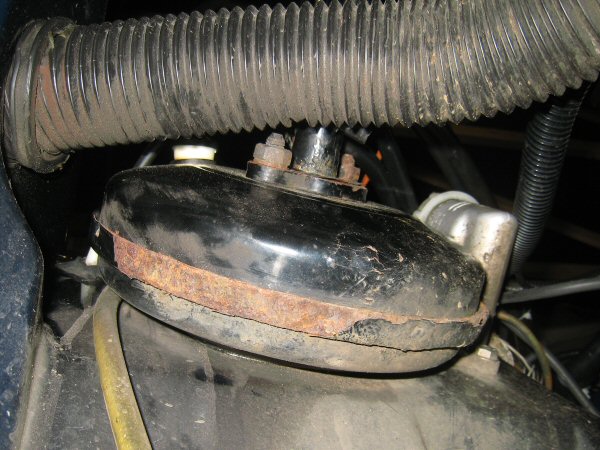
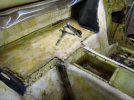
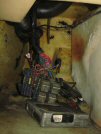
Then it's on to the passenger side, which is a bit more awkward, because first I have to remove the drop-down flap that holds all the elecrical wiring,
fusebox etc up. It's fixed in with a tiny hinge that's held on with 2 bolts behind the washer bottle. I get an open spanner down onto the bolts, and then
undo the nuts under the dash, to remove the hinge and the flap.
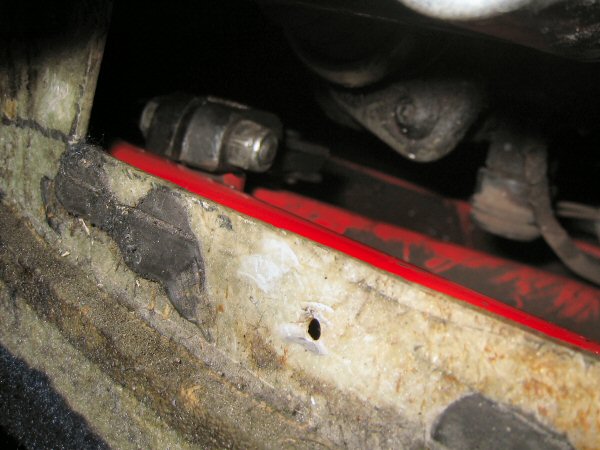
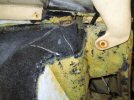
 That lets me remove the carpets from the transmission tunnel, and the inside of the sill. That leaves me with this. The two hinge bolts are near the top,
behind that black wire.
That lets me remove the carpets from the transmission tunnel, and the inside of the sill. That leaves me with this. The two hinge bolts are near the top,
behind that black wire.
 Then I sweep all the debris up, and vacuum clean the whole of the interior, and then scrape off the last tiny bits of carpet.
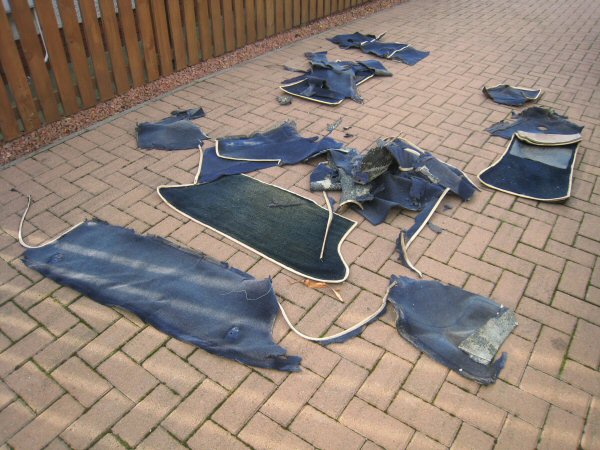
 Here's what left of the old carpets. There's a couple of shovelful of wee bits that I swept up, but they went straight in the bin!
So it's on to fitting the new carpets. I start with the seat belt mount. There are two wee pentangles of carpet, and I trial fit one, folding it over the
supporting fillet, and checking that it fits. Then I spray the mount and the back of the carpet with adhesive, and fold the carpet over the fillet and
clamp it in place with a g-cramp with flat faces. Then I roll the carpet round the front, so that the joint is on the outside (beside the roof hoop). Then
I trim round the top with a stanley knife, and stick it all in place, stretching it into shape with a block of rubber in the palm of my hand (OK, it was
a rubber hammer, held by the head, not the shaft).
 Then it's on to the wheelarch itself. Again, a wee trial fit, then spray both surfaces and stick it down, starting with the front edge round the seat belt
mount, working backwards till I reach the rear bulkhead, then down to the parcel shelf. I use the rubber hammer to tap over the front edges, and the shaft
of the hammer to push the edge into place along the back and sides. Then I work over the whole surface with the rubber to puxh it into the reverse curve of
the wheelarch. The old ones were two bits sewn together to follow the curve, but these are one piece.
Then it's on to the wheelarch itself. Again, a wee trial fit, then spray both surfaces and stick it down, starting with the front edge round the seat belt
mount, working backwards till I reach the rear bulkhead, then down to the parcel shelf. I use the rubber hammer to tap over the front edges, and the shaft
of the hammer to push the edge into place along the back and sides. Then I work over the whole surface with the rubber to puxh it into the reverse curve of
the wheelarch. The old ones were two bits sewn together to follow the curve, but these are one piece.
Then the same procedure on the other wheelarch - I stick the carpet on to the top seatbelt mount, then the wheelarch, then the vertical bulkhead behind
the seats.
The next bit to go on is the inner sill, which is one piece with the outside of the footwell. I line it all up so that the bound rear edge is in the right
place, and notice that the front edge of the door opening is miles out. Then I realise that it's cut to fit an S1 / S2 - and mine has longer doors so I'll
need to trim them. I run a permanent marker around the edge of the door, on the rear of the carpet, and also mark where the heater hoses go through the
bulkhead, and then remove the carpet and trim it to shape. Another refit to check, and then remove, spray with adhesive, and refit. It's a bit of a faff
to pull the carpet forward past the pedals, but I eventually get it all nice and smooth, pushing it into the edges and the mouldings in the floor under
the seat. A final trim with a knife, and it looks good! The other side is exactly the same (but reversed, obviously!).
Then I stick down the vertical bit behind the door - it covers the edge of the wheelarch and also the big body mounting bolt. I only stick it down
temporarily - I'll need to lift it later to bolt the roof hinge back on.
So now it's time for the rear bulkhead. I position it and then stick it on from the bottom up, making
sure that the edging fits properly around the wheelarch. Then I trim the top edge back by about an inch and glue and tuck the edge under the trim that holds
the rear of the roof on. Then at each end I leave the carpet unstuck - the top of the rear door pillar is open, and I'll have to work out how the carpet fits
to cover that up. There is also a strip of velcro that fits on somehow to hold the edge of the roof down.
 Then I cut through the carpet in line with the holes in the bulkhead, and then install the roof hinge bolts, tighten up the nuts inside the pillar, and then
restick the carpets down. Then I trim along the rear of the door gap, and then reinstall the door seals around the edges of the tub.
Then I cut through the carpet in line with the holes in the bulkhead, and then install the roof hinge bolts, tighten up the nuts inside the pillar, and then
restick the carpets down. Then I trim along the rear of the door gap, and then reinstall the door seals around the edges of the tub.
 It looks good!.
 Then I mark through the holes for the roof struts, and drill through the carpet from the boot, then reinstall the struts. The door rubbers aren't finished
in this photo - I need to finish trimming the carpet around the tops of the door pillars first.
Then I mark through the holes for the roof struts, and drill through the carpet from the boot, then reinstall the struts. The door rubbers aren't finished
in this photo - I need to finish trimming the carpet around the tops of the door pillars first.
Then I carpet the drivers side of the transmission tunnel - again it's a single long piece, so it's awkward - but I get there! The answer was to get it in
place, then peel back the back half, glue it, then peel back the front half and glue that. Then I fit the 3 carpets on the floor - there's a bit at the back
that's under the seat, a small bit at the front, that needs a hole cut for the steering column to go through, and then a floormat between the seat and the
pedals. Then the passenger side is the same.
Then, I trim and stick the areas around the rear roof hinge, taking
care that the wiring to the interior light can flex properly as the roof goes up and down. I also replace the two screws through the end of the trimmed hoop
that holds the rear edge of the roof down.
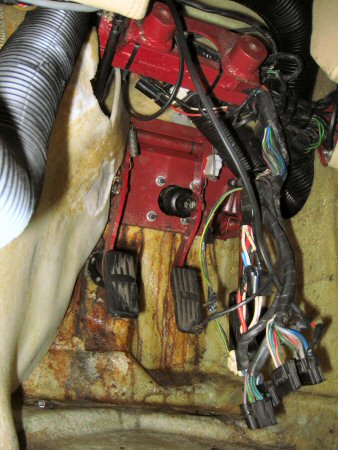
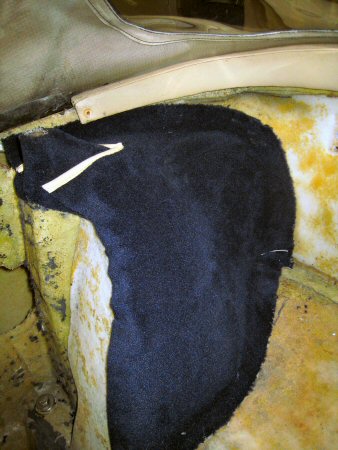
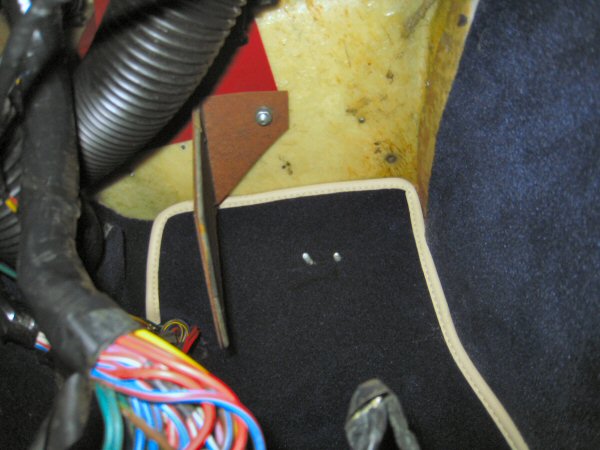
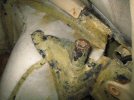
 The mat up in the passenger footwell has a slot cut for the wiring loom where it comes through, but I mark and cut another tiny slit for the two bolts that
will hold on the hinge for the cover that drops down (that holds all the electrical gubbins up). The right angle plate is supposed to have the fuse / relay
box mounted on it, but mine never has. It's turned through 90 degrees here to give better access to those two hinge bolts.
The mat up in the passenger footwell has a slot cut for the wiring loom where it comes through, but I mark and cut another tiny slit for the two bolts that
will hold on the hinge for the cover that drops down (that holds all the electrical gubbins up). The right angle plate is supposed to have the fuse / relay
box mounted on it, but mine never has. It's turned through 90 degrees here to give better access to those two hinge bolts.
After fitting the floor mat under the passenger seat, and then the footwell mat, I move on to the wee cubbyhole behind the gear lever. The kit includes a
bit of carpet that I couldn't identify at first, but this is what it's for. I hold the edge against the top edges of the hole, and mark where the corners
will be, with a permanent marker. Then 4 cuts upwards, about an inch or so long, and I fold it into the cubby hole. Once I cut it slightly to length so that
the edges meet up in one corner, it's perfect! I take it out, apply the spray adhesive (I'm getting a bit woozy by this time!) and stick it back in. Then
3 more cuts in the 3 corners, more spray, and fold over the top edges and stick down. Then there is a separate wee rectangle of carpet that fits into the
base of the cubby hole.
Finally, I spray and stick down the parcel shelf carpet, and that's it! Done!
Then it's a matter of refitting the seat belts by pushing a bradawl through, and then cutting a cross with my trusty stanley knife (other brands of finger-
slashing craft knives are available). Bolts through, tighten up, sorted!
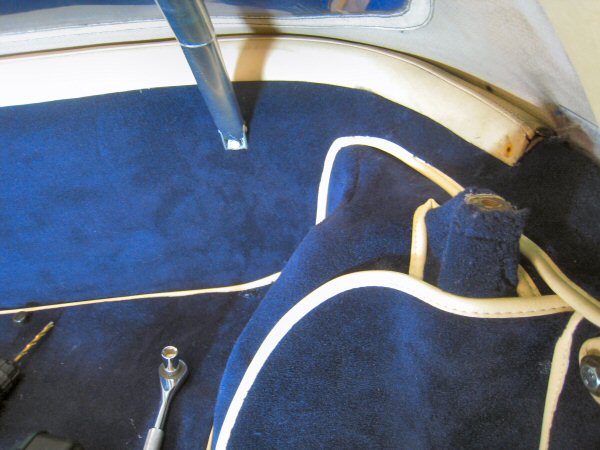
Then it's on to the handbrake warning switch - and here I realise that I should have fed the wires under the carpet first. Never mind, I pull back the carpet
a tiny bit till I can see the switch screw holes in the tunnel, then make a wee slit in the carpet to line up with the holes, and another just behind that,
and push the wires through. Then I line up the screw holes, mount the switch and connect up the wires, then stick the carpet down again. It will all be hidden
by the handbrake gaiter anyway but this reduces the chance of the wire moving and getting chafed. Then I tape the excess wires to the top of the tunnel, but
I'll have to find better tape because masking tape (that was on it originally) doesn't stick very well.
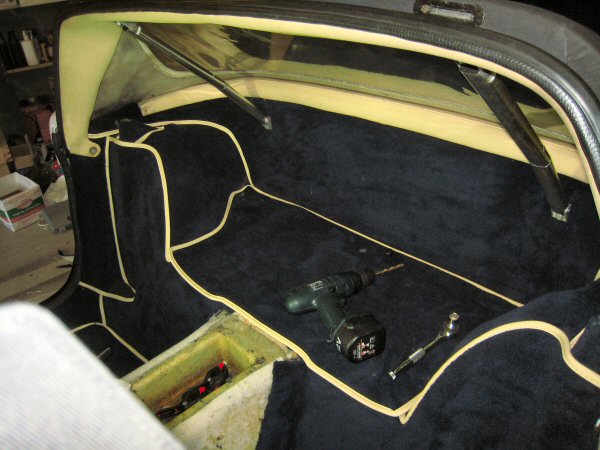
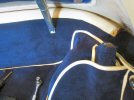
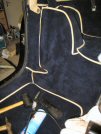
Here's some photos of progress so far:


The flash seems to make the carpet look a wee bit lighter than it is, it's really quite a dark blue. The flash also seems to pick up that the carpet pile
is lying in different directions where I've been smoothing it down - it doesn't really look as blotchy as that!
Then I decide to put the footwell cover back on (the one that the ecu and all the electrics, sits on top of). It take a bit of wrestling into position
under all the gubbins, but I finally manage to get the hinge in place over the two setscrews. Then, by wedging a spanner on the outside, between the bolt head
and the washer bottle, I am able to tighten then up with a long socket extension and a stubby ratchet handle.
 Then I trim some velcro to the same shape as the old bits (that I kept carefully stored on the top of the dashboard for this purpose) and stick them along
the sides of the hood panel, to hold the edge of the roof down.
Then I trim some velcro to the same shape as the old bits (that I kept carefully stored on the top of the dashboard for this purpose) and stick them along
the sides of the hood panel, to hold the edge of the roof down.
The next step is replacing the handbrake lever and cable. First I put the lever through its mounting hole, and then wedge it in place with a bit of wood and
some packing pieces, across to the opposite sill. That means it stays in place while I crawl underneath and reach up between the gearbox and the chassis,
to grab the end of the handbrake cable, pull as much slack out of it as possible, and push the clamp bolt over the splined end of the lever.
 Then it's a case of getting a couple of spanners down past the gear lever, and tightening up the clamp bolt, and then replacing the smaller bolt that hold
the pawl ratchet plate in place. Finally, another dive underneath to turn the cable adjuster back up until the lever moves just 3 clicks. Sorted. Not as
much of a bitch as it was the first time I did it. I'm still learning!
Then it's a case of getting a couple of spanners down past the gear lever, and tightening up the clamp bolt, and then replacing the smaller bolt that hold
the pawl ratchet plate in place. Finally, another dive underneath to turn the cable adjuster back up until the lever moves just 3 clicks. Sorted. Not as
much of a bitch as it was the first time I did it. I'm still learning!
For my next trick I drill 3 holes in the transmission tunnel, for 3 pop studs, to secure the handbrake gaiter.
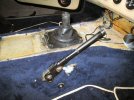 So that takes us to here - handbrake and switch refitted, ready for the centre console.
Before I fit it, though, I need to fit the rubber gaiter to the gear lever - it's hidden by the leather gaiter but you need it to keep fumes and draughts
out. It fixes to the tunnel using little screws and flat washers. Then don't forget to fit the leather gaiter over the rubber one, before you refit the
console.
Then it's on to replacing the centre console. First I get myself upside down in the footwell and reconnect the wiring loom, making sure that I route the
wiring properly past heater hoses etc. Then I clip the two fresh air hoses on to the rear of the eyeball vents, and push the console into position, making
sure I have the radio connectors free, and also tucking way the bulb holder for the "fibre optic" switch illumination. I check that I haven't trapped any
wiring between the console and the dash, and then lower the rear of the console into place. Well when I say "lower" I mean heave it into position - the
new carpets are much thicker and the console isn't very keen on fitting into position. I put in the two screws securing the rear of the console to the
tunnel, and then admire my handiwork

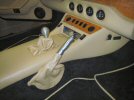 Then I fit the gear knob and the handbrake lever handle.
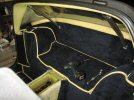
 Then I tidy up the wiring in the passenger footwell, and lift it all up into place and push the footwell cover into place. Because it's been in the shade
and not exposed to the sun (or to the dampness in the footwell) it has hardly faded at all, so I think I'll leave it with the original map pocket in place.
Then I tidy up the wiring in the passenger footwell, and lift it all up into place and push the footwell cover into place. Because it's been in the shade
and not exposed to the sun (or to the dampness in the footwell) it has hardly faded at all, so I think I'll leave it with the original map pocket in place.
After I've given the carpet a vacuum to remove the debris from drilling the bulkhead, I start to fit the steering column. First the column goes through
the bulkhead bearing, then I support the steering wheel on a wee box while I carefully route the wiring back to the right connectors - two on the right
side for the lights and wipers, to on the left for the indicators and headlight flash etc. Another connector underneath connects up the ignition switch,
and then finally there's a single wire to be connected up. There's another connector for the boot switch, and a wire to the manual radiator fan over-ride,
but I can't connect those yet.
Right - now to push the steering wheel up into position, and bolt it to the bracket using the two big spacers, being careful not to trap any wiring between
the bits.
Then I connect up the radiator and boot release wiring to the switches on the lower steering cowl, and refit that to the column.
Under the bonnet now, to connect up the steering up to the bottom of the column. I had marked which way the UJ went on, and I haven't turned either the
steering wheel or the front hubs since, so it goes back exactly as it camne off anyway. Tighten up the pinch bolt and then refit the gaiter I fitted to
keep the UJ free of water and grit from the front wheels.
Then I use the bradawl pushed up
through the floor, to show me where I have to make holes in the carpet - 4 each side for the seat bolts, and 2 each side for a pair of push fasteners that
seem to hold the front edge of the rear section down. Then I drill through the carpet, making sure I don't enlarge the holes in the body tub. The two front
ones (for the clips) are right above the outrigger crossmembers, so I also have to be carful not to drill holes in the top of those!
 The seats go in relatively easily - just 4 bolts through the floor (which are already fixed to the seat frame) with big washers.
 Finally, I decide to fix down the ends of the door seals in front of the hood - I remember I had a problem with those before, where they curve tight round
the top of the door opening. A bit of glue, stick them on and then clamp them in position till the glue dries.
Finally, I decide to fix down the ends of the door seals in front of the hood - I remember I had a problem with those before, where they curve tight round
the top of the door opening. A bit of glue, stick them on and then clamp them in position till the glue dries.
Then it's time to refit the exhaust. I loosen off the top connections of the decat pipes (at the manifolds) to let them move and connect properly, then I
jack up the rear of the exhaust on a wee block of wood, to a few inches lower than its fitted position. Then another jack under the front, and lift that up
into position, making sure the two mounting bolts at the silencer fit into the slots as I lift it.
 Then I fit the six bottom decat bolts and nuts, but don't tighten them at this stage. Then lift the rear of the exhaust into position and fit the two
silencer bolts and the single bolt at the rear mounting, pushing the exhaust forward so that everything lines up. Then I tighten up the decat bolts and the
manifold bolts. Sorted!
Then I fit the six bottom decat bolts and nuts, but don't tighten them at this stage. Then lift the rear of the exhaust into position and fit the two
silencer bolts and the single bolt at the rear mounting, pushing the exhaust forward so that everything lines up. Then I tighten up the decat bolts and the
manifold bolts. Sorted!
Then I replace the offside inner wheel arch and the bonnet gas strut, both of which are dawdles, then it's a simple matter of replacing the wheels in the
right order, and lowering the car to the ground in stages.
 Next job - remove seats. A quick dive underneath with a power wrench quickly removes all 8 nuts (how glad am I that I locked the bolts into the frames
when I refitted the seats?) and the seats are out. Then another 5 minutes with the electric spanner, and the seat belts are all out. So far so easy. This
photo doesn't really show the state of the carpets.
Next job - remove seats. A quick dive underneath with a power wrench quickly removes all 8 nuts (how glad am I that I locked the bolts into the frames
when I refitted the seats?) and the seats are out. Then another 5 minutes with the electric spanner, and the seat belts are all out. So far so easy. This
photo doesn't really show the state of the carpets.