:: Diary - April 2025 ::
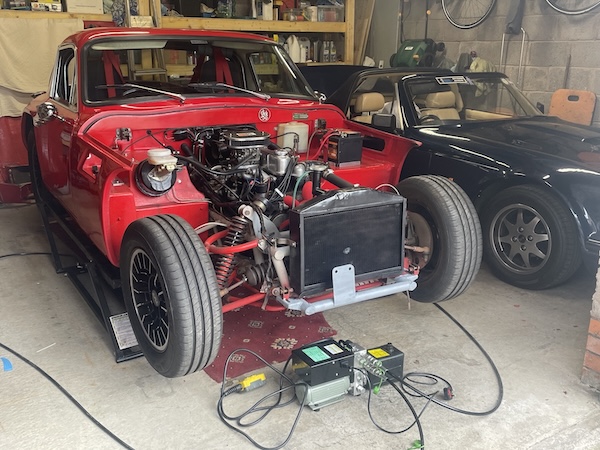
:: Tuesday, 1 April 2025 ::
Is that April already? The weather has been really good, so there has been gardening and other outside work to be done, so it's very handy that
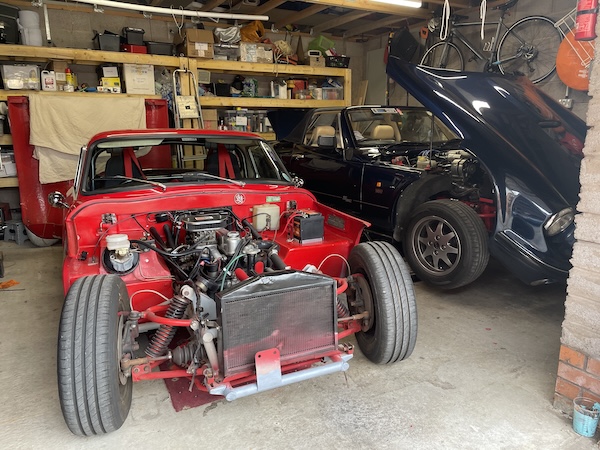
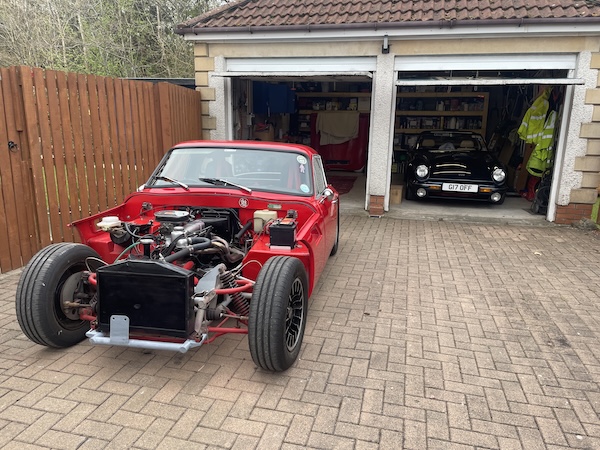
both TVRs are now here in my home garage, where I can nip out for a few minutes for a bit of therapy.
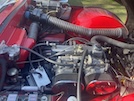
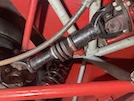
Last night's therapy was to remove the Vixen's carburettor and replace the manifold gaskets, to try to cure a suspected air leak that was causing
uneven running and a misfire / flat spot when accelerating on low throttle openings. Well today I got a chance to try it out - and it seems to
havc worked! It starts better, and definitely runs much better while it's warming up on choke - it was surging and stalling before. Once it has
warmed up, idle speed is more even.
On the road, it's much easier to pull away from a stop - you had to rev it a fair bit to prevent it bogging down, and it had no pulling power in
higher gears, but now it seems much smoother.
A bit of old skool diagnosis and repair, on the Ford crossflow engine of my mispent youth, learned at my father's side. No plug-in computers, no
diagnostic machine, no emissions equipment, just ears and half a brain (and even that's maybe being optimistic). There's also no certainty that
you've got it fixed, but that's part of the ancient game!
I'm a happy pixie (well, happier, let's not get too excited)!
I also had a phone chat with Dave about our excursion to the TVR Car Club's season opener event this weekend. The plan is: meet at 9am on Saturday.
The rest of the "plan" TBC in stages, starting at around 9.05 on Saturday, when we'll all work out the first leg of our journey to a suitable
breakfast / lunch stop. Stage 2 of the plan TBC at that point. As you can see, meticulous attention to detail is key.
He also tells me that he has the engine back in his Griffith, although it has still to be properly mounted and the ancillaries fitted. Good progress!
:: Wednesday, 2 April 2025 ::
And that's another thing...
This is the time of year for roadworks. Bleedin' everywhere. Reason is, that Councils have an annual road maintenence budget. If they don't spend
it this year, they don't get it next year. This inevitably means a mad rush to get jobs done before the end of the financial year (April). So you
have loads of road works going on, during the period of shittiest weather, which doesn't help to minimise the time or the cost. It has been like
this since time immemorial - I used to work in a Council roads department up until about 35 years ago, and every year was the same...
When I was out trying the Vixen yesterday, I went for a wee blatt to check it was ok at higher speeds (for a Vixen). There used to be miles and miles
of national speed limit roads around here, but now they have all been reduced to 50 or even 40, so to get uo to 60 or more, you really have to head
for the motorway (if it's not too busy - at busy times, that's a crawl and all). So, blatt along the motorway for 1 junction, turn off and head
back. It's a fairly straight road back, through an industrial estate - erm I mean "business campus" - past the shopping centre, and into my street.
Simple.
Except that about 1/2 a mile from the motorway, the road is closed because Scottish Water are doing an emergency repair. One diversion sign points
left. That's fine, I go along here for one junction, turn right at the railway station, down past the hospital, easy...
Then I remember that there have been temporary traffic lights for road works at the hospital for the last week, although there haven't been any
great queues. Not today though... this being the diversion route for road works no 1, it's heaving, and the queue is 2 junctions back up the road.
I can't even see a diversion sign from back here... so I turn left again, through a residential area where I used to live, to search out diversion
route 2...
Another 1/2 a mile further on, the slip road on to the dual carriageway is closed because of road works by Scottish Gas. After negotiating another
set of temporary lights, I'm now on to diversion route 3, diverting diversion route 2 from diversion route 1 from the original route I wanted to
take. As you can probably guess, I am now further from home than I was when I turned off the motorway...
There are no diversion signs along this diversion route. That's another other thing - a sign that says "diversion" right at the road works and then
no more signs to help you around the route they have in mind. Fortunately, I have lived here for donkey's years, so I can work out my own route, but
for a stranger, or someone following a sat nav, it's an absolute nightmare.
Maybe Council road guys should be taken to an area that's not their own, dropped off at a set of road works, and then told to follow the diversion
signs until they get lost, while somebody else does the same to road works they have planned? Then, once you find both of them in the middle of
feckin' nowhere, you put them both in a room to fight it out? That'll learn them.
It has been a slow day for TVR news... I'm sat here waiting for the gas man to arrive and my mind is rambling already.
:: Wednesday, 2 April 2025 Part 2 ::
Right, ok, back to TVRs...
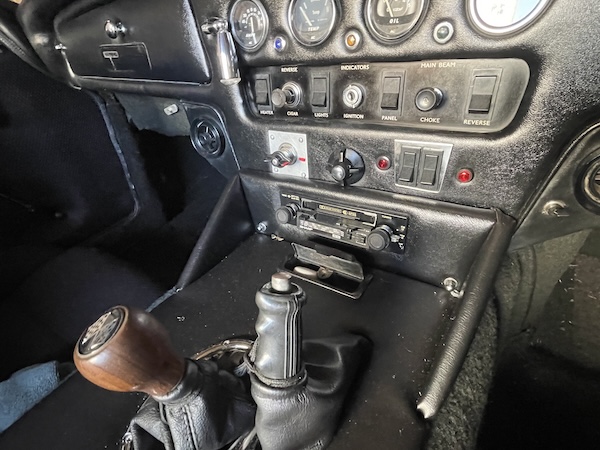
The Vixen has a radio that doesn't work. It fills a hole in the dash but it doesn't work. I tested it with a separate feed but it's dead. Plus, it
has no speakers.
 It fills a hole in the dash, but that's yer lot. To be fair, if it did work, you wouldn't be able to hear it. And even if you could, I probably would
never use it. The S has a radio / CD player and I never switch it on - I think I've listened to it while driving, maybe 3 or 4 times in 22 years...
It fills a hole in the dash, but that's yer lot. To be fair, if it did work, you wouldn't be able to hear it. And even if you could, I probably would
never use it. The S has a radio / CD player and I never switch it on - I think I've listened to it while driving, maybe 3 or 4 times in 22 years...
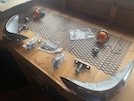
So I was thinking - would it not be better to make a wee cubby hole to stop my jellybabies spilling all over the floor? Seems like a more sensible
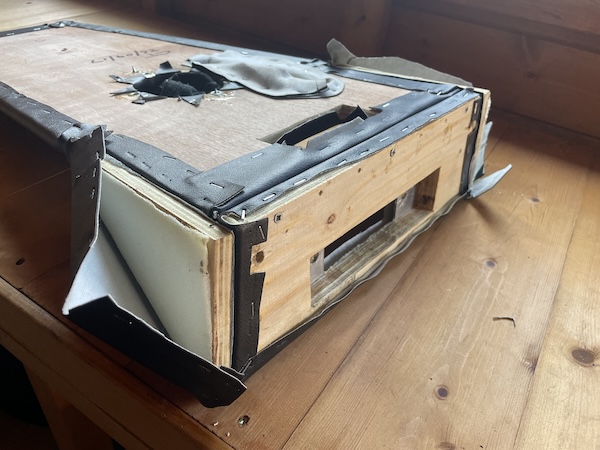
use of space, no? So I bought a cubby box from the local Halfords for a tenner, and set about fitting it.
First, take out the centre console - two bolts at the front and one at the back. Then remove the gear knob and the handbrake gaiter. The radio is
one of those ancient two-spindle jobs, so you have to take off the knobs and unbolt the spindles so that the radio falls out the back as you pull
the console off.
 The hole in the console is DIN-sized, but there are two metal plates screwed on the front, under the vinyl covering, for the spindles to go through.
I need to remove the vinyl to get to the screws...
The hole in the console is DIN-sized, but there are two metal plates screwed on the front, under the vinyl covering, for the spindles to go through.
I need to remove the vinyl to get to the screws...
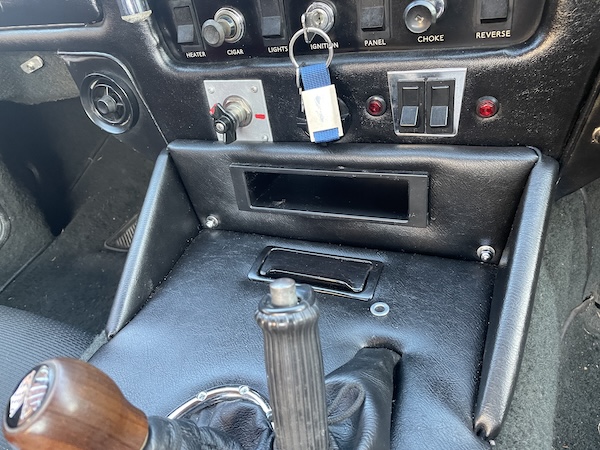
Fortunately, the vinyl is all just stapled on. I peel back the two outside edges to get to the screws holding the centre panel in place. With that
removed, I can pull out the staples and remove the vinyl, and unscrew the plates. THen I replace the vinyl with new staples, screw the console back
together and re-trim the edges.
I have to trim down the back of the cubby box a wee bit with a multi-tool, to remove a couple of plastic fins that hold it into a plastic dash. Don't
need those...
 Then refit the console to the car and trim the vinyl cover a bit, and insert the box. Much more useful than a radio!
Now that I think about it, I don't need that ashtray either!
:: Saturday, 5 April 2025 ::
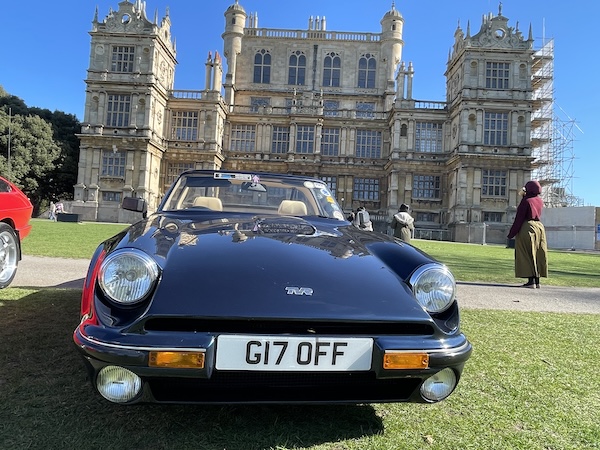
This weekend is the TVR Car Club's 2025 season opener at Wollaton Hall near Nottingham, famous for many events in history, most recently for playing
Batman's House in The Dark Night Rises. Coincidentally (or maybe not coincidentally) there's a village around 8 miles away called Gotham (population
1,600 or so) which is unlikely to provide a big enough crime wave to keep the Caped Crusader busy. There's also a village nearby called Thrumpton
(population around 180) where Pugh, Pugh, Barney Mcgrew, Cuthbert, Dibble and Grubb are on hand to deal with any arsonist Jokers.
So we all assemble at our usual muster point, McDonalds Car Park in Newbridge. That's me, Dave, Eric amd Margaret, Bobby and John.
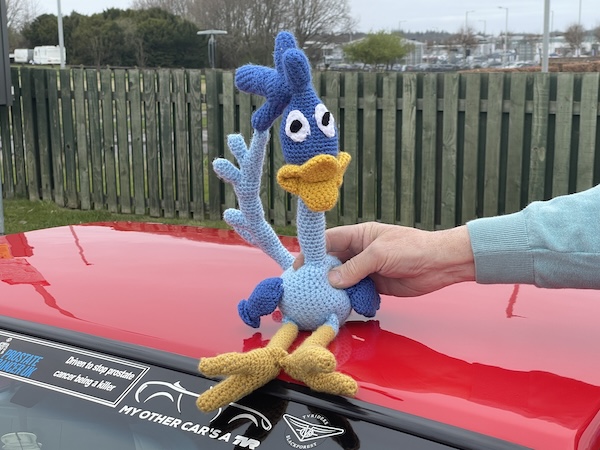
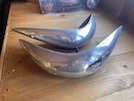
 We're also joined by our new Roadrunner mascot, expertly crafted by Claire and completed late last night (or very early this morning). It's brilliant!
After a brief blether and a Sausage and Egg McMuffin, we're ready to set off! So we all get in our cars, Dave's leading, we're heading out of the
car park in a line, when a muppet in a yellow something-or-other decides to just pull out of his space in between us. Ok... Then as we reach the
signalised roundabout on to the motorway, we're all sitting in a queue and an ambulance comes up from behind. on the wrong side of the road. He
wants to get on to the right side of the road before he enters the roundabout. People move over. yellow muppet man is sitting just before the
triangular throat island. If he moved left, the ambulance would get through. If he went forward a bit, the ambulance would get through. But no, he
sits there...
We are one minute into a 5-hour drive, and already we've seen our first eejit.
The second eejit occurs around 10 minutes later, as we turn right on the big roundabout on to the Edinburgh Bypass, and a balloon in the left lane
decides to turn right across 3 lanes of traffic who are about to accelerate up an exit ramp. Much brake lights and shouty noises.
By this time I notice that (a) although it looks bright and sunny, it's actually bloody freezing, and (b) there's an engine hesitancy at around
2,500 revs when accelerating. It's not drastically bad, but it's not right.
But we continue onwards to Purdy Lodge, where we meet up with Ian, who lives nearby (relatively speaking). He has just acquired a Jaguar I-Pace,
which is very nice.
 After a rather nice omelette breakfast, we head on south again, to Wetherby, where we are meeting uo with Adrian, whio is joining us for the rest
of the trip. Then it's off again, on our final leg for today!
After a rather nice omelette breakfast, we head on south again, to Wetherby, where we are meeting uo with Adrian, whio is joining us for the rest
of the trip. Then it's off again, on our final leg for today!
Eric takes the lead for this bit. He's got a sat nav and everything, what can possibly go wrong?
Well... I dunno either but somehow we end up doing a tour of south Derbyshire, part of Nottinghamshire, probably a bit of Lincoln and possibly
reaching into South Devon... My sat nav says we are "approximately 1 hour from your desination" for at least half an hour before it starts counting
down again... we pass through more traffic signals than I have seen in my life, and I used to design the bloody things...
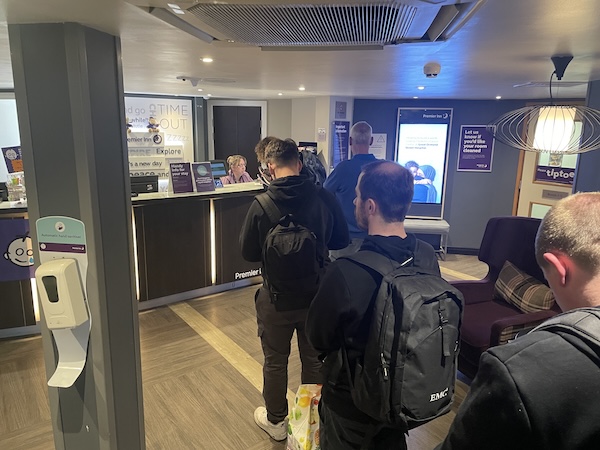
 But we get there, just in time to join the customary Premier Inn check-in queue.
 Cars all tucked up for bed...
Now I've had 300 miles (plus detour!) to think about this misfire / hesitancy. The engine starts off ok after each stop, but gradually gets worse.
The only thing that I've changed since it was last "all fine" is that I replaced the spark plugs. I looked at spark plug gap settings and got 3
different answers, so I set them all to 0.8mm. I think that's too small, and causing the plug tip to overheat.
I could reset them, but I don't have any feeler gauges with me, and neither to any of the others. Then Dave mentions the thickness of a credit card.
I look that up, and credit cars are standardised in size, so that they work in all machines, but are also a standard thickness of 0.76mm. Hmmm...
Then it's dinner, where they announce that they have no fish and no burgers. That's an improvement on last year where they seemed to have hardly
anything. Chef has clearly not yet received delivery of the "boot to the gonads" that I suggested last year.
Then it's off to bed, perhaps to dream - or to wake up abruptly at 2.15am when I hear someone downstairs in my house and listen for any other
sound... before I realise that I'm not in my house and that was the sound of the door of an adjacent room closing, probably when one of the mixed
hockey team was returning to his or her room after some rigorous horizontal training.
:: Sunday, 6 April 2025 ::
It's show time! We have to leave at around 8am because Dave, Eric and Bobby all have cars on the "timeline" and have to be there at 8.30am.
But first, these spark plugs. I go out to the car at first sparrowfart, and remove 5 of the 6 spark plus (the one under the alternator is a bastard)
and set them all to "thickness of a credit card plus a smidge". (A "smidge" is less than "a bit" but more than "a bawhair".)
Then it's time for a light breakfast and we set off across hill and dale for around 20 minutes to the venue. Set sat nav (last night, need to be
properly prepared eh?), follow sat nav. reach intended destination. There was no need to hurry though, because when we get there, there are loads of
cars and not many Marshalls. We find ourselves in a joint "timeline and others" queue that doesn't move for ages.
 Eventually, us "commoners" are allowed to peel off and get parked in the sunshine, and allow the "timeliners" to mingle with the upper crust.
 Here's the hall, with the start of the TVR display in the foreground, and the VIP timeliners queueing for their moment of photographic glory in the
shade of the house.
Here's the hall, with the start of the TVR display in the foreground, and the VIP timeliners queueing for their moment of photographic glory in the
shade of the house.
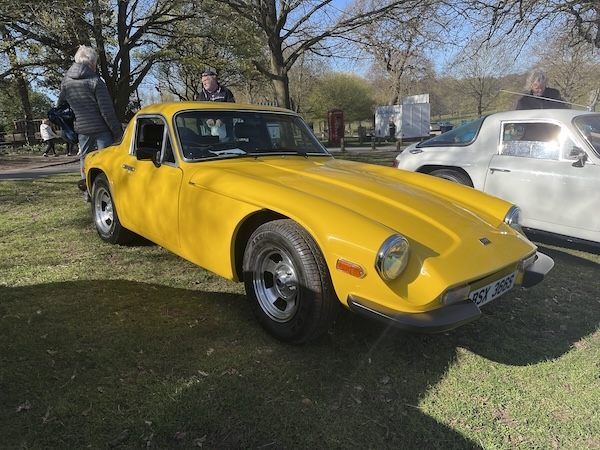
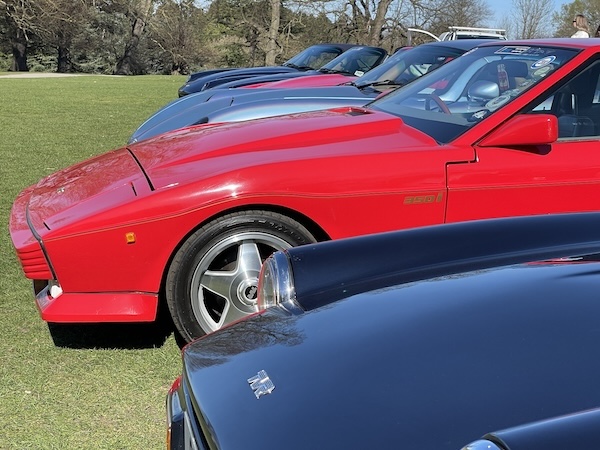
I end up parked up near the top of the slope, beside the "older stuff".
 Last year, I had a wee seat in this car, just to be sure that I could fit!
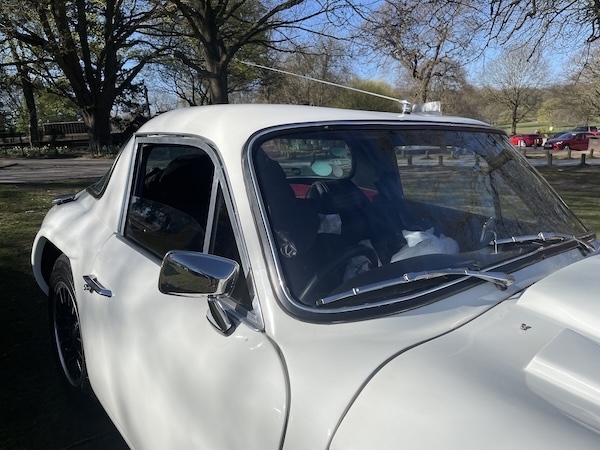
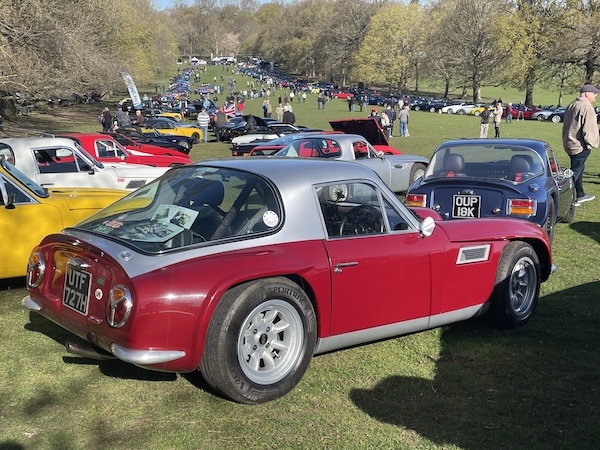
 This time, I notice that he has rectangular "Tex"-style mirrors, similar to those that used to be fitted to Mk2 Escorts and the like. They give a
better view behind you than the wee round "bullet" mirrors fitted to mine and most of the others.
This time, I notice that he has rectangular "Tex"-style mirrors, similar to those that used to be fitted to Mk2 Escorts and the like. They give a
better view behind you than the wee round "bullet" mirrors fitted to mine and most of the others.
 Last year, this man had a silver 3000M, and he was also very helpful about Vixens etc. He said there was one for sale near me, and if it wasn't so
far away from him, he would go and see it. I did, and I bought it!
Last year, this man had a silver 3000M, and he was also very helpful about Vixens etc. He said there was one for sale near me, and if it wasn't so
far away from him, he would go and see it. I did, and I bought it!
 This one's also quite nice, although I'm not too sure about the two-tone roof and sills... but each to their own eh?
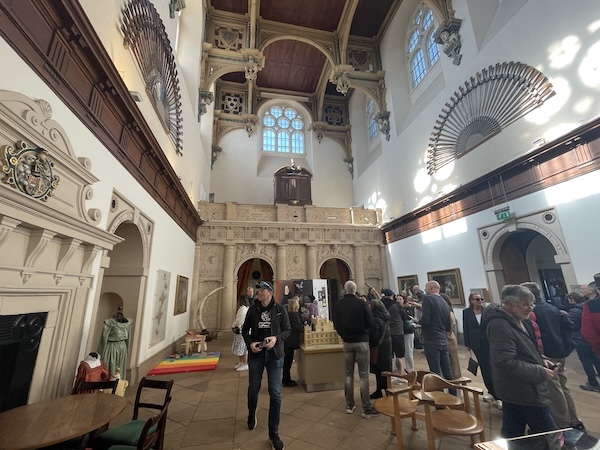
 I've booked a tour of the house - partly because I'm interested and partly in case it was raining on the day, so that I would get at least an hour
in the dry...
I've booked a tour of the house - partly because I'm interested and partly in case it was raining on the day, so that I would get at least an hour
in the dry...
 It's even more impressive on the inside. This is the Grand Hall, which has loads of quirky features that I'm not even going to start to describe here.
See the display of muskets on the wall above the door there? His Lordship bought a consignment of those, plus cannon, after the Napoleonic Wars to
defend the house in the event of a "peasant's revolt" or general uprising. And he had never even heard of Donald Trump! The building also has an
underground "escape room" with the larder, wine store and two water wells down there, so you can survive for ages if you have to.
It's even more impressive on the inside. This is the Grand Hall, which has loads of quirky features that I'm not even going to start to describe here.
See the display of muskets on the wall above the door there? His Lordship bought a consignment of those, plus cannon, after the Napoleonic Wars to
defend the house in the event of a "peasant's revolt" or general uprising. And he had never even heard of Donald Trump! The building also has an
underground "escape room" with the larder, wine store and two water wells down there, so you can survive for ages if you have to.
 This is the kitchen, where we heard interesting stories about sugar, the hazards of rich food, bad teeth, and soaking wee boys in water to keep them
from roasting while they turned the spits in front of the fire.
This is the kitchen, where we heard interesting stories about sugar, the hazards of rich food, bad teeth, and soaking wee boys in water to keep them
from roasting while they turned the spits in front of the fire.
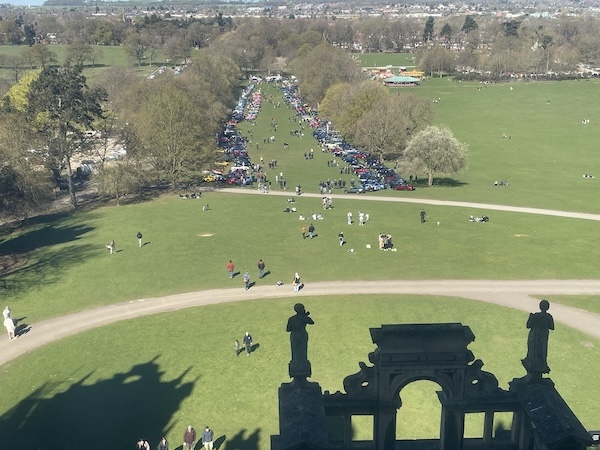
 The view from up on the roof was pretty impressive as well!
 See?
See?
Back at ground level, I head off to meet the others for a wee sandwich for lunch in the courtyard. All very pleasant!
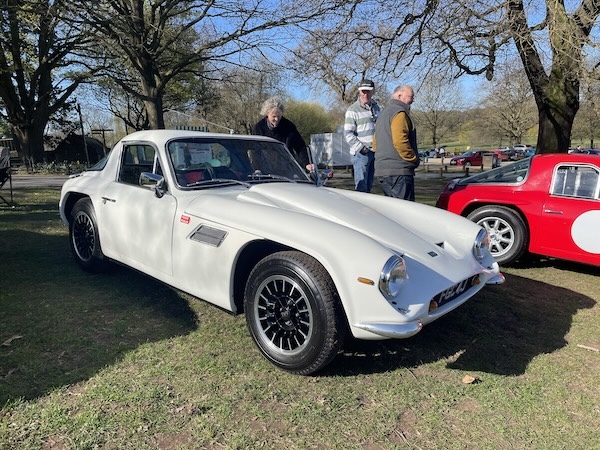
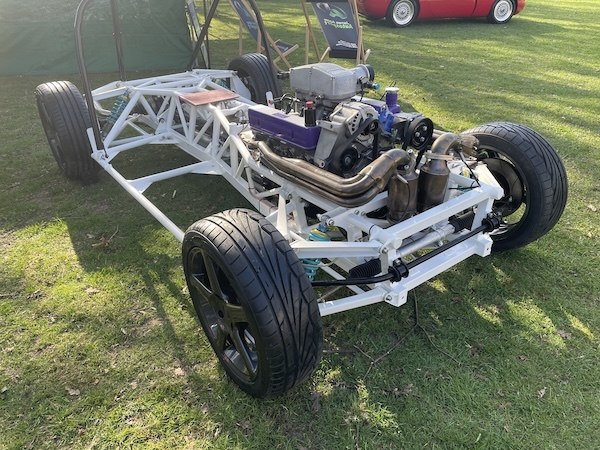
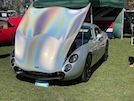
 Then there's time for another wee wander about. This is a TVR in the nude. I can't remember what it is, but that's a feckin big 500 engine.
 Nice T350s
 Tuscan for sale, looking spectacular in the sun!
 As I'm passing my own car, I notice that a family of deer have arrived behind it (just on the hill), probably wondering how they are supposed to
get to their drinking pond through this mayhem.
As I'm passing my own car, I notice that a family of deer have arrived behind it (just on the hill), probably wondering how they are supposed to
get to their drinking pond through this mayhem.
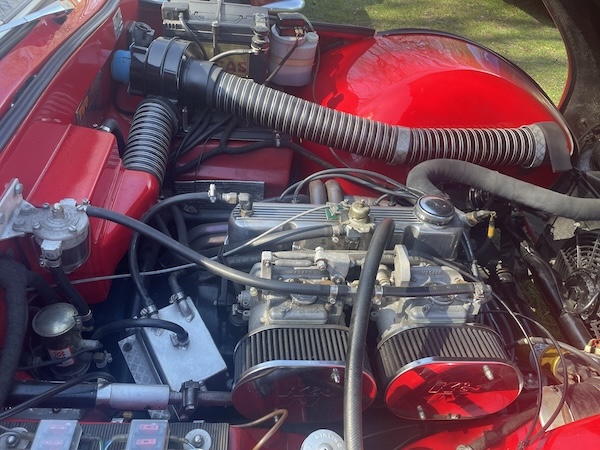
 This Vixen has an electric fuel pump, like I was contemplating, with a fuel pressure regulator. It also has twin-choke Weber carbs, which the
owner says transforms the car... probably transforms your fuel expenditure as well. But still very nice!
This Vixen has an electric fuel pump, like I was contemplating, with a fuel pressure regulator. It also has twin-choke Weber carbs, which the
owner says transforms the car... probably transforms your fuel expenditure as well. But still very nice!
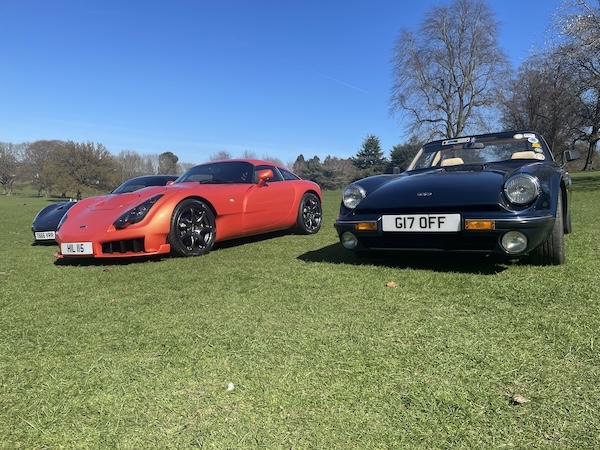
 Then Mr Sheen moves his Sagaris up beside mine, while he waits to take a picture in front of the house. It's a lovely bit of kit, the Sagaris.
 It's getting late, but before we head off, we decide to take a group photo in front of the Hall. Here's the Scottish contingent!
 And again with Scottish contingent personnel!


 Grand day out with the best folk!
So it's time to leave and head back to our hotel. Weer say cheerio to Adrian who is heading for home today - he has work tomorrow and various other
paternal duties to see to. Our trip back to the hotel is uneventful until we get to the traffic signals near the end. Signals go red. We stop.
Lunatic in a Peugeot 2008 (I think it was) absolutely rockets past, straight through the red light, and through the next junction which is also at
red. Absolutely no shits given.
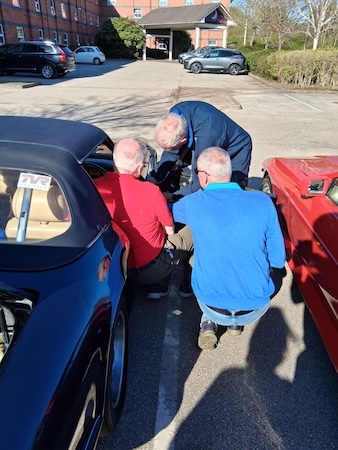
 When we arrive at the hotel car park, I press the switch to put my window up. Nothing, not a flicker... This is not helpful for locking the car up
for the night, so it's into the boot, speaker off, door card off, and check the wiring. All seems ok... With Eric's help, I run a live and earth
straight to the motor - the window goes up and down easy, so the fault is in the switch or the wiring... We leave the window up, re-assemble the
door and lock the car...
When we arrive at the hotel car park, I press the switch to put my window up. Nothing, not a flicker... This is not helpful for locking the car up
for the night, so it's into the boot, speaker off, door card off, and check the wiring. All seems ok... With Eric's help, I run a live and earth
straight to the motor - the window goes up and down easy, so the fault is in the switch or the wiring... We leave the window up, re-assemble the
door and lock the car...
Oh, by the way, the car is running a bit better - not quite right, but it just goes to show - you can fix anything if you just use your credit card...
:: Monday, 7 April 2025 ::
Time to go home! (after breakfast, obviously...)
While I'm removing the roof and loading up the luggage etc, I decide to try the window switch, because I won't need to put the window back up until
I'm home. Even although it was as dead as a dodo last night, today it works...
So we head off with a quick stop for fuel just around the corner. Then we crack on until we reach roadworks on the M1, which crawl along for 25
minutes over a mile or so. But soon we're free again, and driving in close (but not too close) formation north to Wetherby, mainly because that's
about loo endurance distance. No drinks or cakes though - we're saving ourselves for lunch time and Purdy Lodge again.
As we get closer to Purdy Lodge, on the single carriageway bit, we are crawling along at around 35 mph in a huge queue, behind a tractor that is
only occasionally visible in the distance on the straighter bits. It's towing a trailer of hay that's bigger than my last house. Salt of the earth,
our farming community. Invaluable work, feeding the nation, you can't complain. Plus they have eff-off big dogs, so you daren't complain anyway.
Anyway, he turns off after a good few miles of bringing the A1 trunk road to a standstiil, and we reach Purdy Lodge in time for lunch.
Another wee stop for fuel, and then we set off on the last leg, to home. All is going well until...
half a mile up the road, another feckin' tractor for a good few miles...
On to the dual carriageway north of Berwick, so we can all make progress again. The engine seems to be much better, pulling from low revs and
sounding good! It's all very enjoyable until we reach the single carriageway section before Torness, where we meet... another tractor! It's a
conspiracy...
On to the usual delays and chaos on the Edinburgh Bypass, and then more non-standrd queues and delays on another bit. But eventually, we're home!
I've been occasionally trying the window switch, and it has worked every time. until I try it one last time before I get out. It's dead!
Rass'n Frass'n TVRs Grrr...
:: Tuesday, 8 April 2025 ::
I take out all the spark plugs to check the gaps properly. They're not far out, but I set them all (including the bastard one under the alternator)
to the correct gap.
Then I take off the door card to see if I can have a proper look at the wiring, and I notice that the door seems to have shifted slightly and is
rubbing at the lock. Thus commences a session of several hours of loosening, adjusting and tightening hinge bolts, but I still can't get it right.
I leave it loose, in disgust...
:: Wednesday, 9 April 2025 ::
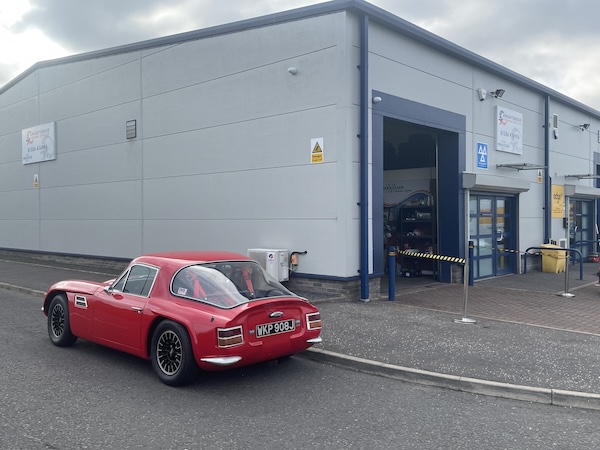
 The good news - the Vixen had its MOT test today, and it passed!
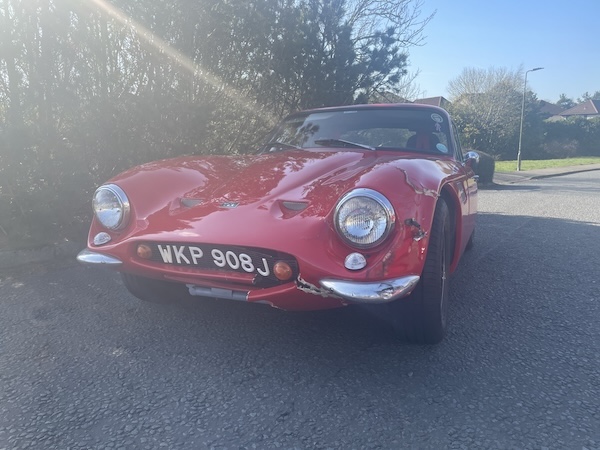
The bad news - on the way home, as I'm coming up the hill in my own street, a young lad coming down the hill crashes into me. It's a tricky wee bit
with a road narrowing on one side at a pedestrian crossing, on a bend with a big bush that restricts visibility on the inside of the bend. I've
been through it several times a day for the last 15 years, and the bush has got bigger and thicker, so you have to take it very slowly... I'm still
on the wrong side of the road, having just gone through the narrow bit, when this lad appears around the bush, and we collide nearside front corners.
 The car's structure looks ok but the fibreglass isn't pretty...
Best to not say a lot more about this until it's all sorted out eh?
Except... bugger!
:: Friday, 11 April 2025 ::
I've been a bit busy with work, so haven't had a lot of time to look at the Vixen. I've been in touch with the lad's dad though, and he has offered
to pay for the damage. He has been in touch with the TVR parts suppliers. I've also had a quote for getting it painted, so I have a fair idea where
we're going with this.
I invited him to the house today, to look at the car and agree the parts that are needeed - to be fair, it's not a long list, but it includes a
bonnet and frame, which sets him back a few bob.
He goes off with his list and some photos of the damage, and I take a few as well, for the benefit of my extensive readership!
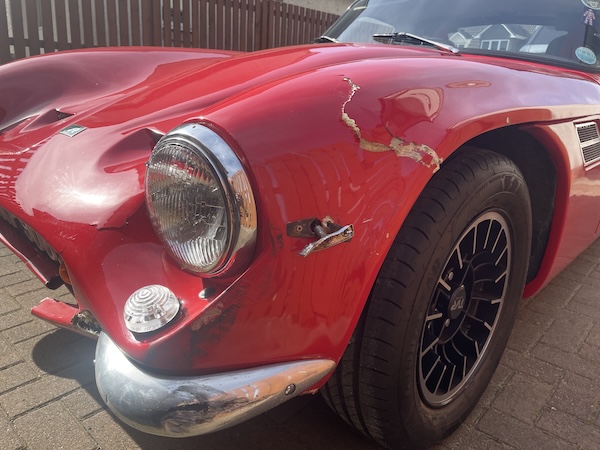
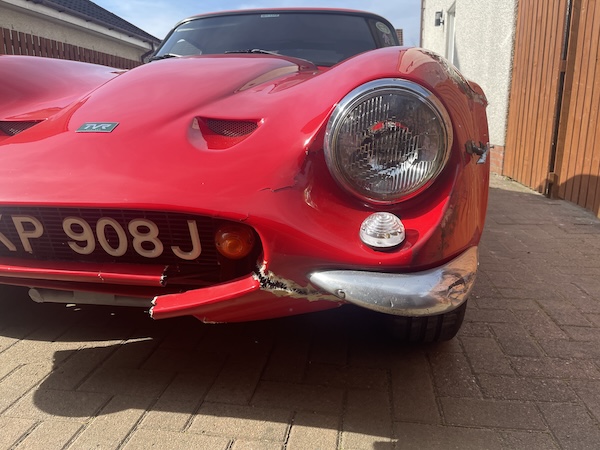
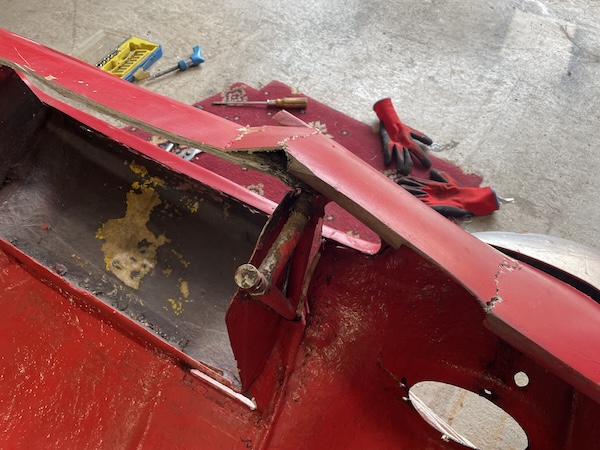
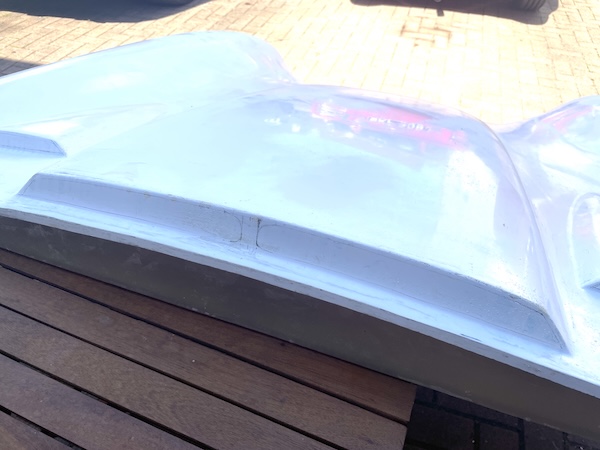
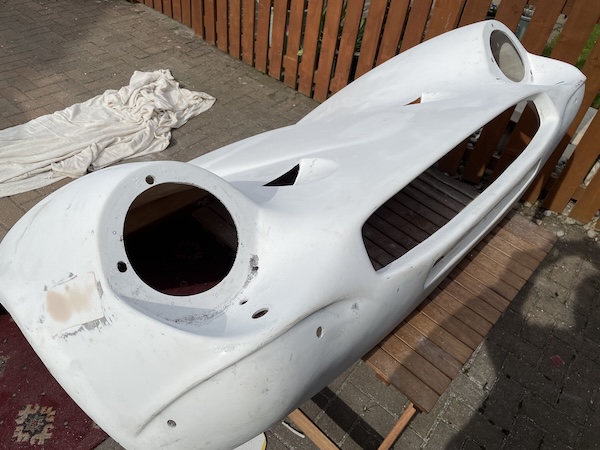
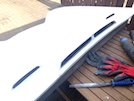
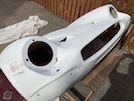
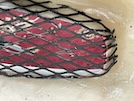
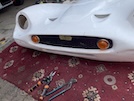
 The bonnet is still in one piece, but only just. The nearside front corner is shattered.
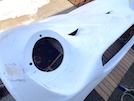
 The quarter bumper is damaged, and the bonnet is split in various directions from the corner. The bonnet pins at the back of the bonnet are bent
over and need to be replaced.
The quarter bumper is damaged, and the bonnet is split in various directions from the corner. The bonnet pins at the back of the bonnet are bent
over and need to be replaced.
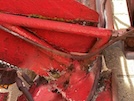 The bonnet is detached from the metal hinge frame in that corner, so that would need to be cut back and relaminated.
The chassis looks ok though, and all straight. There's no visible damage to the suspension.
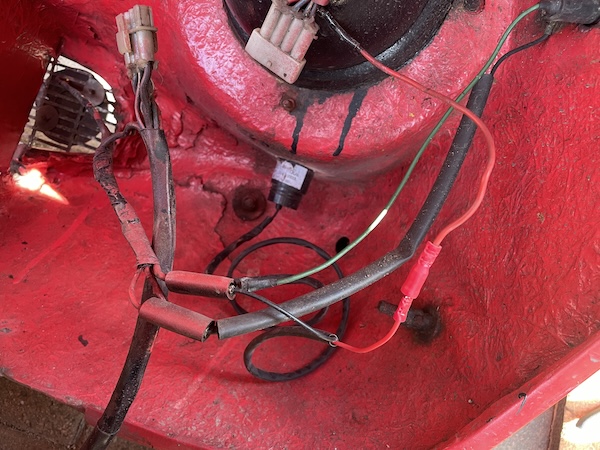
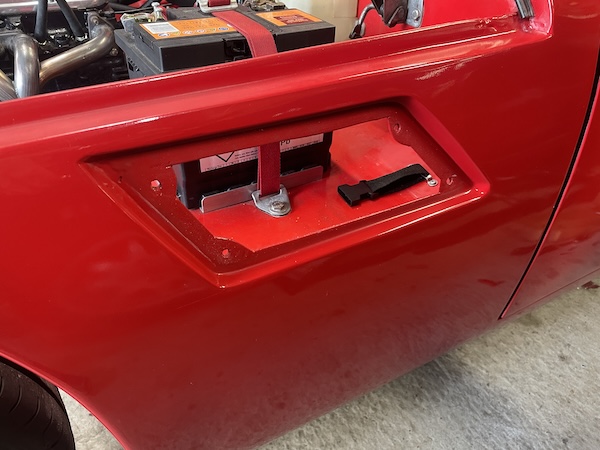
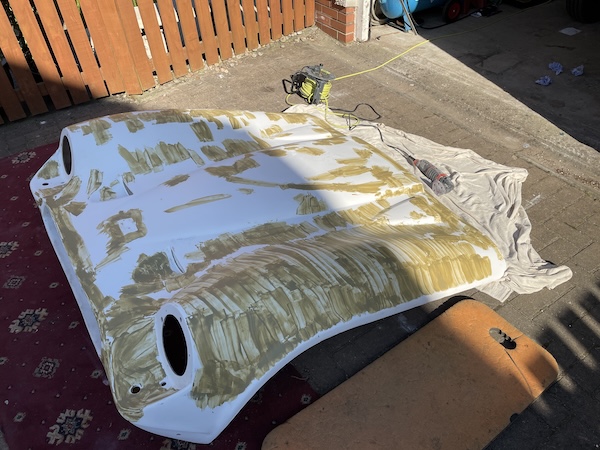
 I finish my work mid-afternoon, so I decide to make a start to stripping off all the bits to transfer on to the new bonnet. First I label up all
the wiring and remove the whole wiring loom from the front end of the car. I'm going to tidy that up when I re-install.
I finish my work mid-afternoon, so I decide to make a start to stripping off all the bits to transfer on to the new bonnet. First I label up all
the wiring and remove the whole wiring loom from the front end of the car. I'm going to tidy that up when I re-install.
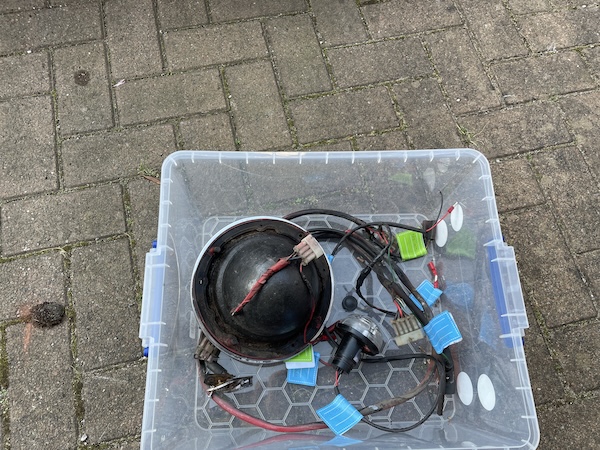
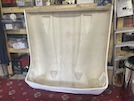
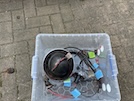 Here's all the bits I have removed before dinner time calls (albeit there's only one headlight in the box). The headlights were a bugger by the
way - the mounting screws were rusted to shit and I had to drill them out...
Here's all the bits I have removed before dinner time calls (albeit there's only one headlight in the box). The headlights were a bugger by the
way - the mounting screws were rusted to shit and I had to drill them out...
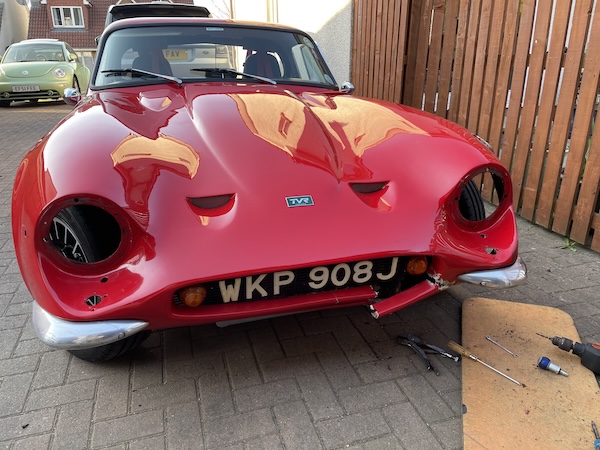
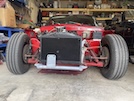
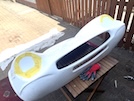
 And here's the front of the car de-electrified!.
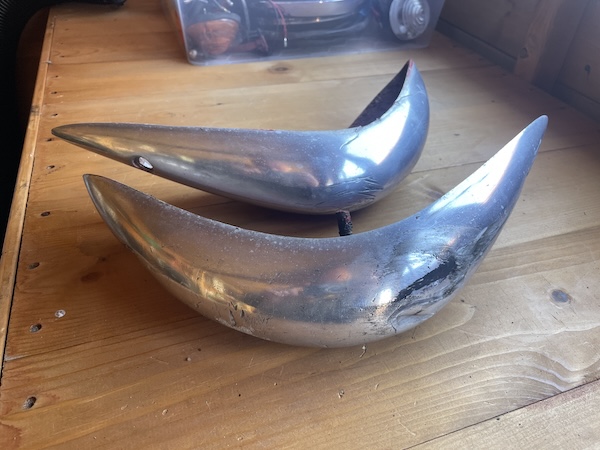
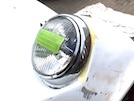
You'll notice in the first photos that the car has enormous side lights in front of the headlights. They are Land Rover Defender side lights, and
they are too big and they look feckin' stupid. The car would have originally had lickle itsy-bitsy sidelights (off a Royal Enfield motorbike or
something) but I had to fit those enormous things to cover the butchery of fitting holes carried out by the previous owner. As the new bonnet doesn't
come pre-drilled, I will have the option of fitting the original wee side lights, or even fitting no side lights at all, and getting new headlights
with pilot lights included. I've only driven the car in the dark once so far, and it was hard to tell that the headlights were even working, so an
upgrade might be a good idea!
It's not a lot, but progress is progress!
Wish I could say the same for the S, which is still sitting with the door hanging off...
:: Saturday, 12 April 2025 ::
Today would have been our friend Jim Tully's 60th birthday. We all miss him.
As a distraction from this sad reality, I get on with Vixen Repair Part 2!
A list of wee jobs today to get the Vixen ready for its new bonnet (whenever I get it - somebody else is paying so I can't complain!).
First, remove the pipes to the windscreen washers - the washers are mounted in the bonnet so the pipe goes from the screenwash bottle, all the way
to the hinge at the front of the car, and then all the way back up the bonnet to the washer jets. That's about 10 feet of pipe, to travel about 10
inches... Anyway, the pipe disconnects easy enough at the hinge, with the end in a bottle because the washer bottle syphons empty as soon as I
split the pipe connection...
Then I can remove the washer jets - a couple of wing nuts on the back.
Then I remove the webbing and brackets that I installed to prevent the bonnet opening too far.
Then I remove the grills in the two wee bonnet vents - they are held into the back of the vent by 2 self-tappers each.
 Next, I prop the bonnet open and remove the two hinge bolts. The bonnet can then be moved away from the car and laid down on a couple of blankets
for further disassemply.
Next, I prop the bonnet open and remove the two hinge bolts. The bonnet can then be moved away from the car and laid down on a couple of blankets
for further disassemply.
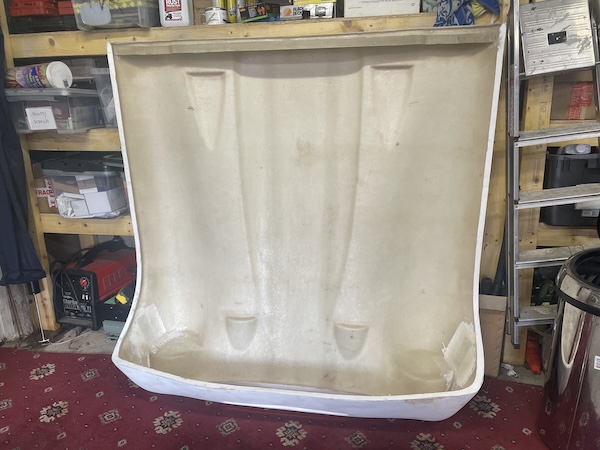
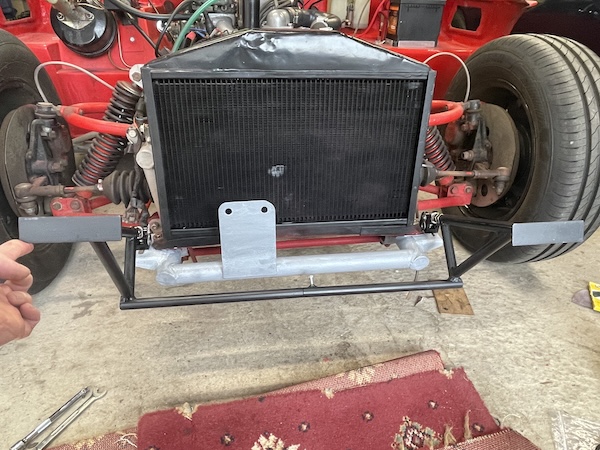
 That gets the car to here...
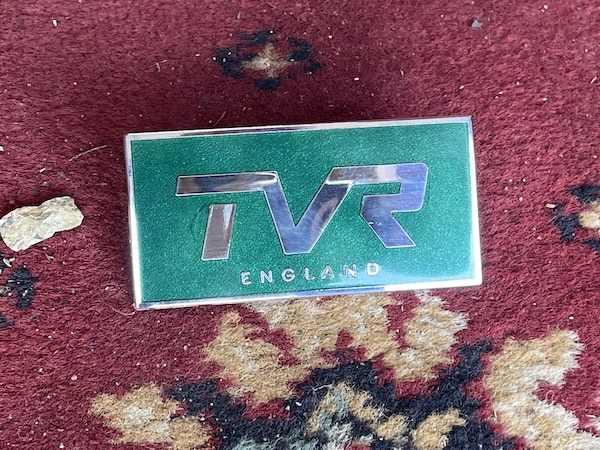
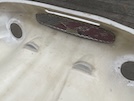
 The bonnet badge is held on with a couple of wee nuts...
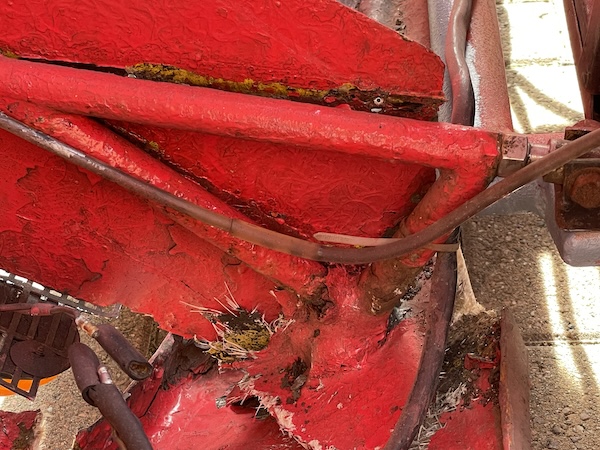
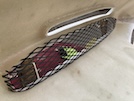
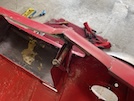 Here's the damage to the bonnet at the left-hand hinge, where the frame has broken away from the bonnet and it has delaminated.
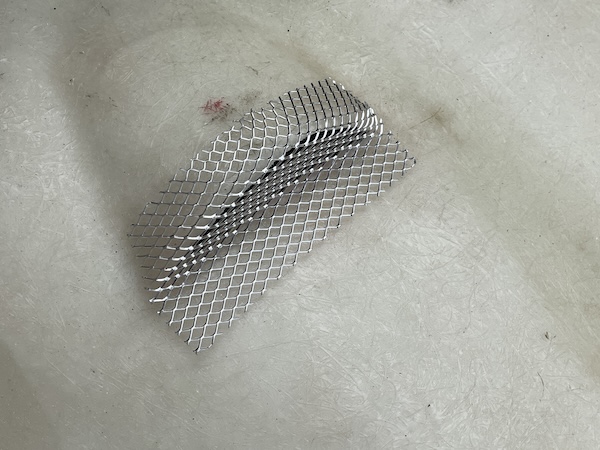
 The front grill is just held on by being pressed into a full tub of isopon behind the front valance. I'm able to crumble it off with a pair of
pliers, and then remove the indicators. I'll give it a wee matt black paint before I put it back. Or I might try to get a bit off the proper
diamond mesh.
The front grill is just held on by being pressed into a full tub of isopon behind the front valance. I'm able to crumble it off with a pair of
pliers, and then remove the indicators. I'll give it a wee matt black paint before I put it back. Or I might try to get a bit off the proper
diamond mesh.
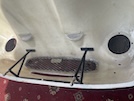
Last for today, I remove those enormous inner wheelarches. They are held on by a tube bracket to the chassis at the back, a bolt to the radiator
bracket at the front, and two self-tappers, one at the top and one at the bottom of the wheelarch in the body. The right hand one also has two
bolted cable clips and the plastic hose for the heater.
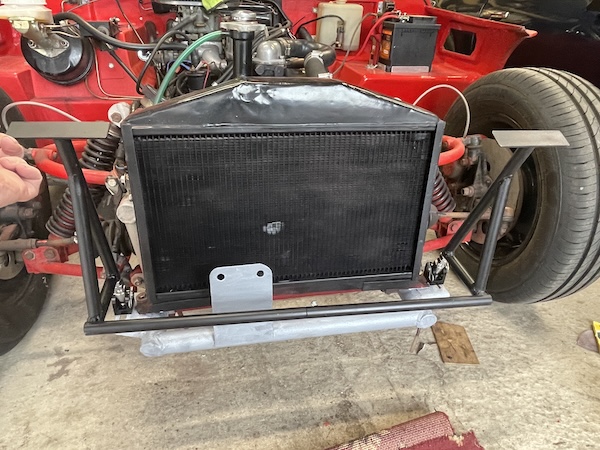
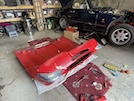
 And here it is, with everything removed, ready for the new bonnet when it comes!
 I prop up the bonnet at the back of the garage, in case I need it to check any measurements, and then turn the car around and stick it in the garage.
This has employed the use of a wide assortment of metric and imperial spanners, especially the tiny ones, and a range of pliers, mole grips and other
implements to get a hold of rusty screws... and even a drill to just drill the bastards out to remove the headlights... How much of a pain in the
arse would this have been if I had been doing it along at the farm?
I've lost my rust penetrating oil though - God knows where I've put it down. I'll probably find it in the fridge or something...
:: Sunday, 13 April 2025 ::
Got any hose? No, hose! No, "O"s as in "Mon Repose"...
Got any "P"s?
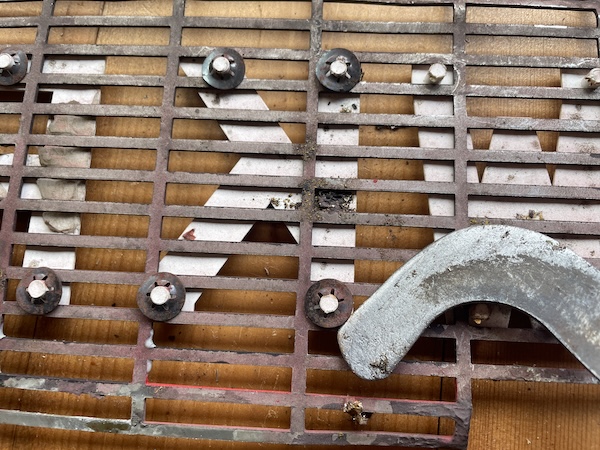
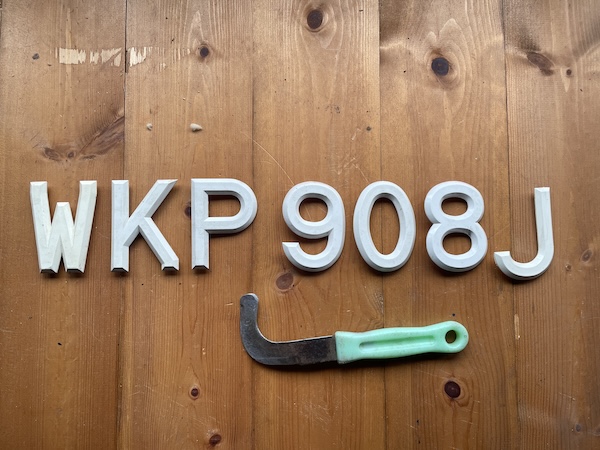
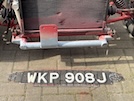
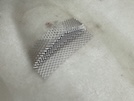
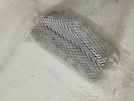
I have! I decided to detach the registration letters from the front grille today, mainly because it's bent, but also because it's the wrong mesh,
with more metal than air holes. I'm hoping to get a bit of the original mesh, so need to change the letters over...
 They are held on with star washers on the back. The letters are only plastic so the likelihood of breaking one of the wee pegs is high!
 I find this old worn out gardening tool, that has been sharpened so often there's nothing left of it...but it's ideal for prising off star washers!
Letters all off, and no pegs broken! Two star washers lost, pinging over my shoulder into a far corner... I'll flatten all the remaining washers
with a hammer for re-use. I'm sure I have some more to replace the missing ones.
I find this old worn out gardening tool, that has been sharpened so often there's nothing left of it...but it's ideal for prising off star washers!
Letters all off, and no pegs broken! Two star washers lost, pinging over my shoulder into a far corner... I'll flatten all the remaining washers
with a hammer for re-use. I'm sure I have some more to replace the missing ones.
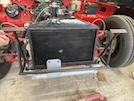
 I also spray the radiator with VHT matt black paint that I have lying around, then I paint the front of the chassis that is inaccessible when the
bonnet is on.
I also spray the radiator with VHT matt black paint that I have lying around, then I paint the front of the chassis that is inaccessible when the
bonnet is on.
 I also remove these wee vents in the front wings - originally the roof pillar vents off a Ford Zephyr!
Then I turn back to the S's door, which I have ignored since Tuesday. Let's try to get that sorted... The problem is that it won't close without
rubbing at the front edge, no matter how much I try to adjust it backwards. Two heads are better than one, and my glamorous door-lifting assistant,
also known as my wife, and henceforth also to be known as my Technical Adviser as well, has the idea of pushing the door inwards as well as backwards.
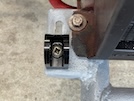
 Eureka! Here's the photo of the top hinge when I replaced them in December. See how the middle hole (for the pivot bolt) is offset to one side? Well
that offset pushes the top of the door outwards, and I need to pull the bottom of the door inwards instead. The bottom hinge has the pivot bolt in
the centre... So I need to swap those hinges over, and also mount the bottom hinge the other way round so that it pulls the bottom of the door inwards.
Eureka! Here's the photo of the top hinge when I replaced them in December. See how the middle hole (for the pivot bolt) is offset to one side? Well
that offset pushes the top of the door outwards, and I need to pull the bottom of the door inwards instead. The bottom hinge has the pivot bolt in
the centre... So I need to swap those hinges over, and also mount the bottom hinge the other way round so that it pulls the bottom of the door inwards.
I don't want to take the door right off (all that wiring!) so I prop the back of the door up with a jack and a block of wood, then I loosen the
bottom hinge, remove one of the bolts and take out the window channel. I find a bolt the same size as the pivot bolt, and a socket the right size
to use as a temporary spacer. I unbolt the top hinge and put the temporary bolt in to hold the top of the door in place (albeit wobbly!). Then I
remove the bottom pivot and swap the hinges over, then replace the top hinge. Lift it all into position and tighten the hinge bolts.
Perfect, first try!
I need to take one bolt out again to replace the window channel, but first I need to repair the screw holes which are all worn oversized. I fill
the holes with JB Weld and leave it to dry.
Oh and I found the rust penetrating oil - it was in the Vixen passenger footwell. Don't know how...
:: Tuesday, 15 April 2025 ::
Back to the S's door today!
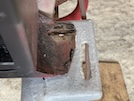
 Here's the bottom hinge, which was the top hinge until yesterday. The big bolt goes into the sill. The wee bolts go into the door. The inner door
panel is on the left of this photo, the outer door skin is on the right. The door adjusts by loosening the two wee bolts and moving the door -
the hinge itself stays in the same place. That offset means that the door is further in, than it would be if there was no offset (like the top hinge,
which was the bottom hinge until yesterday). All clear? Good!
Here's the bottom hinge, which was the top hinge until yesterday. The big bolt goes into the sill. The wee bolts go into the door. The inner door
panel is on the left of this photo, the outer door skin is on the right. The door adjusts by loosening the two wee bolts and moving the door -
the hinge itself stays in the same place. That offset means that the door is further in, than it would be if there was no offset (like the top hinge,
which was the bottom hinge until yesterday). All clear? Good!
The window frame hasn't been installed yet, for photo clarity and ease of door adjustment!
 With the far bolt tight, I remove the nearer bolt and install the window frame, making sure that it's lined up with the glass.
Then I can drill 4 wee screw holes in the mounting plate in the top of the door.
Door shuts nicely, window goes up and down, so I can tie-wrap the wiring out of the way (not on the window frame!) and re-install the door card.
meanwhile, the news on the Vixen is that the parts are set aside and just waiting for collection. I've also paid for original side lights and
front indicators to be included, because those oversize Land Rover ones look stupid.
 How many photos can you take of the same two TVRs?.
I also had the S outside before this, and I think the exhaust is leaking at the manifold. One of the easy accessible bolts is loose, and the manifold
is too hot to try to reach the less accessible ones without burning your skin off. Investigate that another day!
:: Thursday, 17 April 2025 ::
Just farting about with 2 old cars... nothing major!
First, the S - some of the nearside manifold bolts are indeed a wee bit loose, so I tighten them up while the engine is still cold, so that I don't
burn my delicate wee handies.
 Then I lift the Vixen so that I can check a couple of things that the MOT man mentioned
"Slight play in o/s front wheel bearing" - well I can't feel a thing, so it can't be that bad...
 "Slight play in both driveshafts" I was expecting this to be the universal joints, but they are both nice and tight. Where there is play, is in the
splined sliding joint in the middle of each drive shaft, not bad but noticeable. I've mentioned this before. UJ's you can replace. These, you can't,
without replacing the whole driveshaft, and then you're in a whole world of pain (partly the cost of the bloody things, but also getting them with
the correct size of flange on each end corresponding to the age of the differential and whether it's from a Triumph GT6, a TR4, or a Spitfire).
"Slight play in both driveshafts" I was expecting this to be the universal joints, but they are both nice and tight. Where there is play, is in the
splined sliding joint in the middle of each drive shaft, not bad but noticeable. I've mentioned this before. UJ's you can replace. These, you can't,
without replacing the whole driveshaft, and then you're in a whole world of pain (partly the cost of the bloody things, but also getting them with
the correct size of flange on each end corresponding to the age of the differential and whether it's from a Triumph GT6, a TR4, or a Spitfire).
As I said before, I would be better to fix the differential backlash first (although I've since read that they all do that...).
I've also done a bit of work updating the website a bit, particularkly the "events" page, to add some of the places we went to in 2024.
:: Sunday, 20 April 2025 ::
More faffing about until the parts arrive...
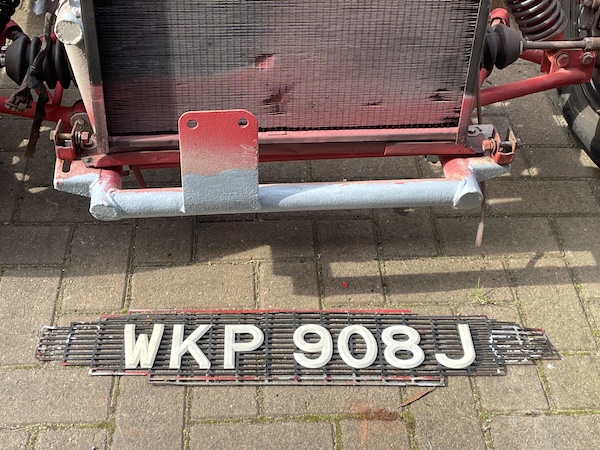
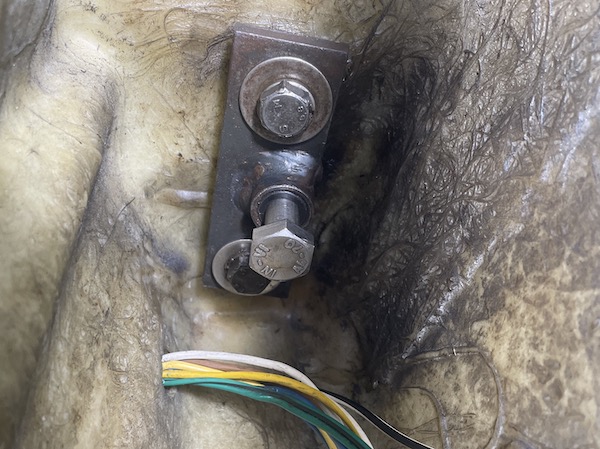
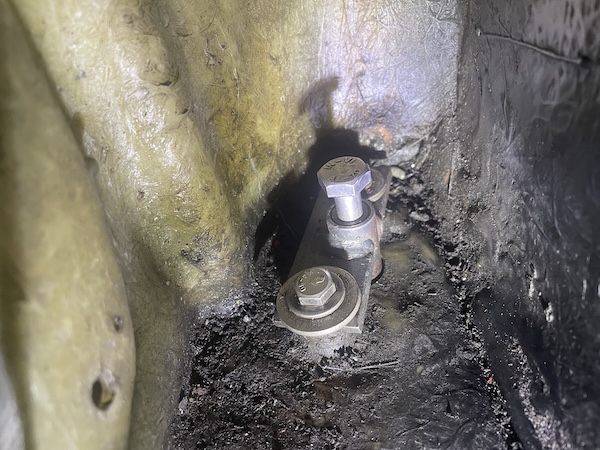
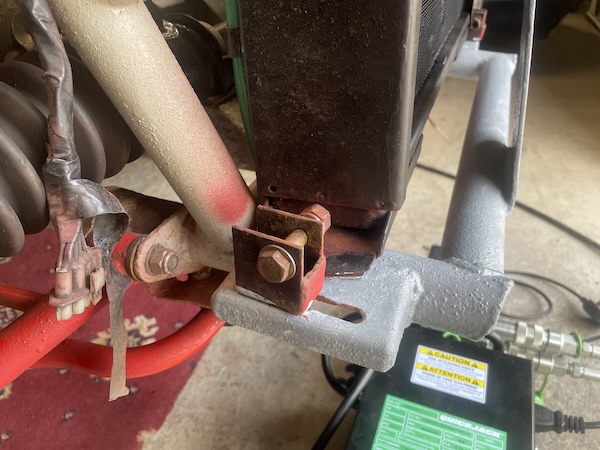
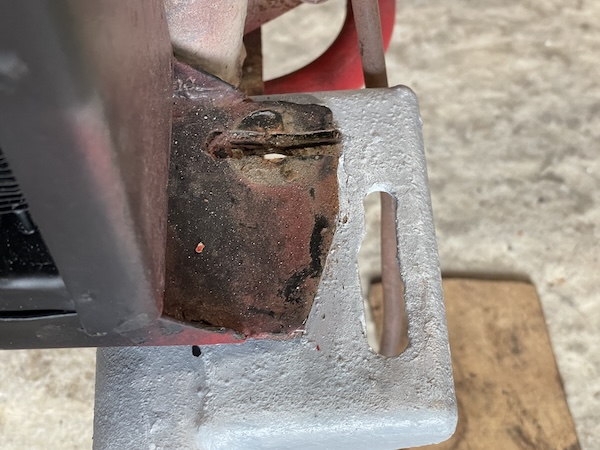
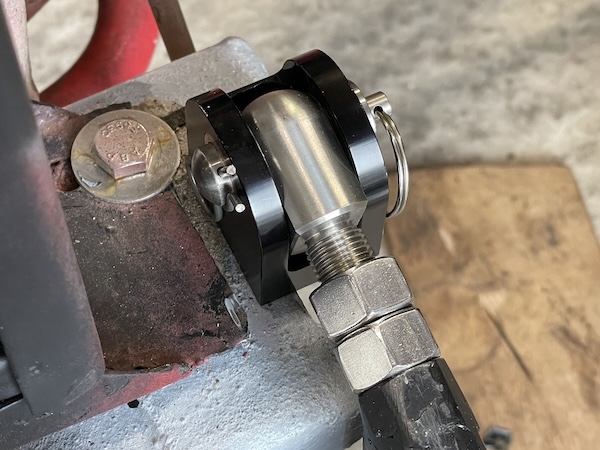
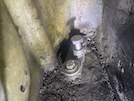
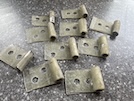
 These two brackets on the chassis are where the hinge bolts on. I've ordered new ones, so I remove these and paint the exposed chassis.
Then I decide to remove the front bumpers from the bonnet. They are held on with two coach bolts each, and they are rusted solid. The coach bolts
just spin in the bumper, you can't get a grip of them, so the nuts just won't loosen. I end up breaking all 4 of them off with a nut splitter and
a wee chisel.
 But they're off! I'm not going to re-use them, but the supplier said that if I send them back, he can use them to make new ones. Don't know if it
was worth the effort, but they're going!
But they're off! I'm not going to re-use them, but the supplier said that if I send them back, he can use them to make new ones. Don't know if it
was worth the effort, but they're going!
Apart from that, I while away a few minutes just tidying the garage and eating chocolate eggs. It's a hard life.
:: Wednesday, 23 April 2025 ::
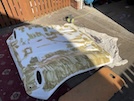
 So it turns out that you can just about fit a Vixen sideways into the back of a Transit van... The new bonnet and other bits arrived tonight,
kindly transported from Grays Motoring Solutions in the Midlands, by the lad's dad.
So it turns out that you can just about fit a Vixen sideways into the back of a Transit van... The new bonnet and other bits arrived tonight,
kindly transported from Grays Motoring Solutions in the Midlands, by the lad's dad.
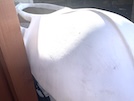
 The bonnet moulding is surprisingly lighter than the old one, but that could be because it doesn't have the hinge frame fitted, and it doesn't have
several layers of paint... Or it could be that it's just thinner fibreglass...
The bonnet moulding is surprisingly lighter than the old one, but that could be because it doesn't have the hinge frame fitted, and it doesn't have
several layers of paint... Or it could be that it's just thinner fibreglass...
The first task will be to cut out the headlight holes and the 4 wee grilles, and the vent in the rear edge of the bonnet.
 Then the hinge frame is fixed to the chassis and the bonnet is positioned on the car and all clearances checked, so that the frame can be glassfibred
into exactly the right position.
Then the hinge frame is fixed to the chassis and the bonnet is positioned on the car and all clearances checked, so that the frame can be glassfibred
into exactly the right position.
 Then you can glass in the new grilles and fit all the new goodies, to make sure everything fits properly before you take it all apart again for
painting.
Then you can glass in the new grilles and fit all the new goodies, to make sure everything fits properly before you take it all apart again for
painting.
I'm not expecting this to be a quick or easy experience!
:: Thursday, 24 April 2025 ::
Bonnet repair, day 1.
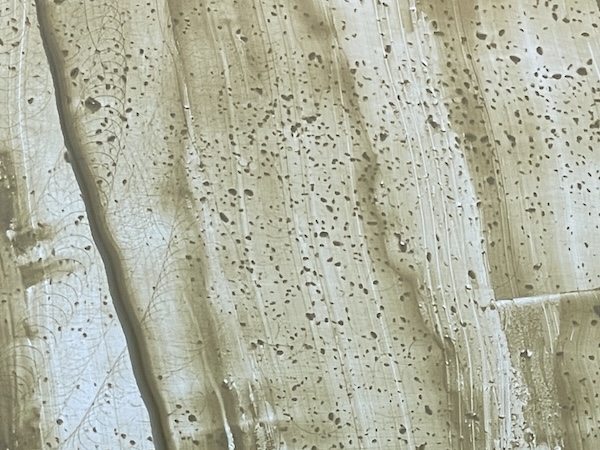
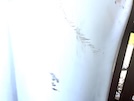
It's only now that I have the time to look at it properly, out in bright sunlight, that I see that the bonnet is "straight from the mould" and needs
a lot of finishing before painting. Here's some close-ip photos of various bits that will need to be filled and sanded, AFTER I've done all the
drilling and cutting etc.


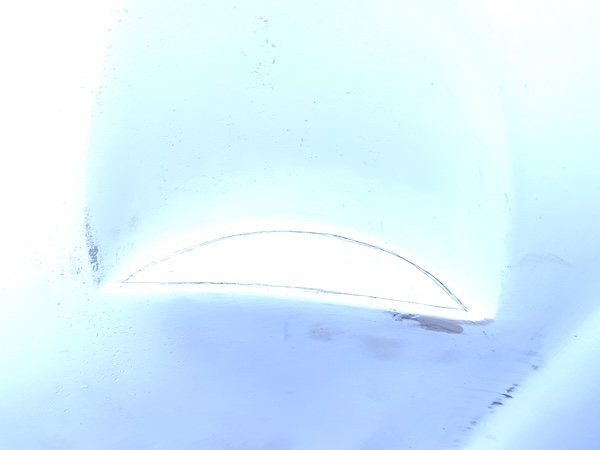
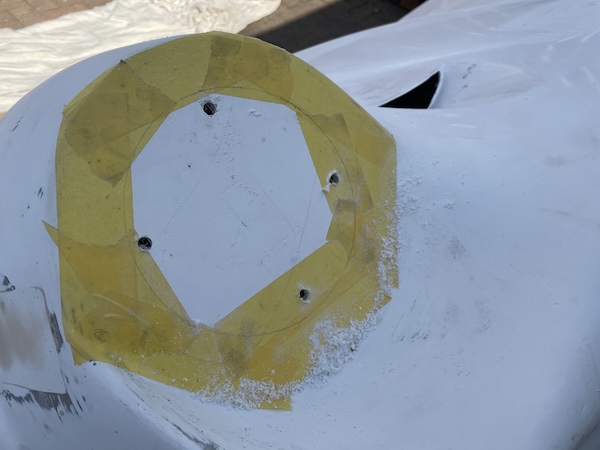
 So, on to marking up where the holes need to be cut. First the headlights. I take check measurements off the old bonnet, and then use a headlight
bowl gasket to draw the shape of the hole. I started applying masking tape to draw on, but realised that you can write on bare fibreglass with a
pencil...
So, on to marking up where the holes need to be cut. First the headlights. I take check measurements off the old bonnet, and then use a headlight
bowl gasket to draw the shape of the hole. I started applying masking tape to draw on, but realised that you can write on bare fibreglass with a
pencil...
 This is one of the wee grille holes. I've left a wee "lip" which I hope will make it look nice, and stop rainwaater from running in. You can always
cut any excess off later, but you can't cut it back on!
This is one of the wee grille holes. I've left a wee "lip" which I hope will make it look nice, and stop rainwaater from running in. You can always
cut any excess off later, but you can't cut it back on!
 Then I lift the back of the bonnet onto a wee table, and mark out the big rear vent in the same way. Again, note the wee "lip" along the bottom,
and I'm going to leave a wee "pillar" in the middle for extra strength.
Then I lift the back of the bonnet onto a wee table, and mark out the big rear vent in the same way. Again, note the wee "lip" along the bottom,
and I'm going to leave a wee "pillar" in the middle for extra strength.
Moment of truth! I'm going to start with that rear vent because any mistakes won't be so easy to see (unless you're inside the car, of course!) so
I drill a couple of starter holes in the corners. I start off using an oscillating multi-tool with a half-circular blade, but it's a wee bit hard to
control. I also try the smaller "end-on" blade but that gets hot and is burning the fibreglass. Then I decide to try the air saw - the one that I
used to get the exhaust off the Porsche - and with a wee bit of care, I can run that along just inside my pencil marks.
 I finish off the shaping with a big grinding stone in an air grinder, and a smaller one in a multi-tool, then hand-sand it smooth. It could still
do with a bit of a clean-up, but that's not too bad at all.
I finish off the shaping with a big grinding stone in an air grinder, and a smaller one in a multi-tool, then hand-sand it smooth. It could still
do with a bit of a clean-up, but that's not too bad at all.
I realised half-way through this (when I got the first bit out) that this hole is double-skinned - there's a fibreglass brace that goes across the back
of the bonnet, right in front of the bottom of that vent. The bottom half of the new hole needs to be glassed in again and filled so it looks nice.
The job list grows longer!
It might not look much, but I've been at this for 3 hours (plus set-up time, looking for tools, finding a face mask, blah blah blah then tidying up
and hoovering up all this fibreglass powder), and I'm going to stop because:.
I'm hungry (it's after half-past lunch time):
I'm thirsty (ditto);
I'm bored; and
I've used up every last percent of my brain battery so far, and it needs re-charged.
:: Friday, 25 April 2025 ::
Bonnet repair, day 2.
Another day of mainly cutting and drilling...
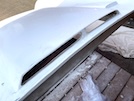
 There's another two backward-facing vents at the back of the bonnet to be cut out. These are very long and thin, so there's less room for error.
Good job I got some practce in yesterday with the air saw! A wee bit of smoothing with a hand file and they're pretty good!
There's another two backward-facing vents at the back of the bonnet to be cut out. These are very long and thin, so there's less room for error.
Good job I got some practce in yesterday with the air saw! A wee bit of smoothing with a hand file and they're pretty good!
None of these vents had mesh over them before, they were just open. I think I'll mesh them before I paint the bonnet though...
Next, the two wee vents at the front. These are a bit tricky because they're recessed into scoops, but they turrn out not too bad either...
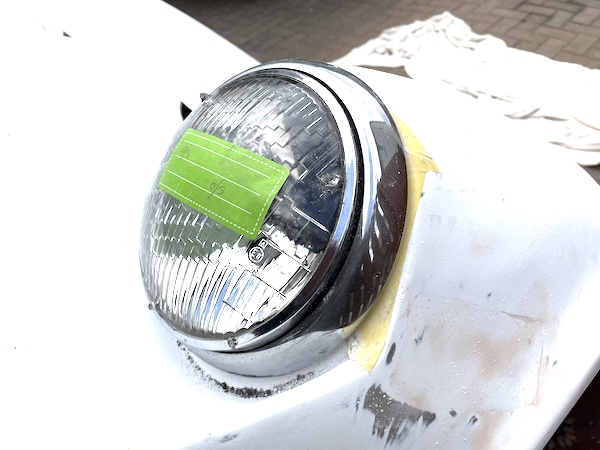
 Then it's on to the headlights. I make absolutely sure that the lights and trim rings will line up with the edge of the front wings...
 Then I drill 6 wee holes to get the sawblade started in, and cut out the cirle between the holes, then tidy up the edges with a flap wheel.
 Then I use the rubber seal to mark the position of the holes for the adjuster screws, and drill those out.
 Perfect, or as near enough as it's gonna get!
 It's starting to take shape!
 I measure and drill out a pair of 25mm holes for the sidelights, and a pair of 16mm holes for the headlight ring screw (later to be filled in by a
rubber grommet)
I measure and drill out a pair of 25mm holes for the sidelights, and a pair of 16mm holes for the headlight ring screw (later to be filled in by a
rubber grommet)
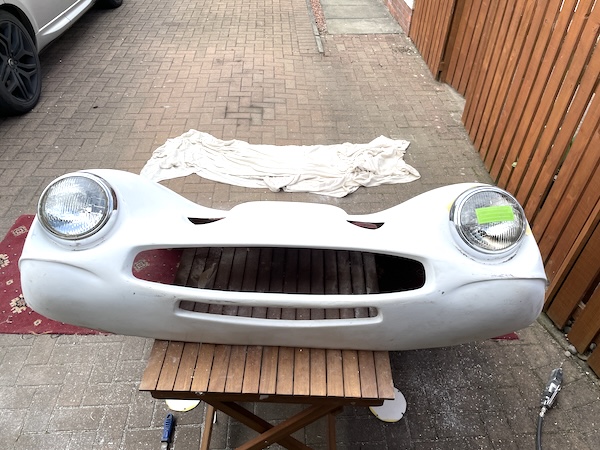
Finally for today, I drill the holes for the bumper securing bolts. Question - how do you get the holes in the right place when you cna't see through
the bumper and a pencil won't fit through the bolt hole? Answer (in my case anyway) - put a timy blob of red paint on the end of a flat punch, and
use that at the right angle, to mark the hole positions. I fit both bumpers temporarily, to make sure that I won't have to do any drilling once
everything is painted.
That's enough for today - that's another 6 hours playing with power tools. You can't have more fun with your clothes still on.
Only a couple of holes to drill for the washer jets and the bonnet badge, and I think that's all the drilling done!
:: Saturday, 26 April 2025 ::
Bonnet repair, day 3.
Activities slightly curtailed by rain - I don't want to get the bonnet wet before it's painted, in case any water gets absorbed and then bubbles
back out under the paint. I don't have room in the garage for 2 TVRs and layong out the bonnet.
I do have space to mark up the locations of the holes for the windscreen washer jets, the TVR badge and the headlamp mounting screws. Again, I'm
not going to drill them inside the garage because I'll end up with glassfibre dust everywhere... It's not worth rushing when the forecast is for
better weather for the whole of the rest of next week.
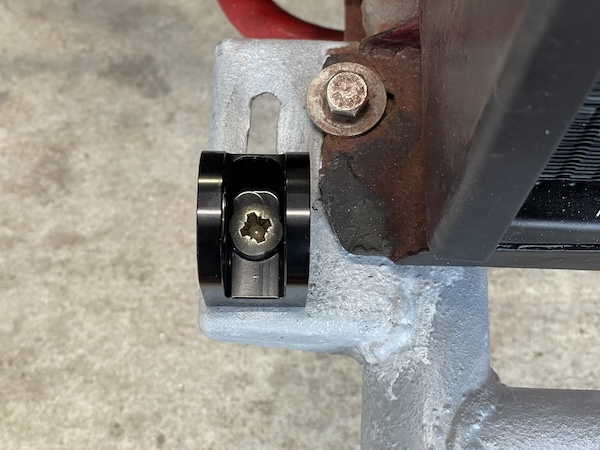
So instead, let's have a go at mounting this bonnet frame. I've bought quick-release hinges, you know, just so that you can whip the bonnet off
altogether every time you stop. I'll connect the R-pins to the handbrake cable to automate the process as much as possible...
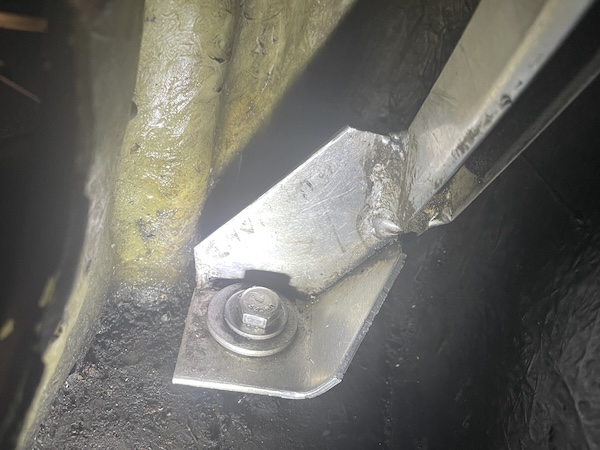
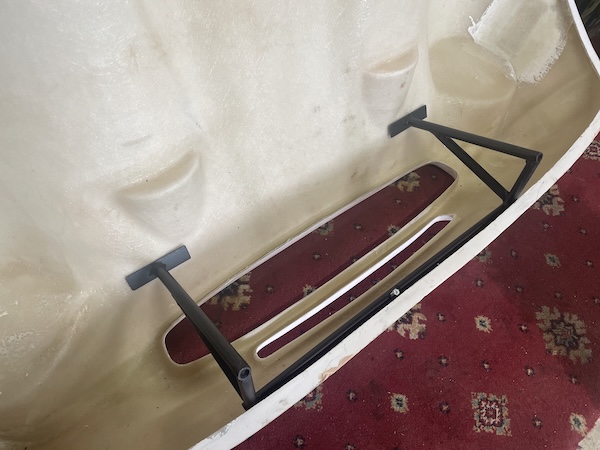
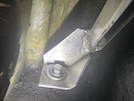
 Here's the offside bracket mounted to the chassis. So far so easy...
 The nearside bracket is more difficult, because the radiator bracket is slightly too wide, so prevents the hinge bracket from being adjusted
backwards or forwards when fitting the bonnet.
The nearside bracket is more difficult, because the radiator bracket is slightly too wide, so prevents the hinge bracket from being adjusted
backwards or forwards when fitting the bonnet.
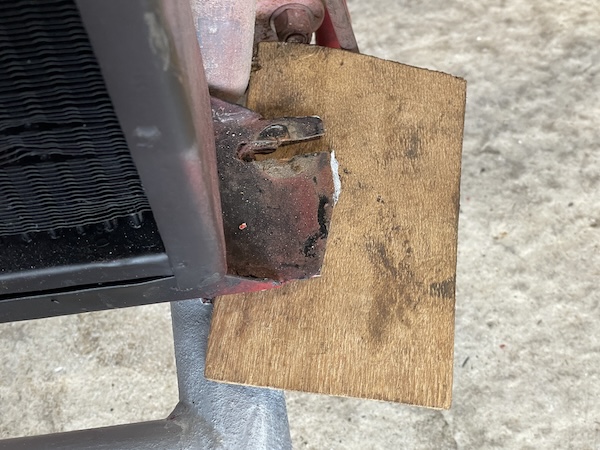
 I take out the radiator mounting bolts and lift it slightly onto a bit of thin ply, while I angle-grind a bit of the bracket off.
 That's better!
 I mount the frame in the brackets, put in the pins and there we go! I have the brackets in the middle of their for-and-aft adjustment, and the
bonnet frame pretty much half-way through its up-and-down adjustment, to allow for final adjustment once I get the bonnet in place.
I mount the frame in the brackets, put in the pins and there we go! I have the brackets in the middle of their for-and-aft adjustment, and the
bonnet frame pretty much half-way through its up-and-down adjustment, to allow for final adjustment once I get the bonnet in place.
 This is it in approximately its "bonnet down" position. I take it back off the car for now so that I don't eand up breaking my leg on the bloody
thing when I'm doing other stuff.
This is it in approximately its "bonnet down" position. I take it back off the car for now so that I don't eand up breaking my leg on the bloody
thing when I'm doing other stuff.
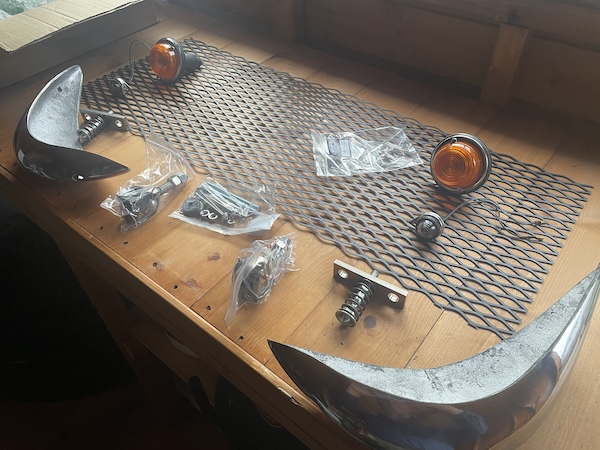
What else did I do? Oh yes - Mr DPD delivered 2 parcels - one is new headlights with built-in sidelights (the original ones will be wired in, but
are just for show - they are less bright than Donald Trump's primary school reports). The other parcel is a fibreglassing kit - materials, mixing
cups, brushes, rollers, the whole shebang. I'm ready now!
I also spend what seems like a disproportionately long period of time picking up power tools, accessories and hand tools off the garage floor (see
"breaking leg" comment earlier).
Only about an hour today (excluding power tool pickup time).
:: Sunday, 27 April 2025 ::
Bonnet repair, day 4.
Activities slightly curtailed by other things to do!
I'm trying to plan the "glass-fibre" operations so that I can get as much as possible out of each batch of resin that I mix, without wasting any or
spending more time cleaning up than making progress. The biggest job there is glassing the frame into the bonnet, but first I have to get it all
positioned correctly, so I have organised a bonnet-fitting party for Thursday. In the meantime, I can hopefully get a few wee jobs out of the way.
So today, I'm going to try to make the front grille, and the little grilles that go in the bonnet vents.
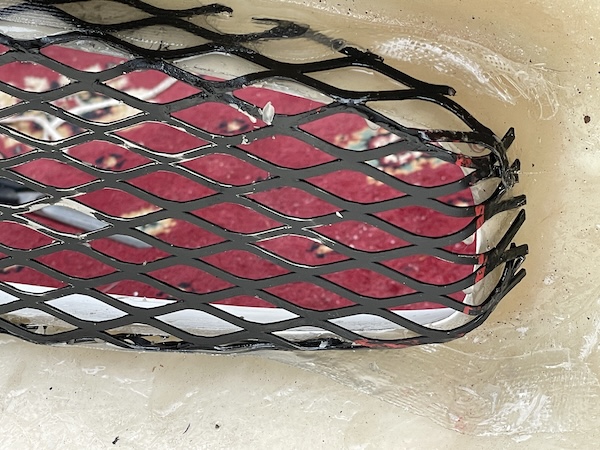
I have the correct black diamond mesh for the front grille, so I start by holding a bit of cardboard behind the front of the bonnet, and tracing the
shape on to the cardboard. Then I tape the cardboard to the mesh, and cut around it leaving an overlap of about 15mm all the way round. Trial fit -
looks ok...
Then I grip the edge in my vice, about 3 or 4 mm from the edge of the cardboard, and bend it over about 45 degrees or so. I work my way round the
top edge and trial fit - looks ok! Same again for the bottom edge and the ends.
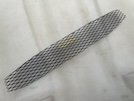 After a wee bit of adjustment with pliers, it looks like this...
 and it fits like this! I'm going to fix that in with resin and a strip of matting - how TVR should have done it, instead of just embedding it in
half-a-tin of body filler.
and it fits like this! I'm going to fix that in with resin and a strip of matting - how TVR should have done it, instead of just embedding it in
half-a-tin of body filler.
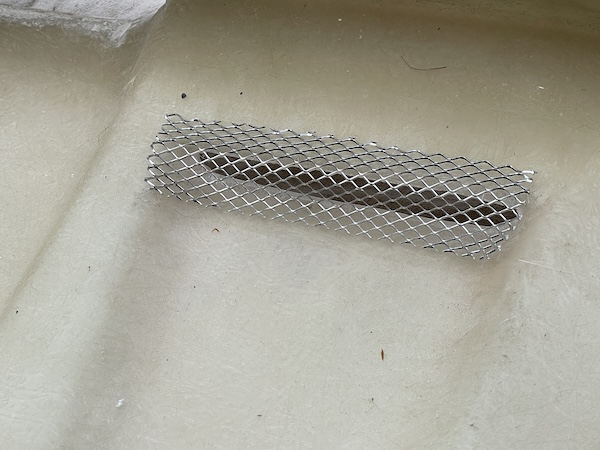
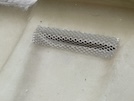 I also have a sheet of much finer aluminium mesh that I bought yesterday in B&Q. Again, with the help of a cardboard template, I cut off 2 bits for
the rear vents, and push those into shape...
I also have a sheet of much finer aluminium mesh that I bought yesterday in B&Q. Again, with the help of a cardboard template, I cut off 2 bits for
the rear vents, and push those into shape...
 And another couple of bits shaped for the front vents. Again, I'm going to glassfibre those into place wehen I have a batch mixed.
I can't do the longer vents at the very rear edge of the bonnet yet - those need a bit of fibre-glassing first, to re-attach the double skin and
fill in the gap between.
So that's the bonnet ready for the first batch of fibre-glassing. I also want to make up a couple of flat fibreglass sheets, around A4 size I think.
Their purpose will become clear later in the process!
Not starting all that today though - I have a couple of other things to be doing.
Total time today - about 2 hours (I know that doesn't look like much for 2 hours, but it was!), so that's 12 hours total so far on getting the bonnet ready).
:: Monday, 28 April 2025 ::
Back to work! Naaah, feck it. Instead let's go for - bonnet repair, day 5. It's glass fibre day (well, the first glassfibre day) in the gitcave.
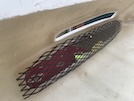
First, the bonnet grille. I do some final bending and shaping to get the grille to overlap the front vent, and bend along the contour of the opening.
 Then I rig up a way to hold the grille tight into place while I glass it in...
 Two bits of cord, two bits of wood and a couple of screwdrivers to apply just a wee bit of tension...
I have the other grills already made up, everything else is ready, so it's time to mix the resin and get started.
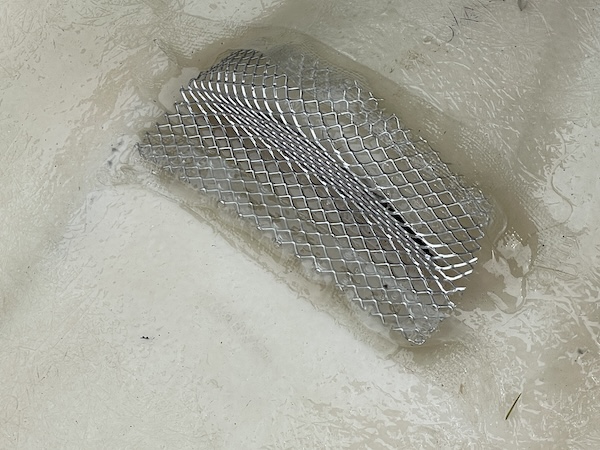
 Here's the front grille, all bent to shape and glassed in tight - and not a trace of filler!
 Here's the inside of one of the wee grilles at the back of the bonnet, glassed in with glass tape and resin...
 and here's the outside!
 Pretty happy with that!
By this time, my resin is starting to cure in the cup, so I clean that out and maker up a fresh batch for 2 more jobs...
First, I apply a layer of matting along the rear brace of te bonnet to replace the wee bit of "double skin" that I cut out to take those larger rear
vents. Once that's cured, I'll fill in the gap and sand it down, before making a couoke of wee grills for that.
Next, I'm going to make some wee hose clips for the windscreen washer hoses. TVR just glassed the washer hoses under a layer of fibreglass into the
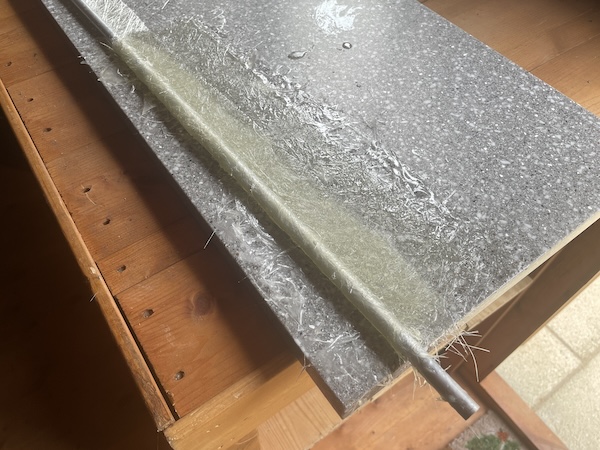
underside of the bonnet, but I want to do something a bit better. I'm going to glass in little tubing guides to hold the tubes but still leave them
visible (and replaceable if necessary)!
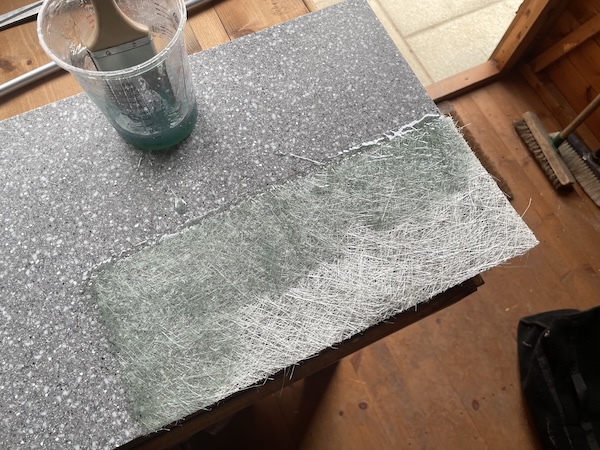
First I need a flat surface, I have a piece of corian composite worktop left over from when I got a new kitchen a few years ago. I spent yesterday
giving it 3 coats of car wax as a releasing agent, and I bought some washer hose, and a bit of aluminium tube that the hose fits through.
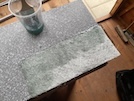 So today, I lay down a coat of resin on that surface - this is about half-way through so I haven't saturated the whole area yet.
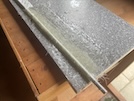 Then I roll over the end, around the metal tube, and lay down a second reinforcing strip.
Then I need to leave all that to cure, after I've spent nearly as much time cleaning up as I did to do the work!
Total time today - about 3 hours, so I'm about 15 hours total into this job.
:: Tuesday, 29 April 2025 ::
Bonnet repair, day 6.
The next stage is those long vents in the rear of the bonnet - I need to fill in the double-skin in the bottom of the slots. I've already glassed
over the bottom so I need to fill the inside. I get some Isopon P40 (the one with glassfibre mixed through it) and press it down into the gap, and
give it some elementary shaping, before removing any excess with acetone. Leave that to dry before filing and sanding (and maybe a smear of ordinary P38 filler).
 Next, the front indicators - I have the "correct" Sparco indicators, but unlike the "wrong" ones that were on before, these have a body that has to
go through the front grille. I use the backing plate as a template, and cut out a hole with tin snips. So now I know that those fit!
Next, the front indicators - I have the "correct" Sparco indicators, but unlike the "wrong" ones that were on before, these have a body that has to
go through the front grille. I use the backing plate as a template, and cut out a hole with tin snips. So now I know that those fit!
Then I drill out holes for the windscreen washers, the bonnet badge, and the mounting screws for the headlights and sidelights.
 Back to these wee clips for the washer hose. I cut the tubing into 1 inch sections, and drill holes in the fibreglass "tail" to help them stick. I'm
not going to stick these on until I've fitted the hinge frame, to make sure that they're not in the way.
Back to these wee clips for the washer hose. I cut the tubing into 1 inch sections, and drill holes in the fibreglass "tail" to help them stick. I'm
not going to stick these on until I've fitted the hinge frame, to make sure that they're not in the way.
 Speaking of which, this is the approximate position of the hinge frame. It has to be finalised with the bonnet on the car though, and Dave and Eric
are coming out on Thursday to help to lift it and hold it in place while I mark it up.
Speaking of which, this is the approximate position of the hinge frame. It has to be finalised with the bonnet on the car though, and Dave and Eric
are coming out on Thursday to help to lift it and hold it in place while I mark it up.
Then I'll need to glass in the frame, and then install the bonnet lock pins at the rear edge, once the bonnet is installed on the car. Those have a
wee bracing plate, and I've bought a bit of sheet metal to make those.
In the meantime, I think that everything else has been trial-fitted, so it should all go back together after it's painted.
It still needs a lot of prep before painting though - there are lots of moulding marks and joins that have to be sanded and filled, and that could
still take a while!
Definitely seeing progress though!
Total time today - about 4 hours, so 19 hours in total so far.
:: Wednesday, 30 April 2025 ::
Bonnet repair, day 7 - 1 day until fitting day!
The important task today is to re-shape the vent slots at the rear of the bonnet, after fibreglassing them yesterday. I reshape them rougnly with a
hand file and then a multi-tool sander.
Then I mix xome Isopon P38 filler, and fill in some of the joins. It looks like a wee separate panel has been let into the bonnet where the badge
goes, and also two wee panels where the side indicators go (which I'm not re-fitting). The panel joints aren't exactly hidden.
Then I get distracted for 3 hours to go and book a holiday for next year for a wedding - they are getting married abroad so we have to get booked
up early. The travel agent is really helpful but... why are travel agents compiters always - always - "not runnibg properly today because we're
getting an upgrade". Even after the booking is confirmed, she's still battering away at the keyboard for ages, like Beethoven on meth, before we
are allowed to leave.
Back home, rub down the filler and it's a lot better - but there's also a lot of wee pinholes (a lot! and a slight scratch down the central hump
(which could have been me, don't know). The're not coming out with the sander. and I don't want to go through the gel coat.
 I go around the bonnet with a tube of knifing stopper and a wee plastic spatula. By the time I've covered all the surface defects I can see, the
car looks like a dirty protest on curry night in a Calcutta jail.
I go around the bonnet with a tube of knifing stopper and a wee plastic spatula. By the time I've covered all the surface defects I can see, the
car looks like a dirty protest on curry night in a Calcutta jail.
 Here's one area as an example, on the top of the offside wing (probably the worst bit, to be fair). You can see that the stopper has even filled
the slight swirl marks from the initial sanding - those will be removed by a final fine sanding after all the paint blemishes are filled.
Here's one area as an example, on the top of the offside wing (probably the worst bit, to be fair). You can see that the stopper has even filled
the slight swirl marks from the initial sanding - those will be removed by a final fine sanding after all the paint blemishes are filled.
I've only got enough time left to sand down the area around the bonnet badge and the front above the radiator opening. It still looks
crap (with the filler being darker than the fibreglass and all) but it's smooth!
So tomorrow morning, we'll be trial fitting this shit-smeared front on to the rest of the car (with any luck) and then taking it back off for finally
fibreglassing the hinge frame into place. Then it will be final prep before paint (which I've just realised I haven't booked yet... although he did say that
as it's a "paint only" job, he should be able to fit in in, within a week or two). If the bonnet fitting goes well tomorrow, I'll be a bit more
certain about booking it in.
Anyway, total time today - about another 4 hours, so 23 hours total rebuilding time so far.
 It fills a hole in the dash, but that's yer lot. To be fair, if it did work, you wouldn't be able to hear it. And even if you could, I probably would
never use it. The S has a radio / CD player and I never switch it on - I think I've listened to it while driving, maybe 3 or 4 times in 22 years...
It fills a hole in the dash, but that's yer lot. To be fair, if it did work, you wouldn't be able to hear it. And even if you could, I probably would
never use it. The S has a radio / CD player and I never switch it on - I think I've listened to it while driving, maybe 3 or 4 times in 22 years...
 The hole in the console is DIN-sized, but there are two metal plates screwed on the front, under the vinyl covering, for the spindles to go through.
I need to remove the vinyl to get to the screws...
The hole in the console is DIN-sized, but there are two metal plates screwed on the front, under the vinyl covering, for the spindles to go through.
I need to remove the vinyl to get to the screws...
 Then refit the console to the car and trim the vinyl cover a bit, and insert the box. Much more useful than a radio!