How many cars do you see which look fantastic on the outside, but are let down by a grotty interior? Or have you been thinking about replacing your seats and trim, but are put off by the expense?
I was having a look around my car the other day, just to see what I could do to tidy it up. The outside isn’t too bad, the bodywork looks pretty good, the wheels are nicely polished. Even the chassis is in pretty good nick after the work I’ve written about in the last couple of months.
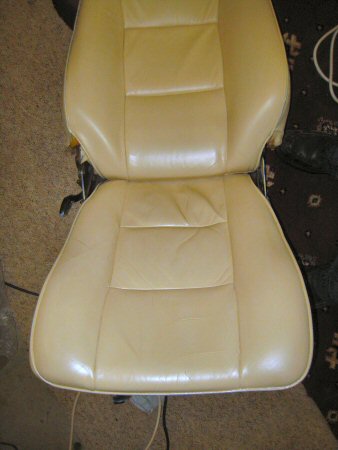
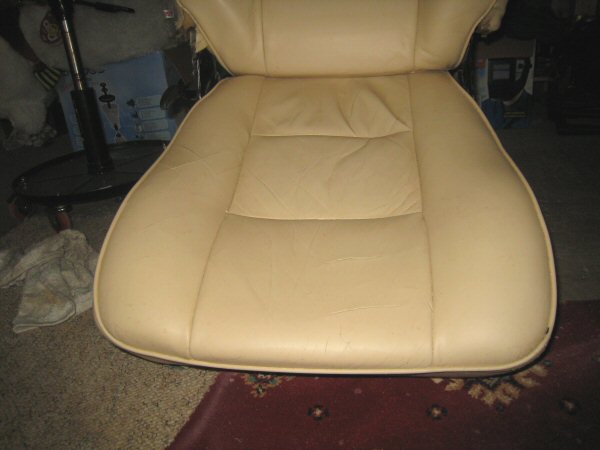
But then you look inside, and it’s a mess. The seats (especially the drivers seat) are cracked and grubby, and not quite the same colour as the rest of the interior trim.
There is, of course, the option of replacing the seats, and in the S, apparently Chimaera or Griffith seats, or even the seats from a Jaguar XJS, are an easy fit. But then you still have to get a colour match.
I decided to try a colour restoration kit, available from The Furniture Clinic in Gateshead – see their web site at The Furniture Clinic in Gateshead - they seem to know everything there is to know about leather repair and restoration.
I called them and they said they could match any colour, as long as they had a bit of the original trim to match. I had been carrying out some work to adjust the door hinges, and while I had the armrest off, I cut a bit off the door card – you only need a bit the size of a 2p coin.
I ordered the kit by post (you have to send the sample piece in!), and they phoned up next day to take payment details – and the kit arrived the following day.
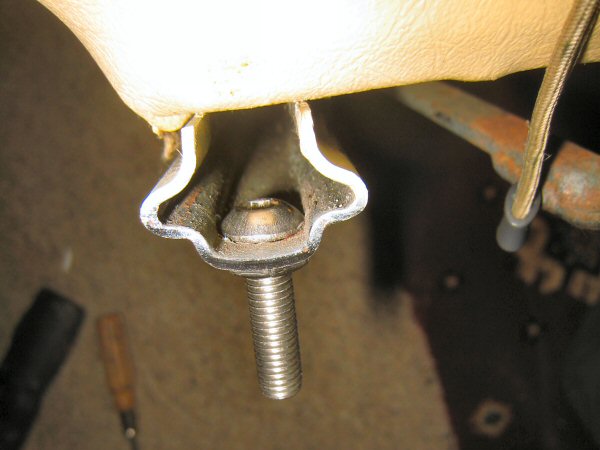
I start with the driver's seat. Each seat is held on with 4 bolts, 2 through each seat runner. The bottoms of the bolts stick through the floor and are rusted to hell. The head of the bolts is inside the seat runner and it's very difficult to get a spanner on - impossible in fact. The 2 rear bolts are a nightmare. I end up clamping a large mole grip on the top of the bolt very tightly, and then removing the nut from underneath, a tiny bit of a turn at a time. The inside nut is tight but does come off, but the offside one won't budge. I have to cut through the nut with a Dremel to get it off.
The two front bolts are a bit easier - a nut has been put on to each bolt and tightened up, before installing the seat, then another nut under the floor when the seat is in. That means that the bolt can't turn when you're unbolting the seat.
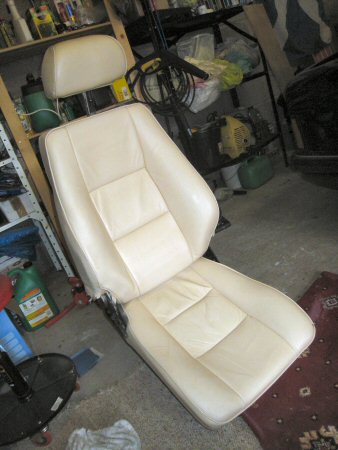
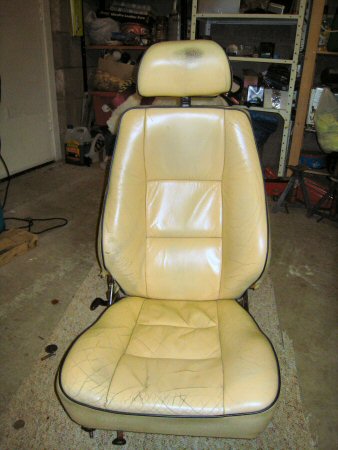 So that's the driver's seat out!
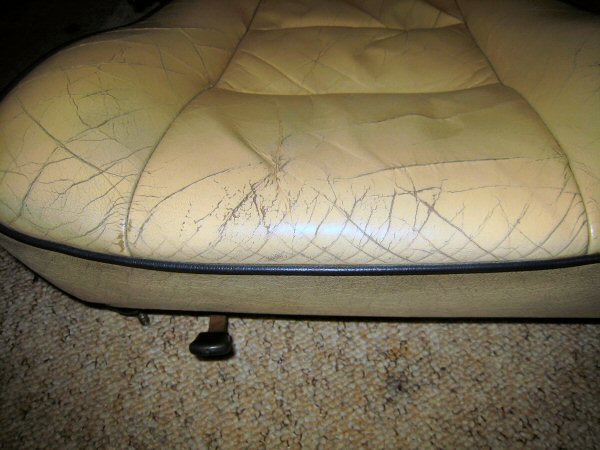
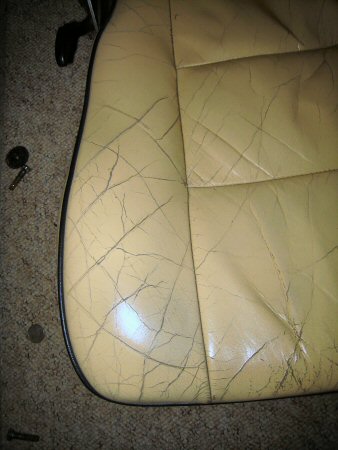
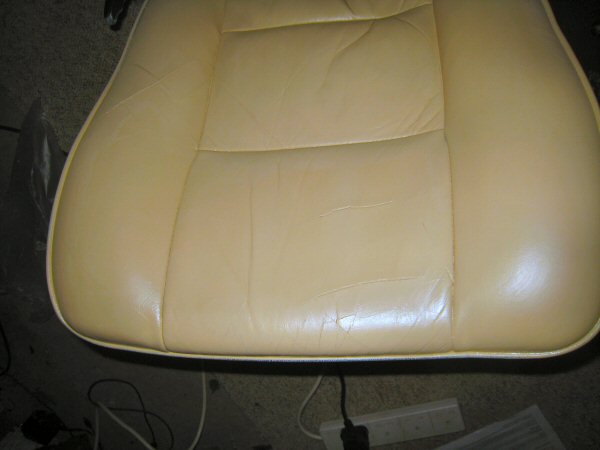
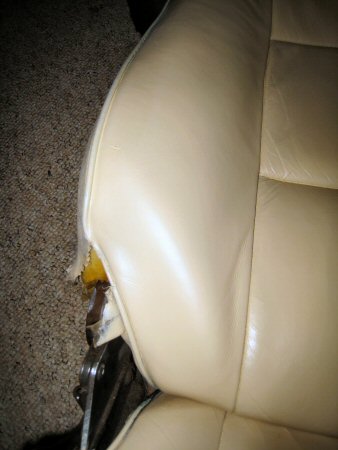
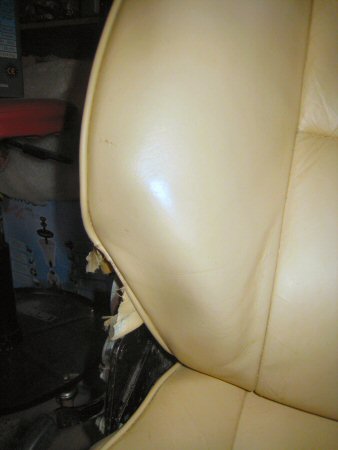
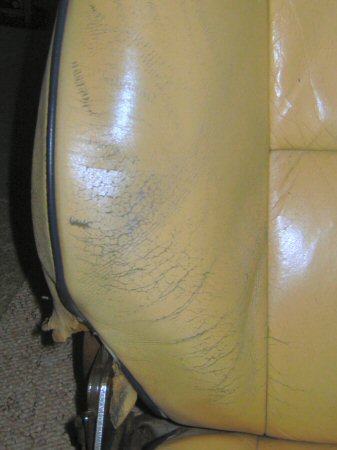 You can see here the worst of the cracking on the seat and side bolsters.
I start on the passenger side but that's even worse!. One of the rear bolts takes ages to get out, even with molegrips on the top. The nut has rusted so badly that it's rounded off, so I have to use those Irwin bolt grips I used to get the exhaust manifolds off a couple of years ago, to grip what's left. Eventually I get it off, but I don't have time to start the other one. Again, the front bolts have locknuts holding the bolts into the frames, so should be easy.
So - first step is to read the instructions! Yes, I know it's unusual, but the kit is full of bottles and bits of stuff and I have no idea what they are all for, so I need to figure it out.
First step is to clean and degrease them again. I know that I only cleaned them a couple of weeks ago, but let's just start again and get it right eh? Besides, there are areas that you can't clean while the seats are in the car.
Step 2 is to prepare the leather by removing the existing colour, amd abrading the leather so that the new colour has a nice surface to stick (or soak in) to. The kit includes cotton wool balls and a couple of abrasive Scotchpads. You wrap the abrasive pad round your balls and then read the instructions again once your screams have subsided - ah you wrap the pad round the cotton wool balls! Then you soak them in a leather prep, and start to rub the leather. You can see the old colour coming off onto the pad. Once you've done the seat, the seat back and the headrest, you take a bit of cotton cloth and wipe the leather over with leather prep to take off any residue.
My seats only have the facings in leather: the backs and sites are vinyl, so you don't prep them at this stage.
Step 3 is to use a separate cloth and some alcohol cleaner, and wipe over the whole seat including the vinyl, to clean off any waxes or silicones.
The seat now looks crap - some of the colour has come off the heavy wear areas, and the creases look worse than ever. You have to leave it for an hour while it dries, ad then comes the fun bit, step 4 - applying the new colour.
I laid the seat out flat and after giving the colour bottle a good shake, poured some on to a small sponge, and wiped it over the whole seat including the sides. The first coat soaks into the leather and almost disappears, it's so thin.
At this point I should explain that I was doing this in November, in Scotland, in my garage. Ergo it was absolutely freezing, so the stuff was taking ages to dry. The instructions suggest using a hair dryer, but I used a two and a half kilowatt floor heater (seeing as I don't have a hairdryer. Or hair.).
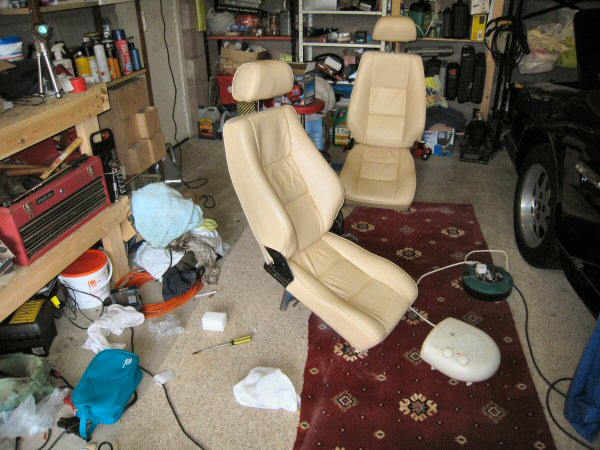
I apply another 4 or 5 coats, drying it and waiting a bit between each one. By the time I've finished that, it looks not too bad at all! And the colour match looks absolutely perfect.
 This is the same seat as the 3 photos on Friday. I am impressed! This kit is absolutely bleeding superb!
The next step is to use a little airbrush to spray the same colour on to the seat so that it goes on nice and evenly. There is an airbrush supplied in the kit, which works on cans of compressed air (also included in the kit). Now the problem with those, in my experience, is that as you spray, the air coming out starts to freeze as it depressurizes. This isn't helped by the fact that the garage is already freezing as it is, so the can temperature doesn't have to drop far before the air brush won’t work.
So I fill a basin with hot water, and dunk the air cans and the colourant in there to warm them up. After a couple of minutes, I connect up a can to the airbrush hose, fil the wee glass pot with colourant, and set it up so that it gives a reasonable spray pattern. So far so good.
I give both seats a spray, paying particular attention to the piping which was blue but which will now be magnolia to match the rest of the seat. The airbrush needs constant adjustment though, because it clogs easily (because it’s so cold), and combining that with swapping cold propellant cans with warm ones, and then drying off each coat with the fan heater again, progress is slow.
After a couple of hours or so, though, I've got a reasonable finish on the front and sides of both seats, I need to leave them to dry and then turn them over and colour the back surface of the backrest.
Unfortunately, I burst the airbrush hose while I am cleaning it (it's my fault for connecting up a plastic hose softened by really hot water, to a propellant can which has also been in the same hot water). So I need another hose – but I end up buying another airbrush and a compressor, because now that I see how controllable they are, I can think of loads of uses for one.
Once I’ve set up the airbrush and compressor, I set up the seats at an angle so that I can do the backs at the same time as the front, by propping the back of each seat frame on an axle stand. Then I spray one seat and then set up the fan heater to warm it up and dry it while I paint the other one. This airbrush is much more controllable, much more reliable, and it takes me about 10 minutes to recoat both seats.
I spray on 3 or 4 coats of colour in no time at all, drying the previous coat with the fan heater, then I leave it to dry overnight.
When the seats have dried, I spray on 5 coats of gloss sealer, trying to get it as even as possible, again drying the seats between each coat with the fan heater. The airbrush works faultlessly, and the seats look fantastic – just a bit too glossy!
You select whether you want a gloss, matt or satin finish when you order the kit. If you want gloss, you leave the sealer as it is. The other two finishes have to be sprayed on top. I chose satin, so that's the last step!
Again, set up the airbrush, and fill the jar with the satin sealer. It's much thicker and milkier than the gloss, but the airbrush works fine. After 3 or 4 coats of sealer (I forget, you just get carried away with these things don't you?) the seats have a lovely satin finish.
Then I get a tin of satin black Hammerite, and paint the bits of the seat frame and the seatback pivots etc that are visible, and leave the whole lot to dry properly.
Once the seats have dried out, it’s time to refit them to the car! I have ordered new stainless steel bolts (with allen heads), flat nuts, full nyloc nuts, and some penny washers. I've also got a new black cover for the seat recline mechanism - mine broke off, and disappeared so I couldn't even repair it. I found it wedged under the driver seat when I took it out but it's broken around the mounting screw and I'm as well fitting the new one now.
 I fit the bolts through the runners, and fit one of the half-bolts underneath, then holding the bolt with an allen key, tighten up the nut
to the frame. That should hold it in place and make fitting and removing the seats easier, if the bolt can't turn when you're undoing the nut
from underneath. I only tighten up the front ones at this stage - I leave the rear ones a little bit loose, to allow me to adjust them slightly
to fit the holes in the car floor - the rear ones are easier to reach in the car if you push the seat right forward.
I fit the bolts through the runners, and fit one of the half-bolts underneath, then holding the bolt with an allen key, tighten up the nut
to the frame. That should hold it in place and make fitting and removing the seats easier, if the bolt can't turn when you're undoing the nut
from underneath. I only tighten up the front ones at this stage - I leave the rear ones a little bit loose, to allow me to adjust them slightly
to fit the holes in the car floor - the rear ones are easier to reach in the car if you push the seat right forward.
Then I fit the cover to the seat mechanism - pretty easy, it's just held on with one screw.
Then I fit the seats into the car - it's a little bit fiddly getting all four bolts through the penny washers and the floor at the same time, then I tighten up the rear half-nuts and fit the washers and nyloc bolts underneath.
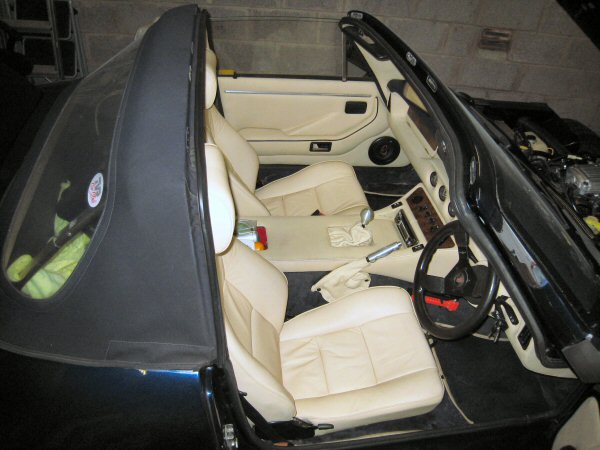 Here they are refitted to the car - perfect!
I think they really transform the car - I had the outside looking half-reasonable before, but the interior looked like the inside of a skip. Not any more!
The whole process took me about a week, but that was working on it on and off in evenings etc, and allowing lots of drying time because the weather was freezing. If you were doing this in warmer weather, or indoors in a heated environment, it would be a lot easier.
I bought the large recolouring kit, because I didn’t want to run out of stuff part-way through –but there’s loads in there, you could easily do the door trims and console at the same time. Everything you need is in the kit – all the cleaners, colours and sealers, sponges, pads and cotton wool etc – even a pair of rubber gloves so you don’t end up recolouring your hands!
I am very impressed with the kit, it does everything it says, although the airbrush wasn't very good – although to be fair, it would probably be ok in the summer time, I think that using it in Scotland in the winter isn't giving it the best chance. The results, even on leather in the state mine was in, are pretty spectacular.