The Vixen's tachometer had an intermittent fault since I got it - it suddenly read zero for a few seconds and then jumped back into life. Then after around 6 months, it stopped working altogether.
So I remove it from the dash and check all the wiring - all connected where they should be, all getting power / earth / continuity where they should.
Conclusion: the gauge itself is fucked.
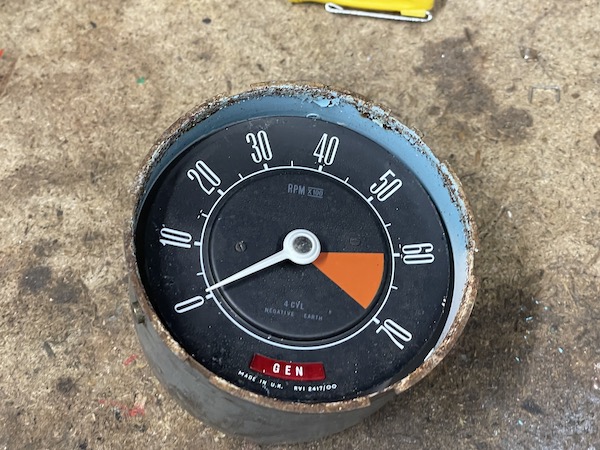
 I went out and found a Mk2 Cortina GT / 1600E tacho on ebay - it looks good, all clean and shiny. no cracks, no corrosion on the face.
Unfortunately, like a bodybuilder with all the muscles but too many steroids, it doesn't work where it matters. Nope, this one's needle can't get up either.
I only discover this after I have taken the dash apart and wired it in, and started the car. Nothing, not a flicker.
This causes me to doubt that I've checked the wiring properly, so let's go through that again.
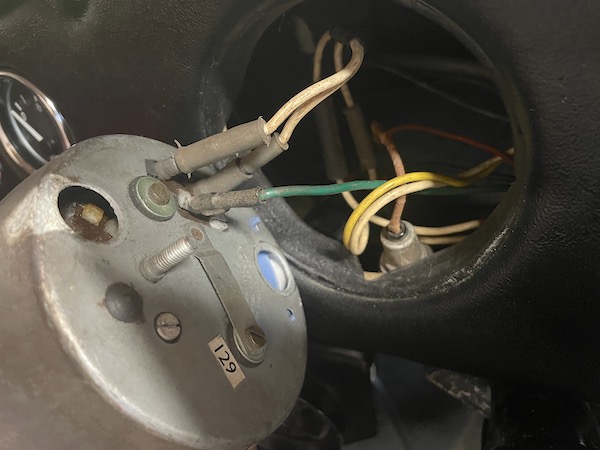 There's 3 wires and an earth. The green wire is an ignition feed - that's easy to check with a voltmeter. The gauge casing has to be earhed - that
can be sorted temporarily with a flying lead with croc clips. There's also two bulb holders - one for gauge illumination, and one for the ignition
warning light - we can ignore those for now.
There's 3 wires and an earth. The green wire is an ignition feed - that's easy to check with a voltmeter. The gauge casing has to be earhed - that
can be sorted temporarily with a flying lead with croc clips. There's also two bulb holders - one for gauge illumination, and one for the ignition
warning light - we can ignore those for now.
The two white wires go to the coil and the distributor respectively. They connect to a loop of wire inside tha gauge, that runs through a wee coil and picks up the electrical impulses going through the LT wire between the points and the coil, by induction - Michael Faraday, magnetic flux and all that O-level physics shit. I remember nearly 50 years ago (not long after my own O-level physics) converting a Mk1 Cortina from positive to negative earth, to find that the tacho didn't work - the way to sort it was to take that internal wire off and loop it the other way - so I know how that works! The car won't run if those are disconnected, so they must be ok, but I check anyway - I disconnect them, and the car won't start. I connect them together, bypassing the gauge, car starts... so all the car wiring seems ok.
So now I have 2 duff tachos... brilliant... I am so happy.
I also have 2 choices - I can either keep buying tachos of doubtful provenance, and hope that I get one that works (some of them say "tested and works ok" but are twice the price of the one I bought... now I know why), or I can have a go at fixing one of the two that I have here, on the basis that if it's already fucked you can't make it any fuckeder. Option 2 seems to be worth a try!
I discover that you can buy a kit that replaces the old circuit board completely, but still uses the original case, face and wiring. If you add the cost of that kit to the cost of the "spare" tacho that I have, it's still cheaper than sending one away for repair. And more fun.
First I have to check that it's compatible with my tacho, and that the moving coil and needle still works. Time to get fiddly with the wee screwdrivers again!
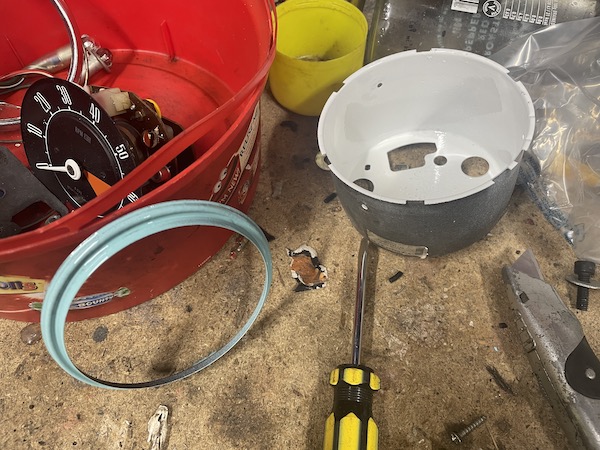
 First step is to take the bezel and glass off. It's held on with wee "tangs" and all you do is twist it until the tangs disengage. The bezel comes
off, with the glass and a rubber seal. Then there's a black metal inner bezel that's rusted in place - but it gives in eventually.
First step is to take the bezel and glass off. It's held on with wee "tangs" and all you do is twist it until the tangs disengage. The bezel comes
off, with the glass and a rubber seal. Then there's a black metal inner bezel that's rusted in place - but it gives in eventually.
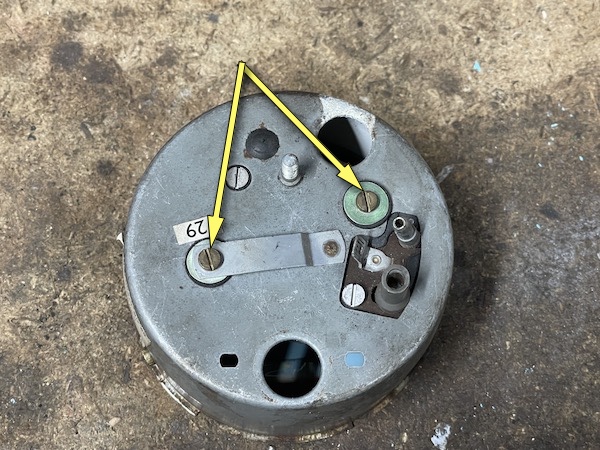 Next step is to take the mechanism out of the case. Remove these two screws here, and it comes out the front.
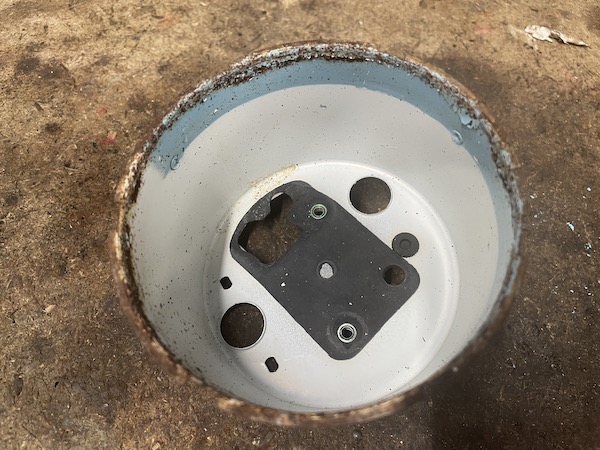 Here's the case - rusty rim and a wee pale blue bit that seems to be there to soften the panel light illumination.
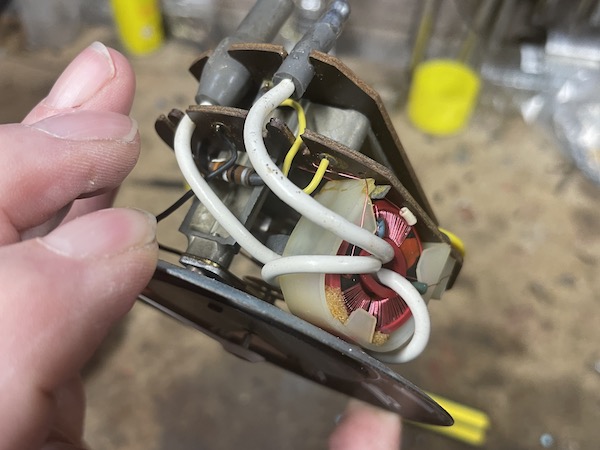 Here's the mechanism, showing the two white wires (or one white wire with a terminal at each end) going therough the induction coil.
 These two red and black wires are the outputs from the circuit board, and they "drive" the indicator needle. I need to test that first - no point in
replacing the circuit board if the meter coil doesn't work.
These two red and black wires are the outputs from the circuit board, and they "drive" the indicator needle. I need to test that first - no point in
replacing the circuit board if the meter coil doesn't work.
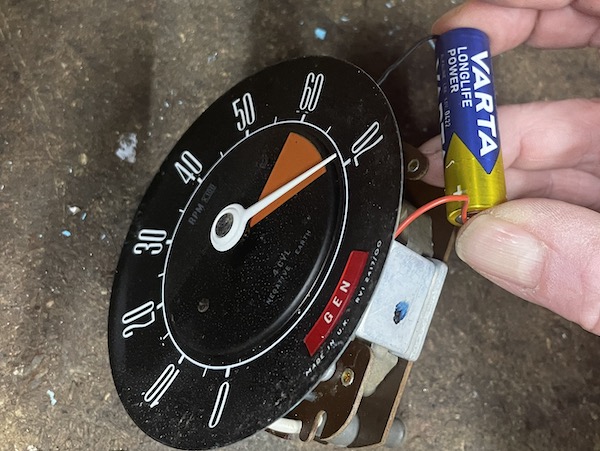 To do that, I snip those wires off the circuit board, and hold a wee 1.5 volt battery across those terminals. The needle zips round to 7,000 revs.
So that works, at least...
To do that, I snip those wires off the circuit board, and hold a wee 1.5 volt battery across those terminals. The needle zips round to 7,000 revs.
So that works, at least...
 To check compatibility, here's a still photo from a video showing them fitting this same kit to a tacho from a Triumh Stag - you can see that the
mechanism is identical - hardly surprising since mine also has a "Smiths" sticker and serial number on the outside of the case.
To check compatibility, here's a still photo from a video showing them fitting this same kit to a tacho from a Triumh Stag - you can see that the
mechanism is identical - hardly surprising since mine also has a "Smiths" sticker and serial number on the outside of the case.
So if the wiring into the gauge is ok, and the needle works ok, it has to be the circuit board, right? So it looks like the repair kit will work, so I'll get that ordered, but while I'm here...
 I give the inside of the case a quick spray of white paint...
 and I also spray the inside of that inner bezel to match the original colour - or rather, to match the 1957 Chevy I had, which seems close enough!
Then it's fiddly electronics time!
I haven't taken photos along the way, because they're set out in the kit instructions. If you really want to see the repair procedure, they also have an instruction video, which you can see here if you have a spare half-hour.
The steps are:
remove the white induction wire between the two connectors, that loops through the induction coil;
remove the coil from the circuit board to make room to;
hot glue the new circuit board to the back of the dial, making sure it's not in the way of the ignition warning light;
connect 2 wires to the needle moving coil and stick the connectors to the back of the dial;
solder the red wire to the old yellow wire leading to the ignition feed spade terminal;
fit an earth terminal to the black wire and fit it under one of the original circuit board mounting screws;
fit a male bullet terminal to the blue wire and hot glue it in place of the old connector;
make sure none of these wires interfere with the movement of the needle.
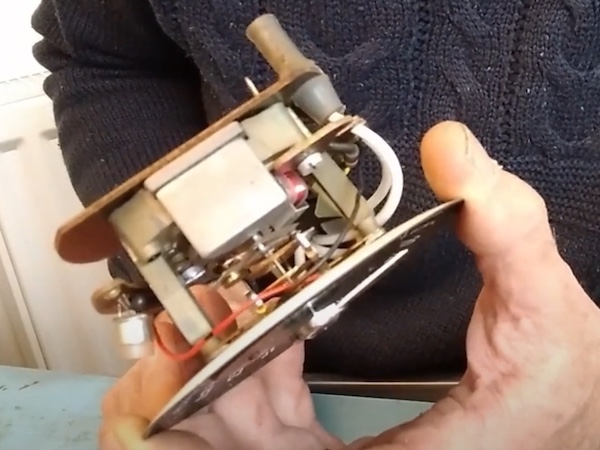
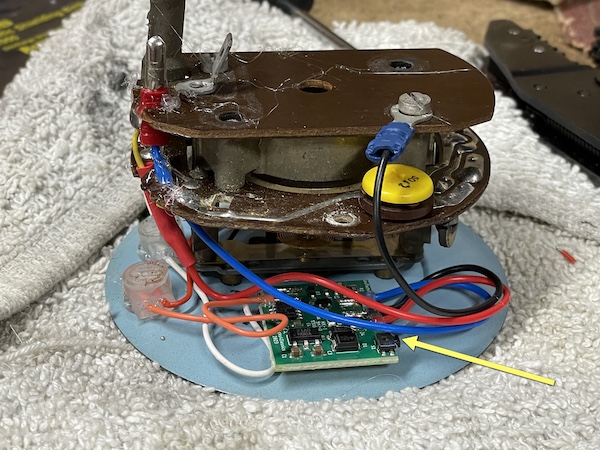 So here it is! That tiny circuit board replaces all of the old circuitry, which is now disconnected. Only the coil that works the needle is retained.
The wee button on the front (arrowed) is used for calibration.
So here it is! That tiny circuit board replaces all of the old circuitry, which is now disconnected. Only the coil that works the needle is retained.
The wee button on the front (arrowed) is used for calibration.
Calibration is simple, and again set up out in the instructions. You connect the spade connector and earth to a battery, and use that wee button to set the needle at 500, 1500, 3000 and 5000 revs, then you set if its a 4-cylinder engine, or a 6 or 8 cylinder. Then you set it for negative earth, CB points / electronic ignition.
And that should be it!
Next step is to re-install the mechanism back into the case, then refit the seal, glass and bezel.
And that's it ready to refit to the car!
First, though, I need to modify the car wiring slightly. The old gauge has the ignition sensor coil wired between the ignition switch and the coil positive terminal - the gauge picks up pulses in the coil input as the magnetic field collapses after each spark. If you disconnect the tacho, the coil gets no supply and the car won't start.
This circuit board needs a constant supply to the ignition coil, and takes its signal from the contact breaker terminal on the coil. The supply is sorted by connecting the two white wires tgether, that previously went through the tacho. I need to fit a new sensor wire between the CB terminal on the coil, and that new bullet connector on the tacho.
The wiring on the car is bound by that spiral plastic binding that you used to get on old cars, so it can be unravelled without damage. I push a bit of blue wire through the bulkhead grommet and bind it back into the loom with the old plastic binding.
Then I put a spade connector on the coil end of that wire, and a female bullet connector on the gauge end. Then I check all the wiring again - that the earth is good, that there is an ignition feed to the back of the gauge, that the two old white wires are connected together so there is a feed to the coil, and that there is continuity in the blue wire from the coil -ve terminal to the gauge. Then I connect it all up to the gauge, start the car and... it works!
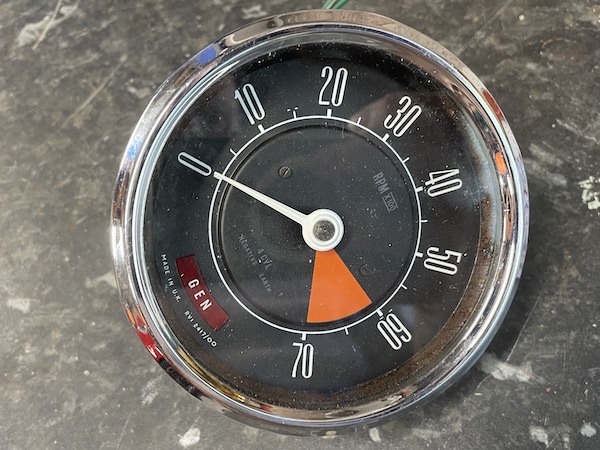
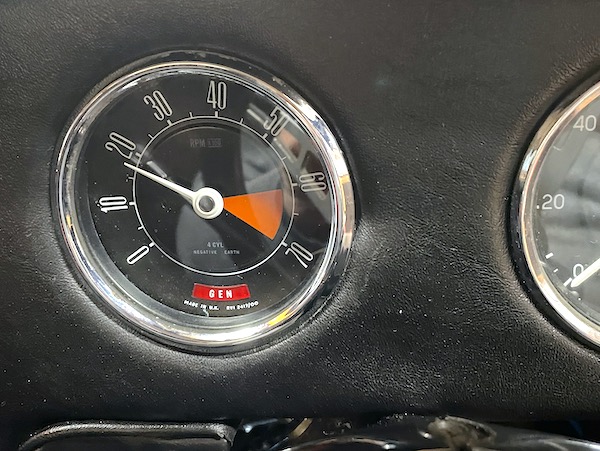 So I reinstall the gauge back into the dash, with the panel light feed and the ignition warning light. Here we are at fast (cold start) idle! All good!
That was an unconventional but interesting repair, with a combination of mechanics, electronics, soldering, etc. Ok the gauge looks standard but it doesn't have standard internals - all the magic is done by that tiny wee circuit board, and only the needle and its moving coil, and the connections on the case, are retained.