The Vixen uses front suspension and steering components from an early Triumph Herald / Spitfire and maybe also the GT6. I hear that the Lotus Esprit uses the same components, but I can't verify that.
It started with an MOT test a couple of days ago. I know that it's older than 40 years so doesn't need one, but a wee annual independent check can't do any harm can it? Not unless it fails so badly that he puts it off the road.
But it's a pass, with a couple of advisories, one of them relating to slight play in a suspension ball joint - the one component that is a TVR special and not Triumph. I've ordered new ball joints, and that should be a relatively easy job. However, while searching for the right parts (the Triumph Herald uses a different top wishbone and different balljoint), I browsed upon various pages discussing lubrication of that bottom trunnion. And this is where I find that I made a big mistake during the last 2 services.
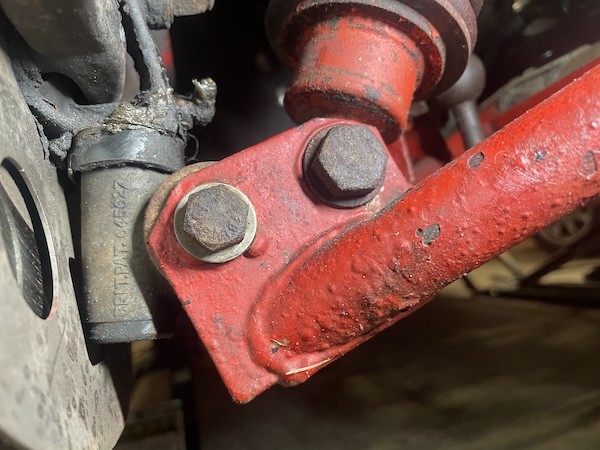
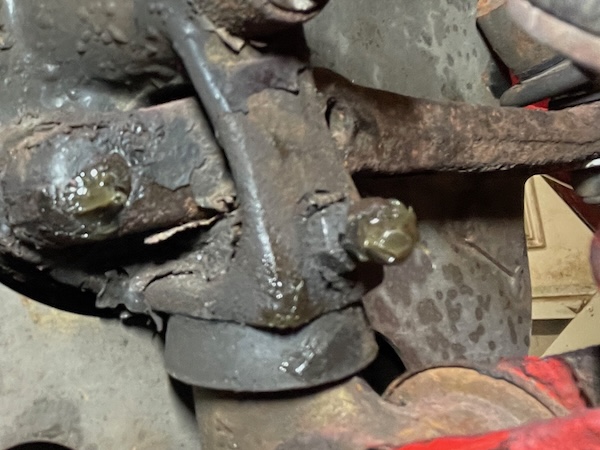 See this? It's a grease nipple on the Vixen's front suspension. To be specific, it's the grease nipple that was blocked, and wouldn't take in any
grease during the service last week.
See this? It's a grease nipple on the Vixen's front suspension. To be specific, it's the grease nipple that was blocked, and wouldn't take in any
grease during the service last week.
Now it's very important to make sure those are well-lubricated. If the trunnions seize up, they snap, and then the front hub dislocates itself from the bottom wishbone and the whole wheel, hub, brake and everything folds outwards through the wing, or folds under the car. In either case, a lot of bodywork damage ensues as the wheel tries to escape from the wheelarch and the chassis scrapes along the ground.
So, best to keep it lubricated properly eh?
You see a grease nipple, you pump grease in, right? Wrong! The front trunnions on Triumph Heralds, Lotus Esprits and TVR Vixens are not lubricated by grease, but by EP90 gear oil... If you put grease in, it clogs the oilway through the centre of the trunnion, blocks the threads, then goes hard, and then the trunnion gets no lubrication when you turn the steering. Then it corrodes. Then it breaks. And the first sign of hard grease? When you can't pump any more in.
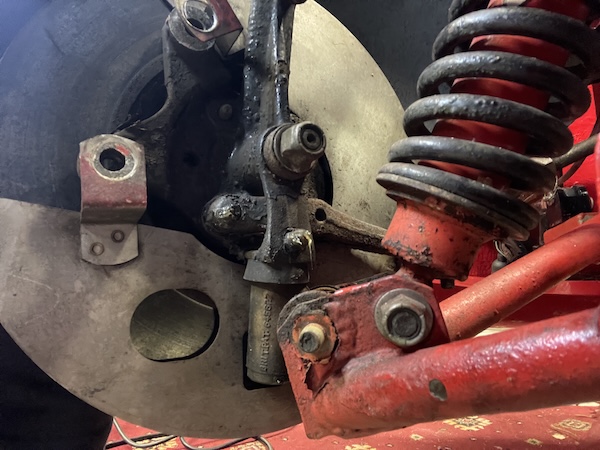
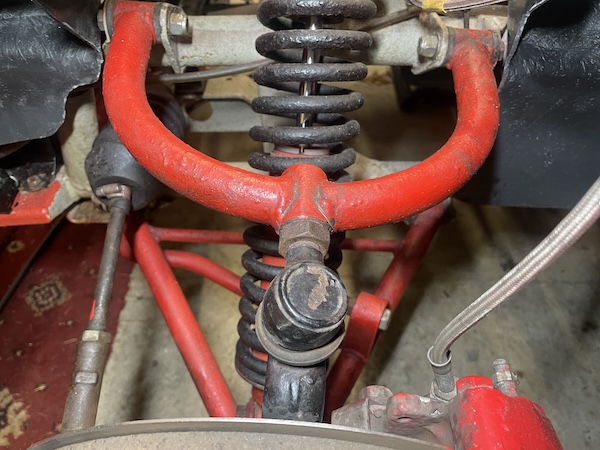 This is where we started - the nearside top balljoint notes as an advisory in the MOT. First job is to measure the existing suspension geometry, so
that I can put the new one back in exactly the same place. First, with the car still on the ground, I measure from the centre of ghe balljoint, to
the edge of the wishbone (where that locknut meets the wishbone). It's 41.5 mm on the nearside, and 37.5 mm on the offside.
This is where we started - the nearside top balljoint notes as an advisory in the MOT. First job is to measure the existing suspension geometry, so
that I can put the new one back in exactly the same place. First, with the car still on the ground, I measure from the centre of ghe balljoint, to
the edge of the wishbone (where that locknut meets the wishbone). It's 41.5 mm on the nearside, and 37.5 mm on the offside.
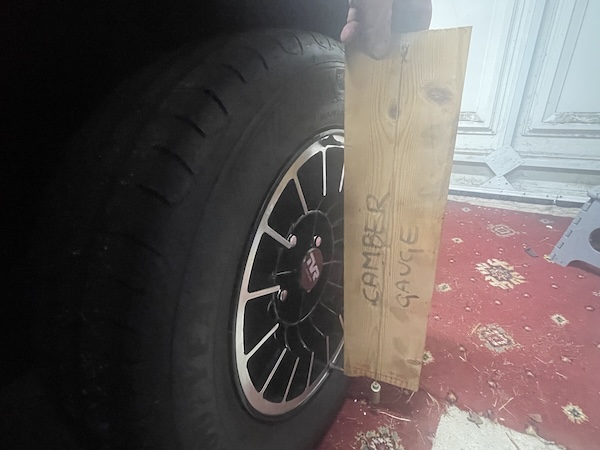 Then I call upon my very expensive but trusty camber gauge. I made this for another car in November 2009, but is guaranteed never to go out of
calibration. I do have to move the top screw to the right diameter for the Vixen's wheel rims, and then check with a spirit level that it's vertical
when it says it's vertical.
Then I call upon my very expensive but trusty camber gauge. I made this for another car in November 2009, but is guaranteed never to go out of
calibration. I do have to move the top screw to the right diameter for the Vixen's wheel rims, and then check with a spirit level that it's vertical
when it says it's vertical.
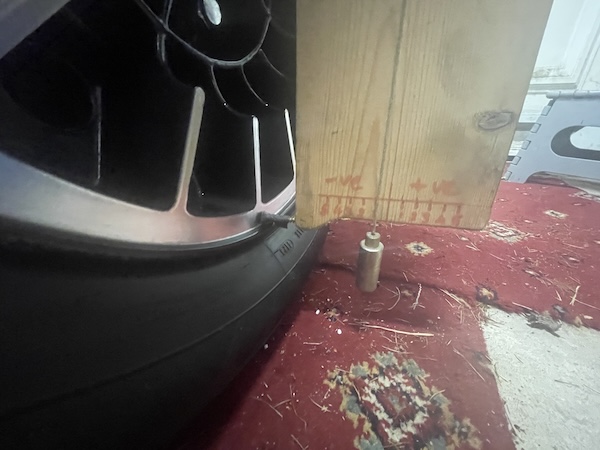 Anyway, it turns out that both front wheels have 1 degree of negative camber.
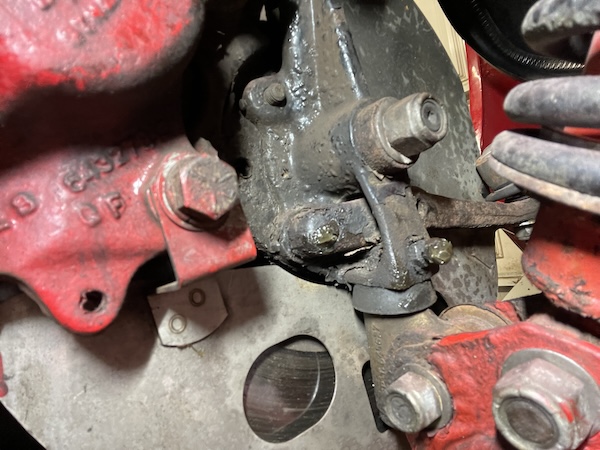
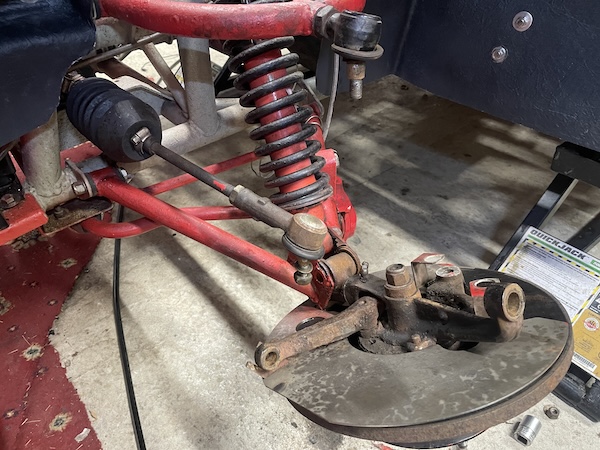
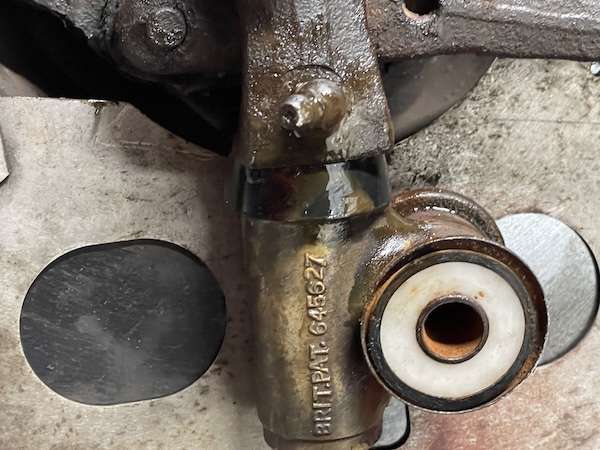
 So, lift the car and get on with the job! Here's how the trunnion fits into the bottom wishbone, and also shows the bottom of the vertical link
holding the wheel hub. This is the driver's side, but you get the idea. This one took a couple of pumps of grease last week, and you can see where
it has been squeezed out past that dust cover.
So, lift the car and get on with the job! Here's how the trunnion fits into the bottom wishbone, and also shows the bottom of the vertical link
holding the wheel hub. This is the driver's side, but you get the idea. This one took a couple of pumps of grease last week, and you can see where
it has been squeezed out past that dust cover.
 We're going to start with the nearside though, because that's the side that was blocked and is most likely to need new parts. First step is to
remove the 2 bolts holding the brake caliper to the hub, and hang it on a bent wire from the chassis out of the way, without stretching the brake
hose.
We're going to start with the nearside though, because that's the side that was blocked and is most likely to need new parts. First step is to
remove the 2 bolts holding the brake caliper to the hub, and hang it on a bent wire from the chassis out of the way, without stretching the brake
hose.
 Then the bottom bolt holding the trunnion to the wishbone. I remove the nut but the bolt is rusted in place... I spray it with some penetrating oil
(not WD40 - that has loads of uses but it's not the best rust lubricant)) and then get a spanner on the bolt to free it. Then I put the nut back on
to protect the threads, and hammer and drift the bolt through the bush.
Then the bottom bolt holding the trunnion to the wishbone. I remove the nut but the bolt is rusted in place... I spray it with some penetrating oil
(not WD40 - that has loads of uses but it's not the best rust lubricant)) and then get a spanner on the bolt to free it. Then I put the nut back on
to protect the threads, and hammer and drift the bolt through the bush.
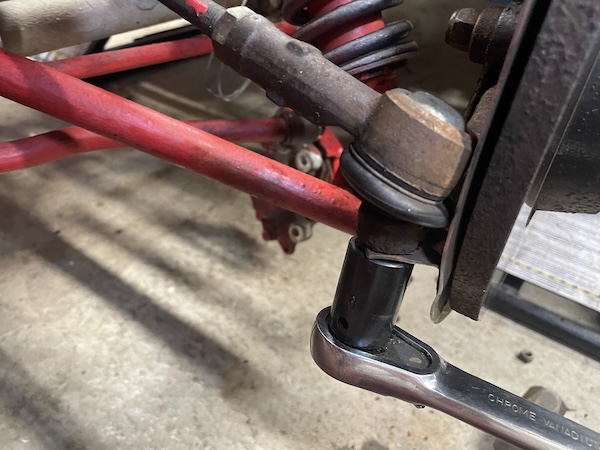 Next is the steering arm balljoint - loosen the nut and then use a non-destructive balljoint remover to, erm... remove it.
Next, I loosen the locknut that top balljoint, before I loosen the bolt through the hub link and release the joint from the taper. Then I unscrew the balljoint 28 turns out of the wishbone.
 Now I can swing the whole hub down and pull it free from the wishbone.
The trunnion won't come off while the brake disk and backing plate are still in place. I remove the split pin from the hub nut, and then undo the nut and lift the hub and bearings off the axle.
 That gets me to here, where I can unscrew the trunnion from the bottom of the upright link, counting 13 full turns.
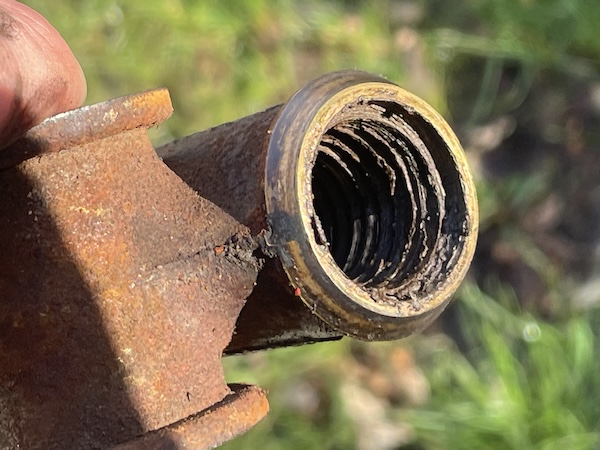
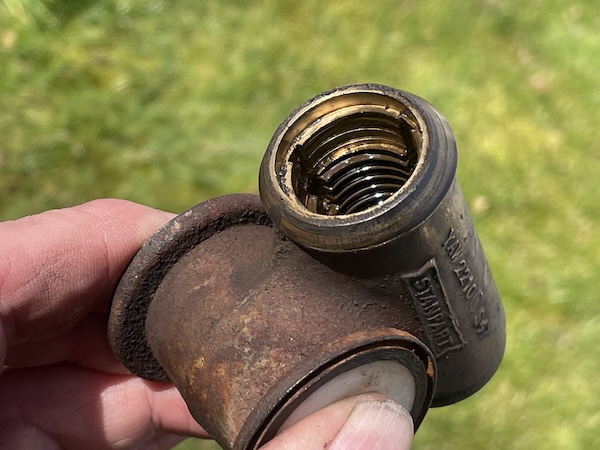
 This is the thread in the bottom of the nearside upright link...
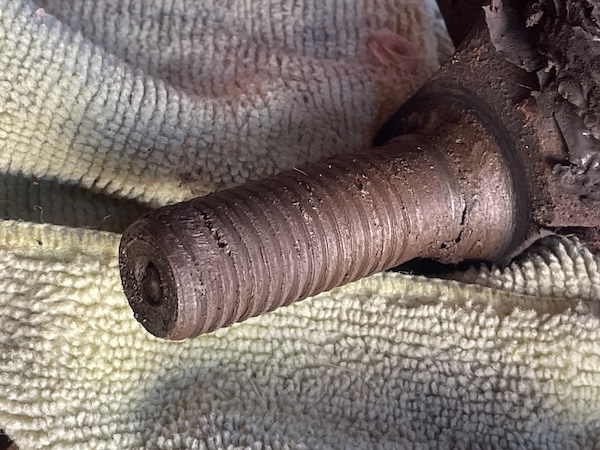
 and here's the corresponding trunnion. You can see that both are packed with dried grease.
 I clean up the inside of the trunnion with brake cleaner and WD40, and check the threads for damage...
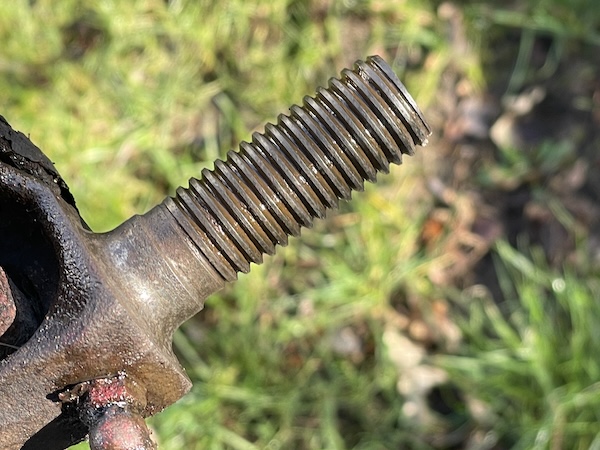 then I clean up the thread on the link, and check carefully for corrosion, cracks or bending damage. I remove the grease nipple and clear out the
oilway up the middle of the thread with a bit of wire and then WD40 spray, then check that with a bit of gear oil, they screw together perfectly
and smoothly, with no play. I don't think I need to replace anything on this side.
then I clean up the thread on the link, and check carefully for corrosion, cracks or bending damage. I remove the grease nipple and clear out the
oilway up the middle of the thread with a bit of wire and then WD40 spray, then check that with a bit of gear oil, they screw together perfectly
and smoothly, with no play. I don't think I need to replace anything on this side.
 Then I pour a little EP90 gear oil into the trunnion cup, fit the seal and screw it onto the vertical link. With the grease nipple removed, I
can check that the trunnion is full when oil starts coming out of the grease nipple hole as I get to 13 turns, then I put the nipple back in. It's
turning much more freely than it was when I removed it!
Then I pour a little EP90 gear oil into the trunnion cup, fit the seal and screw it onto the vertical link. With the grease nipple removed, I
can check that the trunnion is full when oil starts coming out of the grease nipple hole as I get to 13 turns, then I put the nipple back in. It's
turning much more freely than it was when I removed it!
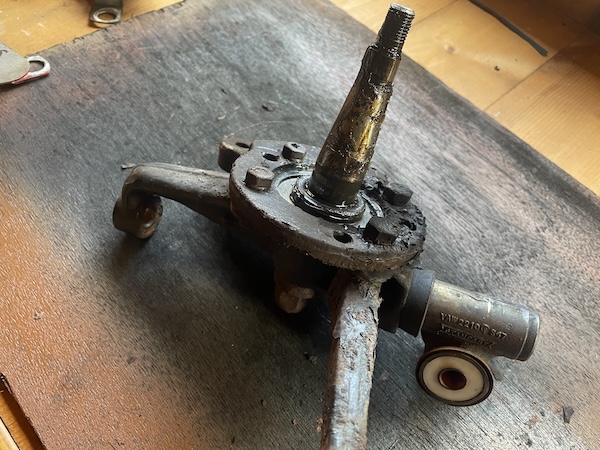
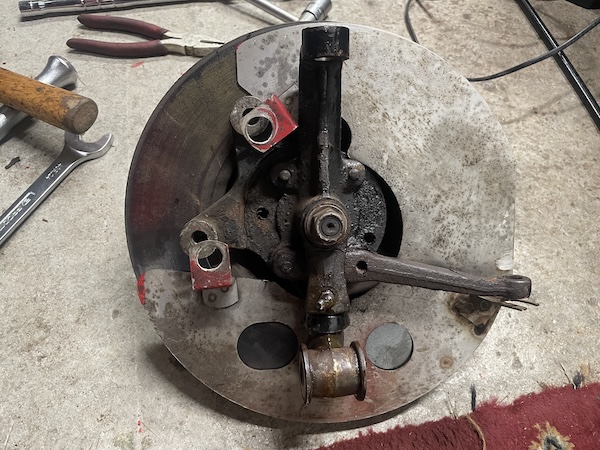 Then I can re-grease the axle spindle, refit the brake shield and the hub, then the hub nut and split pin. Here's the complete assembly ready to
go back on the car.
Then I can re-grease the axle spindle, refit the brake shield and the hub, then the hub nut and split pin. Here's the complete assembly ready to
go back on the car.
Putting it back on the car is the reverse of removal. First I locate the trunnion within the wishbone, and line up the bolt hole (which is the tricky bit!). Then I put a little copper grease on the bolt and tap it through, and tighten up the nut. Then I reconnect the steering arm and replace the brake caliper. I'm going to fit a new top balljoint, but they haven't arrived yet so I leave that for now.
That's one side done!
The other side turns out to be much easier, now that I have practiced on the nearside. The threads on the trunnion and the vertical link were in much better condition, with no signs of hardened grease or corrosion. Still, I cleaned them all out and refitted with EP90 inside, as above, but noting that the offside trunnion has a left-hand thread. Again, I don't refit the top balljoint, since I am expecting new ones on Monday.